
Dimming headlights, a sluggish engine crank, or a dead battery are all telltale signs of a potential alternator issue. While a trip to the mechanic might seem inevitable, your OBDII scanner can be a valuable tool in diagnosing the problem. This guide will delve into how to test an OBDII alternator, providing a step-by-step approach to determine if your alternator is functioning correctly.
Understanding the OBDII Alternator Test
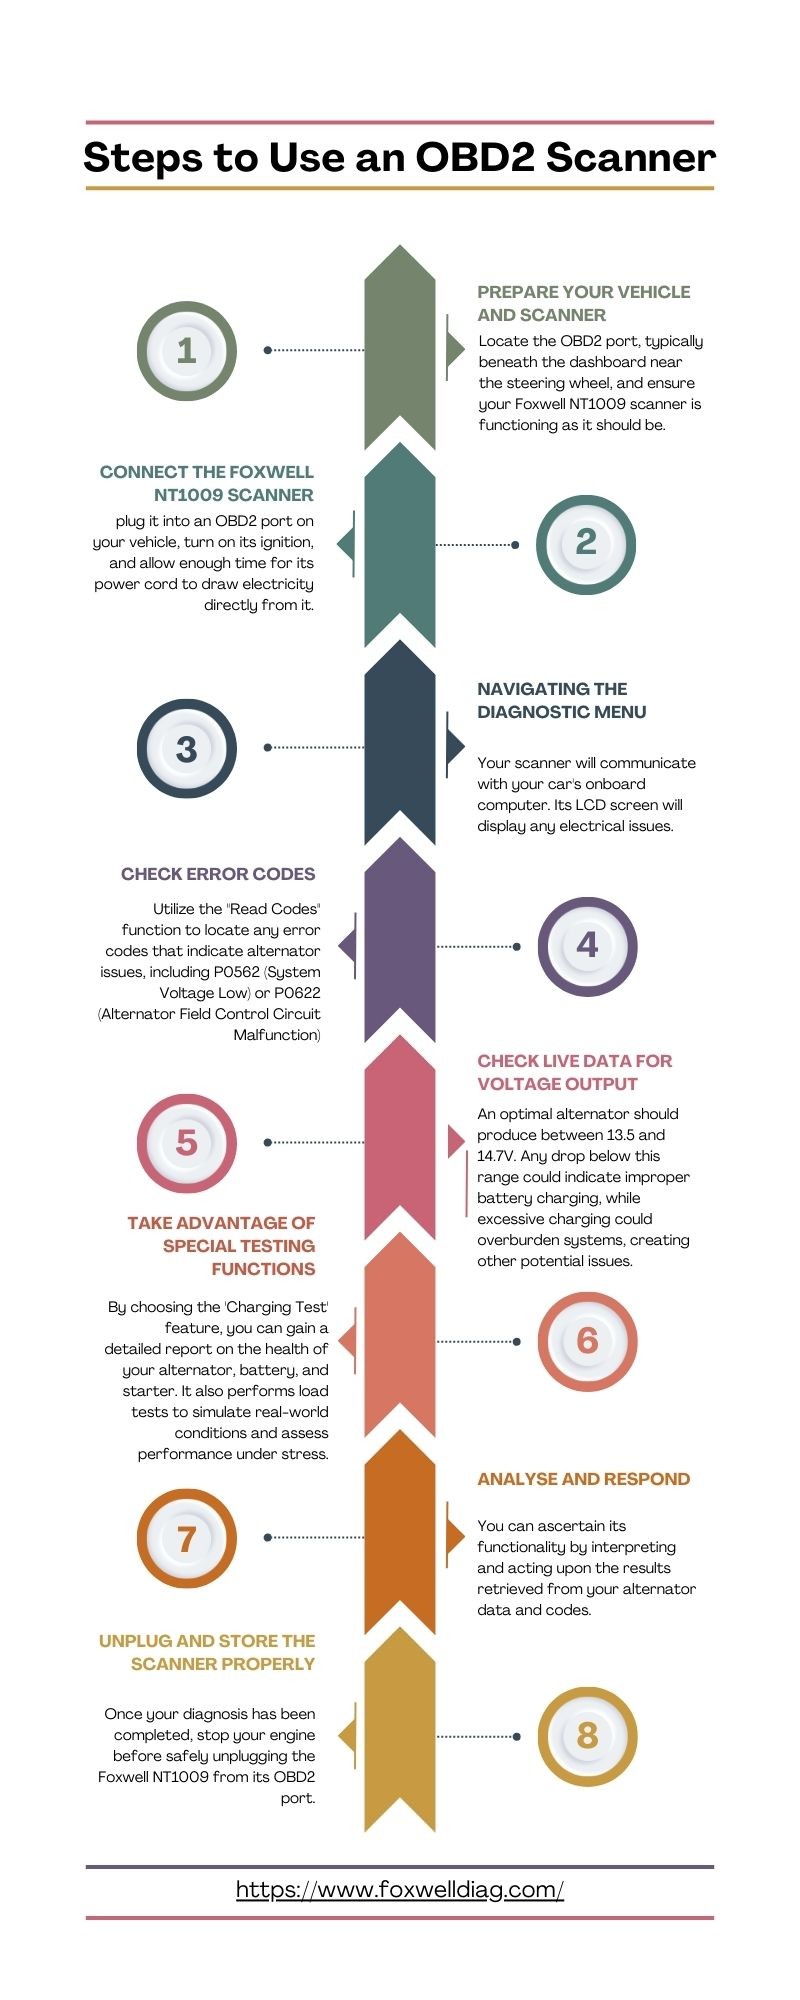
An OBDII scanner, while not directly diagnosing a faulty alternator, can provide crucial clues. It reads trouble codes stored in your vehicle’s computer, highlighting electrical system malfunctions that could point to alternator problems. While a code reader won’t explicitly state “bad alternator,” specific codes like P0562 (System Voltage Low) or P0622 (Alternator Field Control Circuit Malfunction) strongly suggest further investigation. Coupled with live data monitoring, an OBDII scanner empowers you to assess your alternator’s performance in real-time.
Step-by-Step Guide: How to Test Your Alternator with an OBDII Scanner
1. Prepare Your Vehicle and Scanner
Begin by turning off all unnecessary electrical accessories like headlights, radio, and air conditioning to minimize electrical load. Locate your vehicle’s OBDII port, usually under the dashboard near the steering wheel. Ensure your OBDII scanner is charged and functioning correctly.
2. Connect the OBDII Scanner
Plug the scanner into the OBDII port. Turn the ignition key to the “on” position without starting the engine. This allows the scanner to power up and establish communication with the vehicle’s computer.
3. Access Diagnostic Menu
Navigate the scanner’s menu to find the “Diagnostic” option. Select your vehicle’s make and model for accurate data interpretation. The scanner will then communicate with the car’s computer and display any detected issues.
4. Read Trouble Codes
Select the “Read Codes” function. The scanner will display any stored trouble codes. Look for codes related to low voltage (P0562) or alternator field control circuit malfunctions (P0622), which can indicate alternator problems.
5. Monitor Live Data – Voltage Output
Start the engine. Access the “Live Data” section on your scanner and focus on the voltage reading. A healthy alternator typically outputs between 13.5 and 14.7 volts. Readings consistently below this range indicate undercharging, while excessively high readings suggest overcharging.
6. Perform a Load Test
With the engine running, turn on various electrical accessories, such as headlights, air conditioning, and rear defroster. Observe the voltage reading. A significant drop in voltage under load indicates a struggling alternator. Some advanced scanners even offer a dedicated “Charging System Test.”
7. Analyze Results and Respond
Interpret the trouble codes and voltage readings. If readings fall within the normal range and no relevant trouble codes are present, your alternator is likely functioning properly. Consistently low voltage, coupled with related trouble codes, indicates a potential alternator issue requiring further diagnosis or replacement.
8. Unplug and Store
Once the test is complete, turn off the engine and disconnect the scanner from the OBDII port. Store the scanner properly for future use.
Alternative Alternator Testing Methods
If your OBDII scanner doesn’t provide conclusive results, consider these alternative methods:
-
Multimeter Test: Connect a multimeter to the battery terminals while the engine is running. A reading between 13.5 and 14.7 volts indicates a functioning alternator.
-
Load Test with Multimeter: Similar to the OBDII load test, turn on electrical accessories while monitoring voltage with a multimeter. A significant drop signals a weak alternator.
Conclusion
Learning how to test an OBDII alternator empowers you to troubleshoot potential electrical issues. While an OBDII scanner provides invaluable insights, remember that it’s just one piece of the diagnostic puzzle. Combining OBDII data with other testing methods ensures a comprehensive assessment of your alternator’s health, helping you make informed decisions about repairs and maintenance.