As a creator of engaging content at CARDIAGTECH.NET, and an automotive repair expert, I am dedicated to providing clear and actionable solutions. Experiencing issues with your Vcds Audi Q3 setup? Let’s dive into the diagnostics, common problems, and how to ensure a successful VCDS Audi Q3 experience. Discover the ultimate guide to optimizing your Audi Q3 with VCDS, complete with expert tips and troubleshooting to enhance your vehicle’s performance and diagnostics.
1. Understanding VCDS and Its Importance for Audi Q3
VCDS, or VAG-COM Diagnostic System, is a powerful tool utilized for diagnosing and customizing Volkswagen Audi Group (VAG) vehicles, including the Audi Q3. It allows technicians and enthusiasts to access detailed information about the vehicle’s systems, perform diagnostics, coding, and adaptations. Understanding the capabilities of VCDS is essential for anyone looking to maintain, troubleshoot, or enhance their Audi Q3.
1.1. What is VCDS?
VCDS functions as a comprehensive diagnostic tool that interfaces with the onboard computer systems of VAG vehicles. Unlike generic OBD-II scanners that provide limited information, VCDS offers in-depth access to control modules, allowing users to read diagnostic trouble codes (DTCs), view live data, perform output tests, and make coding changes. This level of access is invaluable for diagnosing complex issues and customizing vehicle settings.
1.2. Why is VCDS Important for Audi Q3 Owners?
For Audi Q3 owners, VCDS provides several key benefits:
- Accurate Diagnostics: VCDS allows you to accurately diagnose issues within your Audi Q3, often before they escalate into major problems.
- Customization: VCDS enables you to customize various vehicle settings, such as lighting options, convenience features, and performance parameters.
- Maintenance: VCDS can assist in performing routine maintenance tasks, such as resetting service reminders and calibrating sensors.
- Retrofitting: VCDS is crucial for retrofitting new features or components to your Audi Q3, ensuring they function correctly with the vehicle’s existing systems.
- Cost Savings: By diagnosing and addressing issues yourself, you can potentially save money on costly dealership repairs.
1.3. Key Functions of VCDS
VCDS offers a wide range of functions that can be used to diagnose, customize, and maintain your Audi Q3:
- Reading Diagnostic Trouble Codes (DTCs): Identifies issues within the vehicle’s systems and provides detailed information about the fault.
- Viewing Live Data: Allows you to monitor real-time data from various sensors and control modules.
- Performing Output Tests: Activates specific components to test their functionality.
- Coding: Modifies the vehicle’s software to enable or disable features.
- Adaptation: Adjusts parameters to match specific components or requirements.
- Basic Settings: Performs calibrations and resets for various systems.
1.4. Understanding the VCDS Interface
The VCDS interface typically consists of a hardware interface (cable) that connects to the vehicle’s OBD-II port and software that runs on a Windows-based computer. The software provides a user-friendly interface for accessing the vehicle’s control modules and performing diagnostic and coding tasks.
- Hardware Interface: The cable serves as the physical connection between your computer and the vehicle. It is essential to use a genuine VCDS interface to ensure compatibility and reliability.
- Software Interface: The VCDS software provides a graphical user interface for accessing the vehicle’s control modules, viewing data, and performing coding changes.
- Control Modules: The software allows you to select specific control modules within the vehicle, such as the engine control unit (ECU), transmission control unit (TCU), and anti-lock braking system (ABS).
- Diagnostic Functions: Within each control module, you can access various diagnostic functions, such as reading DTCs, viewing live data, and performing output tests.
- Coding and Adaptation: VCDS allows you to make coding changes and adaptations to customize vehicle settings and enable new features.
1.5. Common VCDS Terminology
Familiarizing yourself with common VCDS terminology is essential for effectively using the tool and understanding diagnostic information:
| Term | Definition |
|---|---|
| DTC | Diagnostic Trouble Code – A code stored in the vehicle’s computer system that indicates a fault or issue. |
| Control Module | A computer system within the vehicle that controls specific functions, such as the engine, transmission, or ABS. |
| Coding | Modifying the vehicle’s software to enable or disable features. |
| Adaptation | Adjusting parameters to match specific components or requirements. |
| Live Data | Real-time data from various sensors and control modules. |
| Output Test | Activating specific components to test their functionality. |
| CANbus | Controller Area Network – A communication protocol used by the vehicle’s control modules to communicate with each other. |
| Freeze Frame Data | A snapshot of data recorded when a DTC is stored, providing additional information about the conditions under which the fault occurred. |
| Readiness | A status indicating whether the vehicle’s emission control systems have been tested and are ready for an emissions inspection. |
| Long Coding Helper (LCode) | A feature in VCDS that provides guidance and information about the available coding options for a specific control module. |
| SVM Code | Software Version Management code – A code used to identify the software version of a control module. |
| ODIS | Offboard Diagnostic Information System – A diagnostic tool used by authorized VAG dealerships and service centers. |
| Measuring Blocks | Groups of live data parameters that can be viewed simultaneously. |
| Basic Settings | Calibration and reset procedures for various systems. |
| Security Access Code | A code required to access certain functions or coding options within a control module. |
| UDS | Unified Diagnostic Services – A diagnostic protocol used in newer VAG vehicles. |
| Guided Fault Finding | A feature in VCDS that provides step-by-step instructions for diagnosing specific faults. |
| Component Protection | A security feature that protects certain components from being stolen and installed in another vehicle. |
| Parameter | A specific setting or value within a control module that can be adjusted. |
| Regression Testing | A type of testing used to ensure that changes to a software program do not adversely affect its existing functionality. |
| TSB | Technical Service Bulletin – A bulletin issued by the manufacturer to provide information about common issues and recommended repair procedures. |
Alternative Text: VCDS software interface displaying diagnostic information for an Audi Q3, showcasing real-time data and control module options.
By understanding what VCDS is and its importance for Audi Q3 owners, you can better utilize this powerful tool to diagnose, maintain, and customize your vehicle.
2. Preparing for VCDS Use with Your Audi Q3
Before diving into diagnostics and coding with VCDS on your Audi Q3, it’s important to prepare properly. This preparation ensures a smooth, safe, and effective experience. Here are the key steps to take before using VCDS on your Audi Q3.
2.1. Ensuring VCDS Compatibility with Your Audi Q3 Model
VCDS compatibility depends on the model year and specific systems of your Audi Q3. Ross-Tech, the developer of VCDS, maintains a detailed compatibility chart on their website. Always verify that your VCDS interface and software version are compatible with your Audi Q3 model year. Using an incompatible version can lead to incorrect readings or potential damage to the vehicle’s electronic systems.
2.2. Software Installation and Updates
- Download the Latest VCDS Software:
- Visit the Ross-Tech website and download the latest version of the VCDS software.
- Ensure your computer meets the minimum system requirements.
- Install the Software:
- Run the downloaded installer and follow the on-screen instructions.
- During installation, you may be prompted to install device drivers for the VCDS interface.
- Update the Software:
- After installation, launch VCDS and check for updates.
- Install any available updates to ensure you have the latest features and bug fixes.
2.3. Hardware Setup and Connection
- Connect the VCDS Interface:
- Plug the VCDS interface into your computer’s USB port.
- Connect the other end of the interface to the OBD-II port in your Audi Q3. The OBD-II port is usually located under the dashboard on the driver’s side.
- Turn on the Ignition:
- Turn the ignition key to the “on” position without starting the engine. This provides power to the vehicle’s electronic systems.
- Launch VCDS and Test the Connection:
- Open the VCDS software on your computer.
- Go to “Options” and select the correct COM port for the VCDS interface.
- Click “Test” to verify the connection between the software and the interface.
- A successful test indicates that the hardware is properly connected and communicating with the vehicle.
2.4. Backing Up Your Audi Q3’s Original Settings
Before making any changes to your Audi Q3’s settings with VCDS, it is crucial to back up the original settings. This backup allows you to revert to the original configuration if something goes wrong or if you are not satisfied with the changes.
- Access the Control Module:
- In VCDS, select the control module you want to modify (e.g., engine, transmission, central electronics).
- Save the Original Coding:
- Go to the “Coding” or “Long Coding” section of the control module.
- Take a screenshot or write down the original coding string.
- Some modules may have an option to save the coding directly within VCDS.
- Save Adaptation Settings:
- If you plan to change adaptation settings, note the original values for each channel.
- Take screenshots or write down the original values for reference.
2.5. Understanding Common Risks and Precautions
Using VCDS involves some risks, and it is essential to take precautions to avoid damaging your vehicle’s electronic systems.
- Incorrect Coding:
- Double-check all coding changes before applying them.
- Use the Long Coding Helper (LCode) feature in VCDS to understand the meaning of each bit and byte.
- If you are unsure about a coding change, consult a VCDS expert or refer to online forums and resources.
- Power Interruption:
- Ensure your computer is connected to a stable power source to avoid interruptions during coding or adaptation.
- A power interruption during coding can corrupt the control module’s software and require professional reprogramming.
- Incompatible Hardware:
- Use a genuine VCDS interface to ensure compatibility and reliable communication with your Audi Q3.
- Avoid using cheap, aftermarket interfaces, as they may not be fully compatible and could damage the vehicle’s electronic systems.
- Software Bugs:
- Keep your VCDS software updated to the latest version to minimize the risk of encountering bugs or glitches.
- If you encounter a bug, report it to Ross-Tech so they can address it in a future update.
2.6. Essential Tools and Accessories
In addition to the VCDS interface and software, you may need the following tools and accessories:
| Tool/Accessory | Description |
|---|---|
| Laptop | A Windows-based laptop with a USB port is required to run the VCDS software. |
| Battery Charger | A battery charger can help maintain a stable voltage during coding and adaptation, especially if the process takes a long time. |
| Extension Cable | An OBD-II extension cable can provide more flexibility in connecting the VCDS interface to the vehicle’s OBD-II port. |
| Internet Access | Internet access is needed to download software updates, access online resources, and consult with VCDS experts or forums. |
| Multimeter | A multimeter can be helpful for diagnosing electrical issues and verifying wiring connections. |
| Wiring Diagrams | Wiring diagrams can provide valuable information about the vehicle’s electrical system, especially when troubleshooting wiring-related issues. |
| Repair Manual | A repair manual can provide detailed information about the vehicle’s systems and components, as well as step-by-step instructions for various repair procedures. |
| Flashlight/Work Light | A flashlight or work light can help illuminate the OBD-II port and other areas under the dashboard. |
| Screwdriver Set | A screwdriver set may be needed to remove trim panels or access certain components. |
| Socket Set | A socket set may be needed to remove or install certain components. |
| Pliers | Pliers can be helpful for gripping, cutting, or bending wires. |
| Wire Stripper | A wire stripper is needed to remove the insulation from wires without damaging the conductors. |
| Electrical Tape | Electrical tape is used to insulate and protect electrical connections. |
| Cable Ties | Cable ties can be used to organize and secure wiring harnesses. |
| Diagnostic Scanner | A generic OBD-II scanner can be used to read basic diagnostic trouble codes (DTCs) before using VCDS. |
| Scan Tool | A scan tool, like those available from CARDIAGTECH.NET, provides enhanced diagnostics and repair capabilities, making it an essential tool for automotive technicians and enthusiasts. |
Preparing properly before using VCDS on your Audi Q3 ensures that you have the necessary tools, knowledge, and precautions in place to perform diagnostic and coding tasks safely and effectively.
Alternative Text: Location of the OBD-II port in an Audi Q3, typically found under the dashboard on the driver’s side, used for connecting VCDS.
3. Diagnosing Common Issues on Audi Q3 with VCDS
VCDS is an invaluable tool for diagnosing issues in your Audi Q3. By accessing the vehicle’s control modules, you can read diagnostic trouble codes (DTCs), view live data, and perform output tests to pinpoint problems. Here’s how to diagnose common issues on your Audi Q3 using VCDS.
3.1. Reading and Interpreting Diagnostic Trouble Codes (DTCs)
- Connect VCDS: Plug the VCDS interface into the OBD-II port of your Audi Q3 and connect it to your computer.
- Turn on Ignition: Turn the ignition key to the “on” position without starting the engine.
- Launch VCDS: Open the VCDS software on your computer.
- Select Control Module:
- Click on “Select Control Module” on the main screen.
- Choose the control module you want to diagnose (e.g., engine, transmission, ABS).
- Read DTCs:
- Click on “Fault Codes – 02” to read the stored DTCs in the selected control module.
- VCDS will display a list of DTCs along with their descriptions.
- Interpret DTCs:
- Each DTC consists of a code (e.g., P0301) and a description (e.g., Cylinder 1 Misfire Detected).
- Refer to the VCDS documentation or online resources to understand the meaning of each DTC.
- Pay attention to the DTC status (e.g., sporadic, static) to determine the frequency and severity of the fault.
- Clear DTCs (Optional):
- After noting the DTCs, you can clear them by clicking on “Clear Codes – 05.”
- Clearing the codes can help determine if the fault is still present or if it was a one-time occurrence.
- Be aware that clearing codes may erase valuable diagnostic information, so only do so after recording the DTCs.
3.2. Understanding Freeze Frame Data
Freeze Frame data provides a snapshot of the vehicle’s operating conditions at the moment a DTC was stored. This information can be invaluable in diagnosing intermittent or elusive problems.
- Access Freeze Frame Data:
- When viewing DTCs in VCDS, look for an option to view Freeze Frame data.
- Freeze Frame data is typically available for most DTCs related to engine and transmission issues.
- Analyze Freeze Frame Data:
- Freeze Frame data includes parameters such as:
- Engine speed (RPM)
- Engine load
- Coolant temperature
- Fuel trim values
- Vehicle speed
- Throttle position
- Analyze these parameters to identify any unusual conditions that may have contributed to the fault.
- For example, if a misfire DTC is accompanied by high engine load and low RPM, it may indicate a problem with the ignition system or fuel delivery.
- Freeze Frame data includes parameters such as:
3.3. Using Live Data for Real-Time Monitoring
Live data allows you to monitor the real-time values of various sensors and parameters while the engine is running. This can be helpful for diagnosing performance issues, sensor problems, and other dynamic faults.
- Access Live Data:
- In VCDS, select the control module you want to monitor (e.g., engine).
- Click on “Measuring Blocks – 08” to access live data.
- Select Measuring Blocks:
- Choose the measuring blocks that contain the parameters you want to monitor.
- VCDS allows you to select multiple measuring blocks and display them simultaneously.
- Common parameters to monitor include:
- Engine speed (RPM)
- Mass airflow (MAF)
- Oxygen sensor readings
- Fuel trim values
- Throttle position
- Coolant temperature
- Ignition timing
- Analyze Live Data:
- Monitor the live data values while the engine is running.
- Compare the values to the expected ranges to identify any abnormalities.
- For example, if the MAF sensor reading is significantly lower than expected, it may indicate a problem with the sensor or the intake system.
- Use a graph or chart to visualize the data and identify trends or patterns.
3.4. Performing Output Tests to Verify Component Functionality
Output tests allow you to activate specific components in the vehicle to verify their functionality. This can be helpful for diagnosing electrical issues, actuator problems, and other component-related faults.
- Access Output Tests:
- In VCDS, select the control module you want to test (e.g., engine).
- Click on “Output Tests – 03” to access the output tests.
- Select Output Test:
- Choose the output test you want to perform.
- VCDS will display a list of available output tests for the selected control module.
- Common output tests include:
- Fuel pump activation
- Injector activation
- Cooling fan activation
- Throttle body adaptation
- EGR valve activation
- Run Output Test:
- Follow the on-screen instructions to run the output test.
- VCDS will activate the selected component and display the results.
- Observe the component to verify that it is functioning correctly.
- For example, if you activate the fuel pump, you should hear the pump running and feel fuel pressure in the fuel lines.
- Interpret Results:
- If the component does not activate or if the results are not as expected, it may indicate a problem with the component itself, the wiring, or the control module.
3.5. Addressing Common Audi Q3 Issues
Here are some common issues that can be diagnosed and addressed using VCDS on the Audi Q3:
| Issue | Symptoms | Possible Causes | VCDS Diagnostic Steps |
|---|---|---|---|
| Engine Misfires | Rough idling, poor acceleration, check engine light. | Faulty spark plugs, ignition coils, fuel injectors, vacuum leaks, low compression. | Read DTCs for misfire codes (e.g., P0300, P0301). View live data for misfire counts and fuel trim values. Perform output tests on ignition coils and fuel injectors. |
| ABS/Brake Issues | ABS warning light, reduced braking performance, uneven braking. | Faulty ABS sensors, hydraulic unit, wheel speed sensors, low brake fluid. | Read DTCs for ABS-related codes. View live data for wheel speed sensor readings. Perform output tests on ABS hydraulic unit. |
| Transmission Problems | Slipping gears, harsh shifting, delayed engagement, transmission warning light. | Low transmission fluid, faulty solenoids, worn clutches, damaged valve body. | Read DTCs for transmission-related codes. View live data for transmission fluid temperature and gear engagement. Perform output tests on transmission solenoids. |
| Electrical Issues | Malfunctioning lights, non-functional accessories, battery drain. | Short circuits, open circuits, faulty relays, defective modules. | Read DTCs for electrical-related codes. View live data for voltage and current readings. Perform output tests on lights and accessories. |
| Airbag System Faults | Airbag warning light. | Faulty airbag sensors, damaged wiring, defective airbag module. | Read DTCs for airbag-related codes. Inspect wiring and connections. |
| HVAC Problems | Inadequate heating or cooling, unusual noises, faulty controls. | Low refrigerant, faulty compressor, defective actuators, clogged filters. | Read DTCs for HVAC-related codes. View live data for refrigerant pressure and temperature. Perform output tests on HVAC actuators. |
| Suspension System Issues | Poor ride quality, unusual noises, ride height problems. | Faulty air struts, defective sensors, damaged compressor. | Read DTCs for suspension-related codes. View live data for ride height sensor readings. Perform output tests on air struts and compressor. |
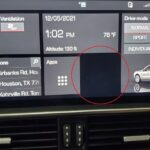
| Infotainment System Problems | Malfunctioning display, audio issues, navigation problems. | Software glitches, damaged hardware, faulty connections. | Read DTCs for infotainment-related codes. Check connections and wiring. Update software if necessary. |
| Key Fob and Central Locking System | Key fob not working, doors not locking or unlocking. | Low battery in key fob, faulty door lock actuators, damaged wiring. | Read DTCs for central locking system-related codes. Check key fob battery. Perform output tests on door lock actuators. |
| Steering System Problems | Stiff steering, power steering failure, unusual noises. | Low power steering fluid, faulty power steering pump, damaged rack and pinion. | Read DTCs for steering system-related codes. View live data for power steering pressure. Perform output tests on power steering pump. |
| TPMS (Tire Pressure Monitoring System) | TPMS warning light. | Low tire pressure, faulty TPMS sensors, damaged wiring. | Read DTCs for TPMS-related codes. Check tire pressures. View live data for TPMS sensor readings. |
| Immobilizer Issues | Engine not starting, immobilizer warning light. | Faulty key, damaged immobilizer module, wiring problems. | Read DTCs for immobilizer-related codes. Check key functionality. |
| Cruise Control Problems | Cruise control not engaging, intermittent operation. | Faulty cruise control switch, damaged wiring, defective sensors. | Read DTCs for cruise control-related codes. View live data for switch position and sensor readings. |
| Wiper System Malfunctions | Wipers not working, intermittent operation, unusual noises. | Faulty wiper motor, damaged linkage, defective switch. | Read DTCs for wiper system-related codes. Perform output tests on wiper motor. |
| Lighting System Faults | Lights not working, intermittent operation, warning lights. | Burnt-out bulbs, faulty relays, damaged wiring. | Read DTCs for lighting system-related codes. Check bulbs and fuses. Perform output tests on lights. |
| Exhaust System Problems | Check engine light, poor performance, unusual noises. | Faulty oxygen sensors, catalytic converter failure, exhaust leaks. | Read DTCs for exhaust system-related codes. View live data for oxygen sensor readings. |
| Fuel System Issues | Check engine light, poor performance, hard starting. | Faulty fuel pump, clogged fuel filter, damaged injectors. | Read DTCs for fuel system-related codes. View live data for fuel pressure and injector pulse width. |
| Turbocharger Problems | Check engine light, poor performance, unusual noises. | Faulty turbocharger, damaged wastegate, boost leaks. | Read DTCs for turbocharger-related codes. View live data for boost pressure. Perform output tests on wastegate actuator. |
By following these diagnostic steps and addressing common issues, you can effectively use VCDS to troubleshoot and maintain your Audi Q3, keeping it running smoothly and reliably.
Alternative Text: A VCDS diagnostic scan displaying a list of diagnostic trouble codes (DTCs) for an Audi Q3, aiding in identifying vehicle issues.
4. Coding and Customization Options for Audi Q3 with VCDS
VCDS allows you to customize various settings and enable hidden features in your Audi Q3. Coding and customization can enhance your vehicle’s functionality, convenience, and aesthetics. However, it is crucial to proceed with caution and ensure you understand the coding changes before applying them. Here’s a guide to coding and customization options for your Audi Q3 using VCDS.
4.1. Understanding Coding and Adaptation
Before diving into coding and customization, it’s essential to understand the difference between coding and adaptation.
- Coding: Coding involves modifying the software of a control module to enable or disable specific features. Coding changes are typically binary, meaning you can either turn a feature on or off.
- Adaptation: Adaptation involves adjusting parameters within a control module to match specific components or requirements. Adaptation changes are typically numerical, meaning you can adjust the value of a parameter within a certain range.
4.2. Accessing Coding Options in VCDS
- Connect VCDS: Plug the VCDS interface into the OBD-II port of your Audi Q3 and connect it to your computer.
- Turn on Ignition: Turn the ignition key to the “on” position without starting the engine.
- Launch VCDS: Open the VCDS software on your computer.
- Select Control Module:
- Click on “Select Control Module” on the main screen.
- Choose the control module you want to code or adapt (e.g., central electronics, comfort system).
- Access Coding or Adaptation:
- Click on “Coding – 07” or “Long Coding – 07” to access coding options.
- Click on “Adaptation – 10” to access adaptation options.
4.3. Using the Long Coding Helper (LCode)
The Long Coding Helper (LCode) is a valuable tool in VCDS that provides guidance and information about the available coding options for a specific control module.
- Open Long Coding Helper:
- In the “Long Coding – 07” screen, click on “Long Coding Helper” to open the LCode window.
- Understand the Coding Options:
- The LCode window displays a series of bytes and bits that represent the coding options for the control module.
- Each byte and bit corresponds to a specific feature or function.
- The LCode window provides descriptions of each byte and bit, explaining what each one controls.
- Make Coding Changes:
- Click on the checkboxes or dropdown menus to change the coding options.
- The LCode window will automatically update the coding string based on your selections.
- Apply Coding Changes:
- Once you have made the desired coding changes, click on “Do It!” to apply the changes to the control module.
4.4. Common Coding and Customization Options for Audi Q3
Here are some common coding and customization options for the Audi Q3 using VCDS:
| Feature | Description | Control Module | Coding/Adaptation Steps |
|---|---|---|---|
| Needle Sweep (Staging) | Activates a gauge sweep when the ignition is turned on, where the needles of the speedometer and tachometer move to their maximum positions and then back to zero. | 17 – Instruments | 1. Select “17 – Instruments.” 2. Go to “Coding – 07.” 3. Use Long Coding Helper to enable “Gauge Test/Needle Sweep.” 4. Apply the coding changes. |
| Cornering Lights via Fog Lights | Enables the fog lights to turn on when the turn signal is activated at low speeds, improving visibility during turns. | 09 – Central Electronics | 1. Select “09 – Central Electronics.” 2. Go to “Coding – 07.” 3. Use Long Coding Helper to enable “Cornering Lights via Fog Lights.” 4. Apply the coding changes. |
| Coming Home/Leaving Home Lights | Enables the headlights and taillights to turn on when the vehicle is unlocked or locked, providing illumination in the surrounding area. | 09 – Central Electronics | 1. Select “09 – Central Electronics.” 2. Go to “Adaptation – 10.” 3. Adjust the “Coming Home” and “Leaving Home” settings to your desired duration. 4. Apply the adaptation changes. |
| Enable Battery Meter in MMI | Displays a battery meter in the Multi Media Interface (MMI) system, allowing you to monitor the battery voltage. | 19 – CAN Gateway | 1. Select “19 – CAN Gateway.” 2. Go to “Adaptation – 10.” 3. Enable the “Battery Meter” option. 4. Apply the adaptation changes. |
| Enable Lap Timer | Enables a lap timer function in the instrument cluster, allowing you to record lap times during track days or performance driving. | 17 – Instruments | 1. Select “17 – Instruments.” 2. Go to “Coding – 07.” 3. Use Long Coding Helper to enable “Lap Timer.” 4. Apply the coding changes. |
| Disable Seatbelt Warning | Disables the seatbelt warning chime and light. (Note: Disabling seatbelt warnings is not recommended for safety reasons.) | 17 – Instruments | 1. Select “17 – Instruments.” 2. Go to “Coding – 07.” 3. Use Long Coding Helper to disable “Seatbelt Warning.” 4. Apply the coding changes. |
| Comfort Windows Operation via Remote | Allows you to open and close the windows using the remote key fob. | 46 – Central Convenience | 1. Select “46 – Central Convenience.” 2. Go to “Coding – 07.” 3. Use Long Coding Helper to enable “Comfort Windows Operation via Remote.” 4. Apply the coding changes. |
| Rain Closing | Automatically closes the windows and sunroof if rain is detected while the vehicle is parked. | 09 – Central Electronics | 1. Select “09 – Central Electronics.” 2. Go to “Adaptation – 10.” 3. Enable “Rain Closing.” 4. Apply the adaptation changes. |
| Teardrop Wiping | Adds an additional wipe after using the windshield washers to remove any remaining streaks. | 09 – Central Electronics | 1. Select “09 – Central Electronics.” 2. Go to “Adaptation – 10.” 3. Adjust the “Teardrop Wiping” setting to your desired duration. 4. Apply the adaptation changes. |
| Display Fan Speed in Auto Mode | Displays the fan speed setting in the automatic climate control mode. | 08 – HVAC | 1. Select “08 – HVAC.” 2. Go to “Coding – 07.” 3. Use Long Coding Helper to enable “Display Fan Speed in Auto Mode.” 4. Apply the coding changes. |
| Auto Lock/Unlock | Automatically locks the doors when the vehicle reaches a certain speed and unlocks them when the ignition is turned off. | 46 – Central Convenience | 1. Select “46 – Central Convenience.” 2. Go to “Adaptation – 10.” 3. Adjust the “Auto Lock” and “Auto Unlock” settings to your desired speeds. 4. Apply the adaptation changes. |
| Disable Amber Side Markers | Disables the amber side marker lights, giving the vehicle a cleaner appearance. (Note: Disabling side markers may not be legal in all regions.) | 09 – Central Electronics | 1. Select “09 – Central Electronics.” 2. Go to “Coding – 07.” 3. Use Long Coding Helper to disable “Amber Side Markers.” 4. Apply the coding changes. |
| Adjust DRL Brightness | Adjusts the brightness of the daytime running lights (DRLs). | 09 – Central Electronics | 1. Select “09 – Central Electronics.” 2. Go to “Adaptation – 10.” 3. Adjust the “DRL Brightness” setting to your desired level. 4. Apply the adaptation changes. |
| Customize Interior Lighting Colors | Allows you to customize the colors of the interior lighting in the vehicle. | 09 – Central Electronics | 1. Select “09 – Central Electronics.” 2 |