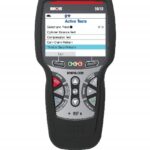
Vcds 2012, a powerful diagnostic tool, allows you to customize your car’s settings and unlock hidden features. CARDIAGTECH.NET offers the VCDS 2012 and expert support to help you optimize your vehicle’s performance, diagnose issues, and personalize its functionality. Discover convenience, efficiency, and control when you delve into advanced vehicle diagnostics with CARDIAGTECH.NET
1. Understanding VCDS 2012: A Comprehensive Overview
VCDS 2012 (VAG-COM Diagnostic System) is a software package used for diagnosing and modifying Volkswagen, Audi, Skoda, and SEAT vehicles. It provides access to a wide range of diagnostic information and allows users to perform various customizations and adaptations. It serves as an indispensable tool for automotive technicians and car enthusiasts alike, offering unparalleled access to vehicle systems and functions. With its intuitive interface and robust capabilities, VCDS 2012 empowers users to take control of their vehicle’s performance, diagnose issues with precision, and personalize their driving experience to suit their preferences.
1.1. What is VCDS 2012?
VCDS 2012 is a software suite designed for vehicle diagnostics and customization, particularly for cars within the Volkswagen Auto Group (VAG). This includes Volkswagen, Audi, Skoda, and SEAT models. This powerful tool allows users to communicate with the various electronic control units (ECUs) within a vehicle, read diagnostic trouble codes (DTCs), view live data, perform output tests, and make adaptations to vehicle settings. With VCDS 2012, users gain access to a wealth of information about their vehicle’s systems, enabling them to diagnose issues, perform maintenance, and customize various functions to their liking. It’s like having a factory-level diagnostic tool at your fingertips.
1.2. Key Features and Capabilities of VCDS 2012
VCDS 2012 comes with a broad spectrum of features tailored to meet the needs of both professional technicians and automotive enthusiasts. Here’s a closer look:
- Diagnostic Trouble Codes (DTCs): Read and clear DTCs to identify issues within the vehicle’s systems.
- Live Data Monitoring: View real-time data from sensors and modules to assess performance.
- Output Tests: Perform tests on various components like lights, motors, and relays to verify functionality.
- Adaptations: Modify vehicle settings such as lighting configurations, comfort features, and more.
- Coding: Recode modules to enable or disable features based on user preferences.
- Basic Settings: Perform basic settings procedures for components like throttle bodies and steering angle sensors.
- Service Resets: Reset service reminders and perform other maintenance-related tasks.
- Data Logging: Record data for in-depth analysis and troubleshooting.
- Module Information: Access detailed information about each module in the vehicle, including part numbers and software versions.
These features collectively provide a comprehensive toolkit for vehicle diagnostics and customization.
1.3. Hardware and Software Requirements for VCDS 2012
To effectively use VCDS 2012, it’s essential to meet certain hardware and software requirements. Here’s what you need:
- Hardware:
- A compatible interface cable, typically a Ross-Tech HEX-USB+CAN or equivalent.
- A laptop or desktop computer with a USB port.
- Software:
- Windows operating system (Windows XP, Vista, 7, 8, 10, or 11).
- VCDS 2012 software installed on the computer.
- Other Requirements:
- Internet access for software updates and activation.
- Administrator privileges on the computer for software installation.
Ensuring that your system meets these requirements will facilitate a seamless setup and operation of VCDS 2012, enabling you to harness its full potential for vehicle diagnostics and customization.
2. Why Choose VCDS 2012? Benefits and Advantages
Choosing VCDS 2012 offers a range of benefits and advantages that make it a preferred option for automotive diagnostics and customization.
2.1. Cost-Effectiveness Compared to OEM Diagnostic Tools
Compared to Original Equipment Manufacturer (OEM) diagnostic tools, VCDS 2012 provides a more cost-effective solution for accessing advanced diagnostic capabilities. OEM tools often come with hefty price tags and require expensive subscription fees for software updates. VCDS 2012, on the other hand, offers a one-time purchase option with free software updates, providing long-term savings without compromising on functionality. This cost-effectiveness makes VCDS 2012 an attractive choice for independent repair shops, small garages, and automotive enthusiasts looking to save money without sacrificing diagnostic accuracy and capabilities.
2.2. User-Friendly Interface and Ease of Use
One of the key advantages of VCDS 2012 is its user-friendly interface and intuitive design, making it accessible to users of all skill levels. The software features a straightforward layout with clear menus, descriptive labels, and helpful prompts, guiding users through various diagnostic and customization procedures. The Long Coding Helper tool simplifies complex coding tasks by providing a graphical interface with bit-by-bit descriptions, eliminating the need to memorize coding values. This ease of use reduces the learning curve and allows users to quickly and confidently perform diagnostic tasks and make vehicle adaptations, saving time and effort in the process.
2.3. Extensive Vehicle Coverage and Compatibility
VCDS 2012 offers extensive vehicle coverage and compatibility, supporting a wide range of Volkswagen, Audi, Skoda, and SEAT models from the mid-1990s to 2012. The software is continuously updated to include new models and features, ensuring that users have access to the latest diagnostic and customization capabilities. This broad vehicle coverage makes VCDS 2012 a versatile tool for diagnosing and servicing various vehicles in the VAG lineup, catering to the needs of both professional technicians and DIY enthusiasts. Whether you’re working on a classic VW Beetle or a modern Audi A4, VCDS 2012 has you covered.
2.4. Comprehensive Diagnostic Capabilities and Customization Options
VCDS 2012 offers comprehensive diagnostic capabilities and customization options that rival those of OEM diagnostic tools. From reading and clearing diagnostic trouble codes (DTCs) to performing advanced adaptations and coding, VCDS 2012 provides users with a wealth of features to diagnose issues, optimize performance, and personalize their vehicles. The software supports various diagnostic protocols, including CAN, UDS, and K-Line, ensuring compatibility with a wide range of vehicle systems. Additionally, VCDS 2012 allows users to access live data, perform output tests, and reset service reminders, providing a complete solution for vehicle maintenance and repair.
3. Key Functions and Procedures with VCDS 2012
VCDS 2012 offers a multitude of functions and procedures that enable users to diagnose, repair, and customize their vehicles with precision and efficiency. Here are some essential tasks you can accomplish with VCDS 2012:
3.1. Reading and Clearing Diagnostic Trouble Codes (DTCs)
Reading and clearing Diagnostic Trouble Codes (DTCs) is a fundamental function of VCDS 2012, allowing users to identify and address issues within the vehicle’s systems. Here’s how it works:
- Connect the VCDS interface cable to the vehicle’s OBD-II port and the computer.
- Launch the VCDS software and select the appropriate vehicle from the menu.
- Select the control module you want to diagnose (e.g., Engine, Transmission, ABS).
- Click on the “Fault Codes – 02” button to read the stored DTCs.
- The software will display a list of DTCs along with their descriptions.
- To clear the DTCs, click on the “Clear Codes – 05” button.
- Confirm the action when prompted, and the software will clear the DTCs from the module’s memory.
By following these steps, users can quickly identify and clear DTCs, providing valuable insights into the vehicle’s condition and facilitating effective troubleshooting.
3.2. Live Data Monitoring and Analysis
Live data monitoring and analysis is a crucial function of VCDS 2012 that allows users to observe real-time data from various sensors and modules within the vehicle. Here’s how to perform live data monitoring:
- Connect the VCDS interface cable to the vehicle’s OBD-II port and the computer.
- Launch the VCDS software and select the appropriate vehicle from the menu.
- Select the control module you want to monitor (e.g., Engine, Transmission, ABS).
- Click on the “Measuring Blocks – 08” button to access live data.
- Select the measuring blocks you want to monitor from the list.
- The software will display real-time data for the selected measuring blocks.
- You can customize the display by selecting different units, graphing data, or logging data for later analysis.
By monitoring live data, users can gain valuable insights into the vehicle’s performance, diagnose issues, and verify the functionality of various components in real-time.
3.3. Performing Output Tests and Component Verification
Performing output tests and component verification is a valuable function of VCDS 2012 that allows users to test the functionality of various components within the vehicle. Here’s how to perform output tests:
- Connect the VCDS interface cable to the vehicle’s OBD-II port and the computer.
- Launch the VCDS software and select the appropriate vehicle from the menu.
- Select the control module you want to test (e.g., Engine, Transmission, ABS).
- Click on the “Output Tests – 03” button to access the output tests menu.
- Select the component you want to test from the list.
- The software will initiate the output test, activating the selected component.
- Observe the component’s behavior to verify its functionality.
- The software may provide feedback on the test results.
By performing output tests, users can quickly and easily verify the functionality of various components, such as lights, motors, relays, and solenoids, helping them diagnose issues and ensure proper operation.
3.4. Adaptations and Coding for Customization
Adaptations and coding are advanced functions of VCDS 2012 that allow users to customize various vehicle settings and enable or disable features based on their preferences. Here’s how to perform adaptations and coding:
- Connect the VCDS interface cable to the vehicle’s OBD-II port and the computer.
- Launch the VCDS software and select the appropriate vehicle from the menu.
- Select the control module you want to customize (e.g., Central Electronics, Comfort System).
- Click on the “Coding – 07” or “Adaptation – 10” button to access the coding or adaptation menu.
- Use the Long Coding Helper tool to simplify coding tasks by providing a graphical interface with bit-by-bit descriptions.
- Make the desired changes to the coding or adaptation values.
- Save the changes and exit the coding or adaptation menu.
By performing adaptations and coding, users can customize various vehicle settings, such as lighting configurations, comfort features, and more, to tailor their vehicle to their specific needs and preferences.
4. VCDS 2012: Step-by-Step Guide
To ensure you get the most out of VCDS 2012, here’s a detailed, step-by-step guide covering installation, setup, and initial use:
4.1. Installing the VCDS 2012 Software
- Download the Software:
- Visit the CARDIAGTECH.NET or the Ross-Tech website.
- Download the latest version of the VCDS software.
- Run the Installer:
- Locate the downloaded file and double-click to run the installer.
- Follow the on-screen prompts to proceed with the installation.
- Accept the License Agreement:
- Read the license agreement carefully and accept the terms to continue.
- Choose Installation Directory:
- Select the directory where you want to install the VCDS software. The default location is usually recommended.
- Complete Installation:
- Click “Install” to begin the installation process.
- Wait for the installation to complete.
- Finalize Setup:
- Once the installation is finished, click “Finish” to exit the installer.
- Ensure that the option to “Run VCDS” is unchecked before clicking “Finish”.
4.2. Setting Up the Interface Cable
- Connect the Cable:
- Plug one end of the VCDS interface cable into a USB port on your computer.
- Plug the other end into the OBD-II port of your vehicle. The OBD-II port is usually located under the dashboard on the driver’s side.
- Install USB Drivers:
- Windows should automatically detect the new hardware and attempt to install the drivers. If prompted, allow Windows to search for drivers online, or manually install the drivers from the VCDS software installation directory.
- Test the Connection:
- Launch the VCDS software.
- Click on “Options.”
- Select the correct COM port or USB port from the drop-down menu.
- Click “Test.” The software will attempt to communicate with the interface cable.
- If the test is successful, a message will appear indicating that the interface is found and ready.
- If the test fails, double-check the cable connections and ensure that the correct COM port or USB port is selected.
4.3. Performing a Basic Scan
- Vehicle Selection:
- In the main VCDS window, click on “Select” to choose your vehicle model.
- Select the appropriate vehicle from the list. If your exact model is not listed, choose the closest match or select “Auto-Scan.”
- Initiate Auto-Scan:
- Click on “Auto-Scan.” This will scan all the control modules in the vehicle.
- Wait for the scan to complete. This may take several minutes, depending on the vehicle and the number of modules.
- Review Scan Results:
- Once the scan is complete, VCDS will display a summary of all the control modules and any fault codes that were found.
- Review the scan results carefully. Pay attention to any modules that have fault codes listed.
- Save Scan Results:
- Click on “Save” to save the scan results to a file. This is useful for future reference and comparison.
- Clear Fault Codes (Optional):
- If you wish to clear the fault codes, click on “Clear All DTCs.” Be cautious when clearing codes, as this may erase important diagnostic information.
4.4. Navigating the VCDS Interface
The VCDS interface is designed to be user-friendly. Here are some key areas:
- Main Menu:
- Provides access to various functions such as “Select,” “Auto-Scan,” “Options,” and “About.”
- Control Module Selection:
- Allows you to select specific control modules for diagnostics and customization.
- Diagnostic Functions:
- Includes functions like “Fault Codes – 02,” “Measuring Blocks – 08,” “Output Tests – 03,” “Coding – 07,” and “Adaptation – 10.”
- Long Coding Helper:
- A graphical interface that simplifies complex coding tasks by providing bit-by-bit descriptions.
- Measuring Blocks:
- Displays real-time data from various sensors and modules.
- Output Tests:
- Allows you to test the functionality of various components.
- Coding and Adaptation:
- Enables you to customize vehicle settings and enable or disable features.
- Status Bar:
- Displays information about the current connection status, vehicle model, and software version.
By following these steps, you can successfully install, set up, and begin using VCDS 2012 to diagnose and customize your vehicle. Remember to always exercise caution and consult the VCDS documentation or CARDIAGTECH.NET support for guidance when performing advanced procedures.
5. Advanced Tips and Troubleshooting
To maximize your experience with VCDS 2012, it’s important to explore advanced tips and troubleshooting techniques.
5.1. Using the Long Coding Helper
The Long Coding Helper is a powerful tool within VCDS 2012 that simplifies complex coding tasks by providing a graphical interface with bit-by-bit descriptions. Here’s how to effectively use it:
- Access the Coding Menu:
- Connect the VCDS interface cable to the vehicle’s OBD-II port and the computer.
- Launch the VCDS software and select the appropriate vehicle from the menu.
- Select the control module you want to customize (e.g., Central Electronics, Comfort System).
- Click on the “Coding – 07” button to access the coding menu.
- Open the Long Coding Helper:
- If the control module supports Long Coding, the software will automatically open the Long Coding Helper. If not, you may need to enter the coding value manually.
- Navigate the Bytes:
- The Long Coding Helper displays the coding value as a series of bytes. Each byte represents a group of settings.
- Click on a byte to view its individual bits and their descriptions.
- Understand Bit Descriptions:
- Each bit within a byte corresponds to a specific setting or feature. The Long Coding Helper provides descriptions for each bit, explaining its function and possible values.
- Read the descriptions carefully to understand the impact of changing a bit’s value.
- Modify Bit Values:
- To change a bit’s value, simply check or uncheck the corresponding box.
- As you modify the bit values, the coding value at the top of the Long Coding Helper will automatically update to reflect the changes.
- Apply the Changes:
- Once you have made the desired changes, click the “Exit” button to close the Long Coding Helper.
- The updated coding value will be automatically entered into the coding field.
- Click “Do It!” to save the changes to the control module.
- Verify the Changes:
- After applying the changes, it’s always a good idea to verify that the settings have been updated correctly.
- You can do this by reading the coding value again or by testing the functionality of the modified features.
By following these steps, you can effectively use the Long Coding Helper to customize your vehicle’s settings with confidence, without having to memorize complex coding values.
5.2. Troubleshooting Common Connection Issues
Encountering connection issues with VCDS 2012 can be frustrating, but with the right troubleshooting steps, you can quickly resolve them. Here are some common connection issues and how to fix them:
- Check Cable Connections:
- Ensure that the VCDS interface cable is securely plugged into both the computer’s USB port and the vehicle’s OBD-II port.
- Try using a different USB port on your computer to rule out a faulty port.
- Verify Interface Status:
- In the VCDS software, click on “Options” and then “Test.” The software will attempt to communicate with the interface cable.
- If the test fails, double-check the cable connections and ensure that the correct COM port or USB port is selected.
- If the interface status is “Not Found,” the software is unable to detect the interface cable. In this case, try reinstalling the USB drivers or using a different USB cable.
- Check Vehicle Compatibility:
- Ensure that the VCDS software supports your vehicle model and year. Older versions of VCDS may not be compatible with newer vehicles.
- Visit the CARDIAGTECH.NET or Ross-Tech website to check the compatibility list and download the latest software updates.
- Disable Antivirus Software:
- Sometimes, antivirus software can interfere with the VCDS software and prevent it from communicating with the interface cable.
- Try temporarily disabling your antivirus software and running the VCDS software again to see if the issue is resolved.
- Update USB Drivers:
- Outdated or corrupted USB drivers can cause connection issues with the VCDS interface cable.
- Visit the device manager on your computer and check for any driver updates for the USB port or the VCDS interface cable.
- Update the drivers if necessary and try running the VCDS software again.
- Restart Computer and Vehicle:
- Sometimes, simply restarting your computer and vehicle can resolve connection issues.
- Turn off the vehicle’s ignition and remove the key.
- Restart your computer and launch the VCDS software again.
- Plug the VCDS interface cable into the vehicle’s OBD-II port and the computer, and then turn on the vehicle’s ignition.
- Try running the VCDS software again to see if the connection issue is resolved.
By following these troubleshooting steps, you can quickly identify and resolve common connection issues with VCDS 2012, ensuring a smooth and reliable diagnostic experience.
5.3. Interpreting Diagnostic Data and Fault Codes
Interpreting diagnostic data and fault codes is a crucial skill for effectively diagnosing and repairing vehicles using VCDS 2012. Here’s how to interpret diagnostic data and fault codes:
- Understand Fault Code Structure:
- Diagnostic Trouble Codes (DTCs) typically consist of a five-character alphanumeric code, such as P0123 or C1234.
- The first character indicates the system the code relates to:
- P: Powertrain (Engine, Transmission)
- B: Body (Airbags, Central Locking)
- C: Chassis (ABS, ESP)
- U: Network (Communication)
- The second character indicates whether the code is generic (0) or manufacturer-specific (1).
- The third character indicates the subsystem involved.
- The fourth and fifth characters provide specific information about the fault.
- Look Up Fault Code Descriptions:
- VCDS 2012 provides descriptions for most fault codes, explaining the nature of the fault and the affected component or system.
- Read the fault code description carefully to understand the issue.
- If the description is unclear, you can consult online resources, such as the Ross-Tech Wiki or the CARDIAGTECH.NET forums, for more information.
- Analyze Live Data:
- Use the VCDS 2012’s live data monitoring function to observe real-time data from various sensors and modules.
- Compare the live data values to the expected values specified in the vehicle’s service manual.
- Look for any deviations from the expected values, as these may indicate a faulty sensor, wiring issue, or other problem.
- Consider Symptoms:
- Take into account any symptoms the vehicle is exhibiting, such as poor performance, warning lights, or unusual noises.
- Relate the symptoms to the fault codes and live data to help narrow down the possible causes of the issue.
- Perform Additional Tests:
- Use the VCDS 2012’s output tests and component verification functions to test the functionality of various components.
- Perform additional tests, such as voltage and continuity tests, to further diagnose the issue.
- Consult Service Manuals:
- Refer to the vehicle’s service manual for detailed diagnostic procedures and troubleshooting information.
- The service manual may provide additional information about the fault code, the affected system, and the recommended repair procedures.
- Seek Expert Advice:
- If you are unsure about how to interpret the diagnostic data or fault codes, seek advice from a qualified technician or mechanic.
- The CARDIAGTECH.NET support team can also provide guidance and assistance with interpreting diagnostic data and fault codes.
By following these steps, you can effectively interpret diagnostic data and fault codes, diagnose vehicle issues, and perform the necessary repairs to get your vehicle back on the road.
6. Safety Precautions and Best Practices
When using VCDS 2012 for vehicle diagnostics and customization, it’s essential to follow safety precautions and best practices to protect yourself, your vehicle, and your equipment.
6.1. Importance of Backing Up Vehicle Data Before Making Changes
Before making any changes to your vehicle’s settings using VCDS 2012, it’s crucial to back up the vehicle data to prevent data loss or corruption. Here’s why backing up data is important:
- Prevent Data Loss:
- Making changes to vehicle settings can sometimes result in data loss or corruption, especially if the process is interrupted or performed incorrectly.
- Backing up the vehicle data ensures that you have a copy of the original settings, allowing you to restore them if something goes wrong.
- Avoid Module Damage:
- Incorrect coding or adaptation can potentially damage or disable control modules, resulting in costly repairs.
- Backing up the vehicle data provides a safety net, allowing you to revert to the original settings if a module is damaged or becomes unresponsive.
- Simplify Troubleshooting:
- If you encounter issues after making changes to vehicle settings, having a backup of the original data can simplify troubleshooting.
- You can compare the current settings to the backup to identify any discrepancies and revert to the original settings if necessary.
Here’s how to back up vehicle data using VCDS 2012:
- Perform Auto-Scan:
- Connect the VCDS interface cable to the vehicle’s OBD-II port and the computer.
- Launch the VCDS software and select the appropriate vehicle from the menu.
- Click on “Auto-Scan” to scan all the control modules in the vehicle.
- Save Scan Results:
- Once the scan is complete, click on “Save” to save the scan results to a file.
- This file contains a snapshot of the vehicle’s current settings and fault codes.
- Backup Coding Values:
- For each control module you plan to modify, make a note of the original coding values before making any changes.
- You can use the Long Coding Helper tool to view the coding values in a graphical format and save them to a file or write them down manually.
- Document Adaptations:
- If you plan to perform adaptations, make a note of the original adaptation values before making any changes.
- You can use the VCDS 2012’s adaptation function to view the adaptation values and save them to a file or write them down manually.
- Store Backups Safely:
- Store the backup files and notes in a safe and accessible location, such as a USB drive or a cloud storage service.
- Make multiple copies of the backups to ensure that you have a backup even if one copy is lost or damaged.
By following these steps, you can effectively back up your vehicle data before making any changes, protecting yourself from data loss, module damage, and other potential issues.
6.2. Avoiding Common Mistakes During Coding and Adaptations
When performing coding and adaptations with VCDS 2012, it’s crucial to avoid common mistakes that can lead to vehicle malfunctions or module damage. Here are some common mistakes to watch out for:
- Incorrect Vehicle Selection:
- Ensure that you have selected the correct vehicle model and year in the VCDS software before performing any coding or adaptations.
- Incorrect vehicle selection can result in incorrect coding values and potentially damage or disable control modules.
- Incorrect Coding Values:
- Double-check the coding values before applying them to the control module.
- Refer to the vehicle’s service manual or online resources to ensure that you are using the correct coding values for your vehicle model and year.
- Interrupted Coding Process:
- Avoid interrupting the coding process, as this can result in incomplete or corrupted coding values.
- Ensure that the vehicle’s battery is fully charged and that the VCDS interface cable is securely connected before starting the coding process.
- Ignoring Warnings:
- Pay attention to any warnings or error messages displayed by the VCDS software during the coding or adaptation process.
- These warnings may indicate potential issues or conflicts that need to be resolved before proceeding.
- Overlooking Dependencies:
- Some coding and adaptation settings may depend on other settings or modules.
- Ensure that you understand the dependencies before making any changes, and adjust the related settings or modules accordingly.
- Failing to Test Changes:
- After making any coding or adaptation changes, test the functionality of the modified features to ensure that they are working correctly.
- If you encounter any issues, revert to the original settings and troubleshoot the problem before proceeding.
- Neglecting Documentation:
- Keep a record of any coding or adaptation changes you make, including the original and modified values.
- This documentation can be helpful for troubleshooting issues or reverting to the original settings if necessary.
By avoiding these common mistakes, you can perform coding and adaptations with VCDS 2012 safely and effectively, without risking damage to your vehicle or control modules.
6.3. Safe Handling of Diagnostic Equipment and Cables
Safe handling of diagnostic equipment and cables is essential for protecting yourself, your vehicle, and your equipment. Here are some tips for safe handling:
- Inspect Equipment Regularly:
- Inspect the VCDS interface cable and other diagnostic equipment regularly for any signs of damage, such as frayed wires or broken connectors.
- Replace any damaged equipment immediately to prevent electrical hazards or communication issues.
- Use Proper Grounding:
- Ensure that the diagnostic equipment is properly grounded to prevent electrical shocks or damage to the vehicle’s electrical system.
- Connect the equipment to a grounded power outlet or use a grounding strap to provide a safe electrical path.
- Avoid Moisture and Extreme Temperatures:
- Keep the diagnostic equipment and cables away from moisture and extreme temperatures, as these can damage the equipment and create electrical hazards.
- Store the equipment in a dry, climate-controlled environment when not in use.
- Handle Cables with Care:
- Avoid pulling or yanking on the VCDS interface cable, as this can damage the connectors or wires.
- Gently unplug the cable from the computer and the vehicle’s OBD-II port when disconnecting it.
- Secure Cables Properly:
- Secure the VCDS interface cable properly to prevent it from getting tangled, pinched, or damaged.
- Use cable ties or clips to keep the cable out of the way and prevent it from interfering with vehicle operations.
- Disconnect When Not in Use:
- Disconnect the VCDS interface cable from the vehicle’s OBD-II port and the computer when not in use.
- This will prevent the equipment from draining the vehicle’s battery or being damaged by electrical surges.
- Follow Manufacturer’s Instructions:
- Always follow the manufacturer’s instructions for safe handling and operation of the diagnostic equipment.
- Refer to the equipment’s user manual for detailed information on safety precautions and best practices.
By following these tips, you can ensure the safe handling of diagnostic equipment and cables, protecting yourself, your vehicle, and your equipment from potential hazards.
7. Real-World Applications and Case Studies
VCDS 2012 has proven to be a valuable tool in various real-world applications, providing accurate diagnostics, efficient repairs, and customized solutions for vehicle owners and technicians. Here are some case studies that demonstrate the versatility and effectiveness of VCDS 2012:
7.1. Diagnosing and Resolving Engine Performance Issues
Scenario:
- A vehicle owner notices a sudden drop in engine performance, accompanied by a check engine light on the dashboard.
Diagnosis with VCDS 2012:
- Connect the VCDS interface cable to the vehicle’s OBD-II port and the computer.
- Launch the VCDS software and select the appropriate vehicle from the menu.
- Select the engine control module (ECM) and read the diagnostic trouble codes (DTCs).
- VCDS 2012 reveals a fault code indicating a malfunctioning mass airflow (MAF) sensor.
- Use the live data monitoring function to observe the MAF sensor readings in real-time.
- The live data confirms that the MAF sensor is providing incorrect readings, leading to poor engine performance.
Resolution:
- Replace the faulty MAF sensor with a new one.
- Clear the fault codes using VCDS 2012.
- Monitor the engine performance using the live data monitoring function to ensure that the new MAF sensor is functioning correctly.
- The vehicle owner reports that the engine performance has returned to normal, and the check engine light is no longer illuminated.
Outcome:
- VCDS 2012 accurately diagnosed the engine performance issue, allowing for a quick and effective repair, saving the vehicle owner time and money.
7.2. Customizing Vehicle Lighting and Comfort Features
Scenario:
- A vehicle owner wants to customize the lighting and comfort features of their car to suit their preferences.
Customization with VCDS 2012:
- Connect the VCDS interface cable to the vehicle’s OBD-II port and the computer.
- Launch the VCDS software and select the appropriate vehicle from the menu.
- Select the central electronics control module and access the coding and adaptation functions.
- Use the Long Coding Helper tool to enable or disable various lighting features, such as daytime running lights (DRLs), cornering fog lights, and coming home/leaving home lights.
- Adjust the comfort settings, such as the automatic locking/unlocking behavior, the seat heating levels, and the mirror tilting function.
- Save the changes and test the functionality of the modified features.
Outcome:
- VCDS 2012 allowed the vehicle owner to customize the lighting and comfort features of their car to their liking, enhancing their driving experience and adding a personal touch to their vehicle.
7.3. Performing Routine Maintenance and Service Resets
Scenario:
- A vehicle owner wants to perform routine maintenance on their car, such as changing the oil and resetting the service reminder.
Maintenance with VCDS 2012:
- Connect the VCDS interface cable to the vehicle’s OBD-II port and the computer.
- Launch the VCDS software and select the appropriate vehicle from the menu.
- Select the instrument cluster control module and access the service reset function.
- Follow the on-screen prompts to reset the service reminder.
- Perform other routine maintenance tasks, such as checking the fluid levels, inspecting the brakes, and replacing the air filter.
Outcome:
- VCDS 2012 allowed the vehicle owner to perform routine maintenance on their car and reset the service reminder, ensuring that their vehicle remains in optimal condition and preventing any potential issues.
These case studies demonstrate the versatility and effectiveness of VCDS 2012 in various real-world applications, making it an indispensable tool for vehicle owners and technicians alike.
8. Where to Buy VCDS 2012 and Related Accessories
Purchasing VCDS 2012 and related accessories from reputable sources is essential to ensure that you receive genuine products, reliable support, and the latest software updates. Here are some options for where to buy VCDS 2012 and related accessories:
8.1. Authorized Distributors and Resellers
- CARDIAGTECH.NET:
- CARDIAGTECH.NET is a trusted online retailer that