CARDIAGTECH.NET understands the frustration of encountering “Vcds 17.1 Usb Interface Not Found” errors. This comprehensive guide provides proven solutions to get your VCDS interface working smoothly, allowing you to diagnose and repair vehicles efficiently. Let’s explore VCDS troubleshooting, scan tool errors, and diagnostic interface issues, ensuring your automotive diagnostics are back on track.
1. Understanding the “VCDS 17.1 USB Interface Not Found” Error
The “VCDS 17.1 USB interface not found” error is a common issue that can prevent your VCDS (VAG-COM Diagnostic System) from communicating with your vehicle. This error typically arises when the VCDS software fails to recognize the USB interface cable connected to your computer. This could be due to several reasons, including driver issues, USB port problems, software conflicts, or incorrect device settings. Understanding the root causes is the first step toward resolving this issue and ensuring you can effectively use your VCDS for vehicle diagnostics.
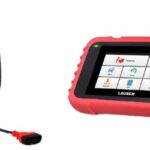
Alt text: VCDS interface cable connected to a laptop and a car’s OBD-II port, illustrating the connection required for diagnostics.
2. Identifying the Root Causes of the Error
Several factors can contribute to the “VCDS 17.1 USB interface not found” error. Addressing these potential causes will help you pinpoint the exact reason for the error and apply the appropriate solution.
2.1. Driver Issues
Outdated, corrupted, or incompatible USB drivers are a primary cause of this error. Drivers act as the communication bridge between your VCDS interface and your computer’s operating system. When these drivers are not functioning correctly, the VCDS software cannot recognize the interface.
2.2. USB Port Problems
The USB port you are using might be faulty or incompatible with the VCDS interface. Some USB ports may not provide sufficient power or may have compatibility issues with the device.
2.3. Software Conflicts
Conflicts with other software installed on your computer can interfere with the VCDS software’s ability to recognize the USB interface. This is especially true for other diagnostic tools or USB device management software.
2.4. Incorrect Device Settings
Incorrect device settings within your operating system can prevent the VCDS interface from being recognized. This includes incorrect COM port settings, device recognition settings, and power management settings that may be disabling the USB port.
2.5. Damaged USB Cable or Interface
A damaged USB cable or a faulty VCDS interface can also cause this error. Physical damage to the cable or internal components of the interface can disrupt the connection and prevent proper communication with the computer.
3. Preliminary Checks and Basic Troubleshooting
Before diving into more complex solutions, perform these basic checks to rule out simple issues:
3.1. Inspect the USB Cable and Interface
- Visual Inspection: Check the USB cable and VCDS interface for any visible signs of damage, such as frayed wires, bent connectors, or cracks.
- Cable Integrity: Ensure the cable is securely connected to both the computer and the VCDS interface.
- Interface Condition: Examine the interface for any physical damage or loose components.
3.2. Try a Different USB Port
- Port Variation: Connect the VCDS interface to a different USB port on your computer. Some ports may function better than others.
- USB 2.0 vs. USB 3.0: If you are using a USB 3.0 port, try a USB 2.0 port, as some older devices may have compatibility issues with USB 3.0.
3.3. Restart Your Computer
- System Refresh: Restarting your computer can resolve temporary software glitches and refresh the USB port connections.
- Complete Shutdown: Ensure you perform a full shutdown and restart, rather than just a simple reboot, to clear any lingering processes.
3.4. Check the VCDS Software Version
- Software Compatibility: Verify that you are using a compatible version of the VCDS software for your interface.
- Update Software: If an update is available, download and install the latest version of the VCDS software from the official Ross-Tech website.
3.5. Test on Another Computer (If Possible)
- Cross-Device Testing: If possible, test the VCDS interface on another computer to determine if the issue is specific to your primary computer.
- Isolate the Problem: This will help you identify whether the problem lies with the interface itself or with your computer’s configuration.
4. Step-by-Step Solutions to Fix “VCDS 17.1 USB Interface Not Found”
If the preliminary checks do not resolve the issue, proceed with these detailed troubleshooting steps:
4.1. Reinstall or Update USB Drivers
Incorrect or outdated USB drivers are a common cause of the “VCDS 17.1 USB interface not found” error. Reinstalling or updating the drivers can often resolve this issue.
4.1.1. Uninstall the Existing Drivers
-
Open Device Manager:
- Press
Windows + Xand select “Device Manager” from the menu.
- Press
-
Locate the VCDS Interface:
- Expand “Ports (COM & LPT)” or “Other devices.”
- Look for an entry related to the VCDS interface, which might appear as “Ross-Tech USB Interface” or a similar name.
-
Uninstall the Driver:
- Right-click on the VCDS interface entry.
- Select “Uninstall device.”
- Check the box that says “Delete the driver software for this device” if available.
- Click “Uninstall.”
Alt text: Screenshot of Device Manager showing the VCDS interface driver being uninstalled, with the option to delete the driver software highlighted.
-
Restart Your Computer:
- Restart your computer to ensure the driver is completely removed.
4.1.2. Install the Latest Drivers
-
Download Drivers from Ross-Tech:
- Visit the official Ross-Tech website (www.ross-tech.com).
- Navigate to the “Downloads” section.
- Download the latest VCDS software package, which includes the necessary USB drivers.
-
Install the VCDS Software:
- Run the downloaded installer.
- Follow the on-screen instructions to install the VCDS software.
-
Connect the VCDS Interface:
- Plug the VCDS interface into a USB port on your computer.
-
Allow Windows to Detect the Device:
- Windows should automatically detect the new hardware and attempt to install the drivers.
-
Verify Driver Installation:
- Open Device Manager again.
- Check if the VCDS interface is listed under “Ports (COM & LPT)” without any error symbols (such as a yellow exclamation mark).
Alt text: Screenshot of Device Manager showing the VCDS interface driver successfully installed under “Ports (COM & LPT)” without any error symbols.
4.1.3. Manual Driver Installation (If Necessary)
If Windows does not automatically install the drivers, you may need to install them manually:
-
Locate the Driver Files:
- The driver files are typically located in the VCDS installation directory (e.g.,
C:Ross-TechVCDS). - Look for files with extensions like
.infor.sys.
- The driver files are typically located in the VCDS installation directory (e.g.,
-
Open Device Manager:
- Press
Windows + Xand select “Device Manager.”
- Press
-
Update Driver Software:
- Right-click on the VCDS interface entry (usually under “Other devices” if the driver is not installed).
- Select “Update driver.”
- Choose “Browse my computer for drivers.”
Alt text: Screenshot of Device Manager showing the option to browse the computer for VCDS driver software.
-
Browse to the Driver Folder:
- Navigate to the folder containing the driver files.
- Make sure the “Include subfolders” option is checked.
- Click “Next.”
-
Follow the On-Screen Instructions:
- Windows will install the driver.
- Restart your computer if prompted.
4.2. Adjust COM Port Settings
The VCDS software communicates with the interface through a COM port. If the COM port settings are incorrect, the software may fail to recognize the interface.
4.2.1. Determine the Correct COM Port
-
Open Device Manager:
- Press
Windows + Xand select “Device Manager.”
- Press
-
Locate the VCDS Interface:
- Expand “Ports (COM & LPT).”
- Note the COM port number assigned to the VCDS interface (e.g., “COM3”).
Alt text: Screenshot of Device Manager showing the VCDS interface listed under “Ports (COM & LPT)” with the assigned COM port number highlighted.
4.2.2. Configure VCDS Software
-
Open VCDS Software:
- Launch the VCDS software on your computer.
-
Access Options:
- Click on the “Options” button.
-
Select COM Port:
- In the “Options” window, select the COM port number that matches the one identified in Device Manager.
Alt text: Screenshot of the VCDS software “Options” window, showing the COM port selection dropdown menu.
-
Test the Interface:
- Click the “Test” button.
- A message should appear indicating whether the interface was found and is working correctly.
-
Save Settings:
- Click “Save” to save the settings.
4.2.3. Advanced COM Port Configuration (If Necessary)
If the interface still does not work, you may need to adjust the advanced COM port settings:
-
Open Device Manager:
- Press
Windows + Xand select “Device Manager.”
- Press
-
Locate the VCDS Interface:
- Expand “Ports (COM & LPT).”
- Right-click on the VCDS interface entry and select “Properties.”
-
Port Settings Tab:
- Go to the “Port Settings” tab.
-
Adjust Settings:
- Set the “Bits per second” to 12800.
- Set the “Data bits” to 8.
- Set the “Parity” to None.
- Set the “Stop bits” to 1.
- Set the “Flow control” to None.
Alt text: Screenshot of the COM port properties window, showing the advanced settings for bits per second, data bits, parity, stop bits, and flow control.
-
Advanced Button:
- Click the “Advanced” button.
-
Adjust COM Port Number (If Necessary):
- If the COM port number is already in use by another device, change it to an available port (e.g., COM3 or COM4).
- Ensure that the “Use FIFO buffers” option is enabled.
- Adjust the “Receive Buffer” and “Transmit Buffer” settings to the maximum values.
Alt text: Screenshot of the advanced COM port settings, showing options for changing the COM port number and adjusting buffer settings.
-
Click OK:
- Click “OK” to save the settings.
-
Test Again:
- Test the interface in the VCDS software to see if it is now recognized.
4.3. Disable USB Selective Suspend Setting
The USB selective suspend setting can sometimes cause USB devices to be disconnected to save power, which can interfere with the VCDS interface.
4.3.1. Access Power Options
-
Open Control Panel:
- Press
Windows + R, typecontrol panel, and press Enter.
- Press
-
Go to Power Options:
- Click on “Hardware and Sound.”
- Click on “Power Options.”
Alt text: Screenshot of Control Panel showing the path to access “Power Options” through “Hardware and Sound.”
4.3.2. Change Plan Settings
-
Select Change Plan Settings:
- Click on “Change plan settings” next to your currently selected power plan.
Alt text: Screenshot of Power Options showing the “Change plan settings” link for the selected power plan.
4.3.3. Access Advanced Power Settings
-
Click Change Advanced Power Settings:
- Click on “Change advanced power settings.”
Alt text: Screenshot of Power Plan Settings showing the “Change advanced power settings” link.
4.3.4. Disable USB Selective Suspend
-
Locate USB Settings:
- Expand “USB settings.”
- Expand “USB selective suspend setting.”
-
Disable Setting:
- Change the setting to “Disabled” for both “On battery” and “Plugged in.”
Alt text: Screenshot of Advanced Power Settings showing the USB selective suspend setting disabled for both “On battery” and “Plugged in.”
-
Apply Changes:
- Click “Apply” and then “OK” to save the changes.
4.4. Disable Conflicting Software
Conflicting software can sometimes interfere with the VCDS software’s ability to recognize the USB interface.
4.4.1. Identify Potential Conflicts
- Other Diagnostic Tools:
- Uninstall any other vehicle diagnostic software that may be installed on your computer.
- USB Device Management Software:
- Disable or uninstall any USB device management software that may be running.
- Virtual Machine Software:
- If you are using virtual machine software (e.g., VMware, VirtualBox), ensure that the VCDS interface is properly connected to the virtual machine and not conflicting with the host operating system.
4.4.2. Disable Startup Programs
-
Open System Configuration:
- Press
Windows + R, typemsconfig, and press Enter.
- Press
-
Go to the Services Tab:
- Click on the “Services” tab.
Alt text: Screenshot of the System Configuration window showing the “Services” tab.
-
Hide Microsoft Services:
- Check the box that says “Hide all Microsoft services.”
-
Disable Remaining Services:
- Click the “Disable all” button.
Alt text: Screenshot of the System Configuration window with all non-Microsoft services disabled.
-
Apply Changes:
- Click “Apply” and then “OK” to save the changes.
-
Restart Your Computer:
- Restart your computer to apply the changes.
4.4.3. Test the VCDS Interface
- Run VCDS:
- After restarting, run the VCDS software and test the interface to see if it is now recognized.
4.5. Update Chipset Drivers
Outdated chipset drivers can cause compatibility issues with USB devices. Updating these drivers can improve the recognition of the VCDS interface.
4.5.1. Identify Your Motherboard Manufacturer and Model
-
Open System Information:
- Press
Windows + R, typemsinfo32, and press Enter.
- Press
-
Note System Information:
- Look for the “BaseBoard Manufacturer” and “BaseBoard Product” entries to identify your motherboard.
Alt text: Screenshot of the System Information window showing the “BaseBoard Manufacturer” and “BaseBoard Product” entries.
4.5.2. Download Chipset Drivers
-
Visit the Manufacturer’s Website:
- Go to the website of your motherboard manufacturer (e.g., ASUS, Gigabyte, MSI).
-
Search for Your Motherboard Model:
- Enter your motherboard model in the search bar.
-
Go to the Support or Downloads Section:
- Navigate to the “Support” or “Downloads” section for your motherboard.
-
Download Chipset Drivers:
- Look for the latest chipset drivers compatible with your operating system.
Alt text: Screenshot of a motherboard manufacturer’s website showing the chipset drivers available for download.
4.5.3. Install the Chipset Drivers
- Run the Installer:
- Run the downloaded installer.
- Follow On-Screen Instructions:
- Follow the on-screen instructions to install the chipset drivers.
- Restart Your Computer:
- Restart your computer to apply the changes.
4.5.4. Test the VCDS Interface
- Run VCDS:
- After restarting, run the VCDS software and test the interface to see if it is now recognized.
5. Advanced Troubleshooting Techniques
If the previous solutions do not resolve the issue, consider these advanced troubleshooting techniques:
5.1. Check for Hardware Conflicts in Device Manager
Hardware conflicts can prevent the VCDS interface from being recognized. Device Manager can help identify and resolve these conflicts.
5.1.1. Open Device Manager
- Open Device Manager:
- Press
Windows + Xand select “Device Manager.”
- Press
5.1.2. Look for Error Symbols
-
Check for Errors:
- Look for any devices with a yellow exclamation mark or a red “X” symbol. These symbols indicate a hardware conflict or a device that is not functioning correctly.
Alt text: Screenshot of Device Manager showing a device with a yellow exclamation mark, indicating a hardware conflict.
5.1.3. Resolve Conflicts
- Update Drivers:
- Right-click on the device with the error symbol and select “Update driver.”
- Choose “Search automatically for drivers” to allow Windows to find and install the appropriate drivers.
- Manual Configuration:
- If updating the driver does not resolve the issue, you may need to manually configure the device settings or remove conflicting devices.
5.2. Test with a Different USB Cable
A faulty USB cable can cause intermittent connection issues and prevent the VCDS interface from being recognized.
5.2.1. Replace the USB Cable
- Use a New Cable:
- Replace the USB cable with a new, high-quality USB cable.
- Ensure Compatibility:
- Make sure the cable is compatible with both the VCDS interface and your computer.
5.2.2. Test the Connection
- Connect the Interface:
- Connect the VCDS interface to your computer using the new USB cable.
- Run VCDS:
- Run the VCDS software and test the interface to see if it is now recognized.
5.3. Rule Out Power Supply Issues
Insufficient power supply to the USB port can sometimes cause devices to malfunction or not be recognized.
5.3.1. Use a Powered USB Hub
- Connect a Hub:
- Connect a powered USB hub to your computer.
- Plug in the Interface:
- Plug the VCDS interface into the powered USB hub.
- Ensure Adequate Power:
- Make sure the USB hub is connected to a power source to provide sufficient power to the interface.
5.3.2. Test the Connection
- Run VCDS:
- Run the VCDS software and test the interface to see if it is now recognized.
5.4. Perform a Clean Boot
A clean boot starts Windows with a minimal set of drivers and startup programs. This can help identify if a background program is interfering with the VCDS software.
5.4.1. Open System Configuration
- Open System Configuration:
- Press
Windows + R, typemsconfig, and press Enter.
- Press
5.4.2. Disable Services
- Go to the Services Tab:
- Click on the “Services” tab.
- Hide Microsoft Services:
- Check the box that says “Hide all Microsoft services.”
- Disable Remaining Services:
- Click the “Disable all” button.
- Apply Changes:
- Click “Apply.”
5.4.3. Disable Startup Programs
- Go to the Startup Tab:
- Click on the “Startup” tab.
- Open Task Manager:
- Click on “Open Task Manager.”
- Disable Startup Items:
- Disable all startup items.
- Close Task Manager:
- Close Task Manager.
5.4.4. Restart Your Computer
- Restart:
- Click “OK” in the System Configuration window and restart your computer.
5.4.5. Test the VCDS Interface
- Run VCDS:
- After restarting, run the VCDS software and test the interface to see if it is now recognized.
5.5. Check and Update BIOS
An outdated BIOS can sometimes cause compatibility issues with USB devices.
5.5.1. Identify Your BIOS Version
- Open System Information:
- Press
Windows + R, typemsinfo32, and press Enter.
- Press
- Note BIOS Version:
- Look for the “BIOS Version/Date” entry to identify your BIOS version.
5.5.2. Visit the Motherboard Manufacturer’s Website
- Go to the Manufacturer’s Website:
- Go to the website of your motherboard manufacturer (e.g., ASUS, Gigabyte, MSI).
- Search for Your Motherboard Model:
- Enter your motherboard model in the search bar.
- Go to the Support or Downloads Section:
- Navigate to the “Support” or “Downloads” section for your motherboard.
- Check for BIOS Updates:
- Look for the latest BIOS version compatible with your motherboard.
5.5.3. Update the BIOS
- Follow the Manufacturer’s Instructions:
- Follow the manufacturer’s instructions to update the BIOS. This process typically involves downloading the BIOS update file and using a special utility to flash the BIOS.
- Be Cautious:
- Updating the BIOS is a critical process, and incorrect flashing can damage your motherboard. Follow the instructions carefully and ensure you have a stable power supply during the update.
5.5.4. Test the VCDS Interface
- Run VCDS:
- After updating the BIOS, run the VCDS software and test the interface to see if it is now recognized.
6. When to Seek Professional Help
If you have tried all the troubleshooting steps and are still experiencing the “VCDS 17.1 USB interface not found” error, it may be time to seek professional help.
6.1. Contact Ross-Tech Support
- Technical Assistance:
- Contact Ross-Tech support for technical assistance. They may be able to provide specific troubleshooting steps or identify hardware issues with your VCDS interface.
6.2. Consult a Computer Technician
- Hardware and Software Issues:
- Consult a computer technician for assistance with hardware and software issues. They can diagnose and repair any underlying problems with your computer that may be causing the error.
7. Preventing Future Issues
To prevent the “VCDS 17.1 USB interface not found” error from recurring, follow these best practices:
7.1. Keep Drivers Updated
- Regular Updates:
- Regularly update your USB drivers and chipset drivers to ensure compatibility and optimal performance.
7.2. Use a Dedicated USB Port
- Consistent Port Usage:
- Use a dedicated USB port for the VCDS interface to avoid conflicts with other devices.
7.3. Avoid USB Hubs (If Possible)
- Direct Connection:
- Connect the VCDS interface directly to your computer whenever possible to avoid potential issues with USB hubs.
7.4. Regularly Scan for Malware
- System Security:
- Regularly scan your computer for malware and viruses to prevent software conflicts and system instability.
7.5. Properly Store the VCDS Interface and Cable
- Careful Handling:
- Store the VCDS interface and cable in a safe place to prevent physical damage.
8. Maximizing the Value of Your VCDS Tool
Investing in a VCDS tool is a significant step towards efficient vehicle diagnostics. To maximize its value, consider these points:
- Stay Updated: Regularly update your VCDS software to access the latest features and vehicle data.
- Proper Training: Ensure you and your team receive adequate training on using VCDS for accurate diagnostics.
- Community Support: Engage with the VCDS community for tips, tricks, and troubleshooting advice.
9. Why Choose CARDIAGTECH.NET for Your Diagnostic Needs
At CARDIAGTECH.NET, we understand the critical role diagnostic tools play in your automotive repair business. Here’s why you should choose us for your VCDS and other diagnostic equipment needs:
- Expert Guidance: We offer expert guidance to help you select the right tools for your specific needs.
- Quality Products: We provide high-quality, reliable diagnostic equipment that ensures accurate and efficient vehicle diagnostics.
- Comprehensive Support: Our comprehensive support includes troubleshooting assistance and ongoing technical support to keep your tools running smoothly.
Don’t let a “VCDS 17.1 USB interface not found” error slow you down. Follow these troubleshooting steps to resolve the issue and get back to diagnosing vehicles efficiently.
10. Call to Action
Are you struggling with your VCDS tool or need assistance in selecting the right diagnostic equipment for your automotive repair business? Contact CARDIAGTECH.NET today for expert guidance and support. Our team is ready to help you maximize the efficiency and accuracy of your vehicle diagnostics.
Contact Information:
- Address: 276 Reock St, City of Orange, NJ 07050, United States
- WhatsApp: +1 (641) 206-8880
- Website: CARDIAGTECH.NET
Reach out now and let us help you elevate your diagnostic capabilities!
FAQ: Troubleshooting VCDS 17.1 USB Interface Issues
Here are some frequently asked questions about troubleshooting the “VCDS 17.1 USB interface not found” error:
1. Why does my VCDS 17.1 interface keep disconnecting?
- Answer: This can be due to faulty USB cables, power management settings, or driver issues. Check the cable, disable USB selective suspend, and ensure your drivers are up to date.
2. How do I update the drivers for my VCDS 17.1 interface?
- Answer: Visit the Ross-Tech website, download the latest VCDS software package, and follow the installation instructions. This package includes the necessary USB drivers.
3. What should I do if the VCDS software doesn’t recognize my interface?
- Answer: Ensure the USB cable is properly connected, check the COM port settings in VCDS, and reinstall the USB drivers. Also, disable any conflicting software.
4. Can a damaged USB cable cause the “VCDS 17.1 USB interface not found” error?
- Answer: Yes, a damaged USB cable can disrupt the connection between the interface and your computer. Try using a new, high-quality USB cable.
5. How do I check the COM port settings for my VCDS interface?
- Answer: Open Device Manager, locate the VCDS interface under “Ports (COM & LPT),” and note the COM port number. Then, open the VCDS software, go to “Options,” and select the corresponding COM port.
6. Is it possible that other software is conflicting with my VCDS software?
- Answer: Yes, other diagnostic tools or USB device management software can conflict with VCDS. Disable or uninstall any potentially conflicting software.
7. What is USB selective suspend, and how does it affect my VCDS interface?
- Answer: USB selective suspend is a power management feature that can cause USB devices to be disconnected to save power. Disabling this feature can prevent the VCDS interface from disconnecting unexpectedly.
8. How do I perform a clean boot to troubleshoot VCDS issues?
- Answer: Open System Configuration (
msconfig), disable all non-Microsoft services and startup programs, and restart your computer. This helps identify if a background program is interfering with VCDS.
9. Why is it important to keep my chipset drivers updated?
- Answer: Outdated chipset drivers can cause compatibility issues with USB devices. Updating these drivers can improve the recognition of the VCDS interface.
10. What should I do if I have tried all the troubleshooting steps and the issue persists?
- Answer: Contact Ross-Tech support for technical assistance or consult a computer technician for help with hardware and software issues.
By following these troubleshooting steps and understanding the potential causes of the “VCDS 17.1 USB interface not found” error, you can quickly resolve the issue and get back to diagnosing vehicles efficiently. And remember, CARDIAGTECH.NET is always here to provide expert guidance and support for all your diagnostic equipment needs.
11. Understanding Diagnostic Scan Tools and Automotive Repair
Diagnostic scan tools are indispensable in modern automotive repair. These tools read data from a vehicle’s onboard computer, helping technicians identify problems quickly and accurately. The VCDS (VAG-COM Diagnostic System) is particularly valuable for vehicles within the Volkswagen Auto Group (VAG), including Volkswagen, Audi, SEAT, and Škoda. However, like any advanced tool, VCDS can encounter issues, such as the “USB interface not found” error.
11.1 The Role of Scan Tools
- Data Retrieval: Scan tools access a wealth of information, from engine performance to transmission behavior.
- Fault Code Reading: They identify diagnostic trouble codes (DTCs), providing a starting point for diagnosis.
- Real-time Data: Live data streams allow technicians to observe how components are functioning under various conditions.
11.2 The Value of VCDS
- VAG Specialization: VCDS is specifically designed for VAG vehicles, offering deep diagnostic capabilities.
- Coding and Adaptation: Beyond basic diagnostics, VCDS allows for coding new components and adapting control modules.
- User Community: A robust user community provides support, guidance, and shared knowledge.
11.3 Addressing Common Challenges
- Software Glitches: Diagnostic software can be complex and prone to occasional glitches.
- Hardware Compatibility: Ensuring compatibility between the scan tool, vehicle, and computer system is crucial.
- USB Connectivity: Establishing a reliable USB connection is fundamental for successful diagnostics.
12. Conclusion: Empowering Your Automotive Diagnostics
Troubleshooting the “VCDS 17.1 USB interface not found” error requires a systematic approach. By understanding the potential causes, following the step-by-step solutions, and implementing preventive measures, you can ensure your VCDS tool functions reliably.
At CARDIAGTECH.NET, we are committed to providing you with the tools and support you need to excel in automotive diagnostics. Contact us today to explore our range of diagnostic equipment and discover how we can help you enhance your business.
Final Contact Information:
- Address: 276 Reock St, City of Orange, NJ 07050, United States
- WhatsApp: +1 (641) 206-8880
- Website: CARDIAGTECH.NET
We look forward to assisting you in achieving diagnostic excellence.