Connecting a Raspberry Pi 3 to your car’s OBDII port opens a world of possibilities for monitoring vehicle data. This guide provides a foundation for building your own car diagnostic tool using a Raspberry Pi 3 and a Bluetooth OBDII adapter. While not an exhaustive tutorial, it offers enough information to get started.
Project Prerequisites
Before diving in, familiarize yourself with these skills and gather the necessary tools and parts.
Skills:
- Basic automotive wiring and circuit understanding
- Python programming fundamentals
- Soldering techniques
- Linux command line usage
Tools:
- Wire strippers
- Soldering iron
- Computer or laptop
- Monitor or TV (optional, for initial setup)
Parts:
- Raspberry Pi 3 (recommended for built-in Wi-Fi and Bluetooth)
- MicroSD card
- Bluetooth OBDII adapter (most models on Amazon will work, Veepeak is a popular choice)
- Power supply for the Pi (a 5V micro USB power supply; the car’s USB port may not provide enough power)
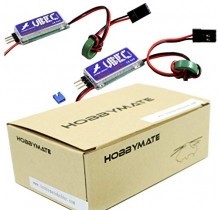
- A 12V to 5V step-down converter (UBEC) is recommended for connecting to the car’s power system. For example: Hobbywing 5V UBEC.
- Screen (optional, for displaying data in the car) Adafruit offers a suitable option: Adafruit PiTFT
- Mausberry Circuits 3A Car Supply Switch (highly recommended for clean shutdown and power management)
- Fuse taps (for connecting to the car’s fuse box)
 alt text: Hobbywing 5v UBEC
Project Steps
This project involves several key steps:
1. Raspberry Pi Setup
- Install Raspbian OS: Download and install Raspbian OS on your microSD card using a guide like the one found on the official Raspberry Pi website: https://www.raspberrypi.org/learning/software-guide/
- Enable Remote Access: Enable SSH and VNC for remote access to the Pi without a monitor: https://www.raspberrypi.org/documentation/remote-access/vnc/README.md
- Install Required Packages: Using the terminal, update your system and install necessary Python packages:
  sudo apt-get update
  sudo apt-get -y install python-pip
  sudo pip install obd
  sudo apt-get install python-serial
2. OBDII Adapter Installation
Locate your car’s OBDII port (usually under the driver’s side dash) and plug in the Bluetooth OBDII adapter. Test the connection with your phone to ensure it’s working correctly.
3. Bluetooth Connection
This step can be tricky. Ensure your Raspberry Pi is powered and within range of the OBDII adapter. Follow the instructions in this forum post to pair, trust, and connect to the adapter: https://www.raspberrypi.org/forums/viewtopic.php?f=28&t=162911&start=25. You will likely need to establish a serial connection using rfcomm. Remember to automatically run the connection command on each boot.
 alt text: OBDII connector located under the dashboard
4. Test the Connection
Use the following Python code to verify the connection and list supported OBDII commands:
import obd
connection = obd.OBD() # auto-connects
print("Connection Status: " + connection.status())
print("Protocol Name: " + connection.protocol_name())
commands = connection.supported_commands
print("Supported Commands:")
for command in commands:
    print(command.name)
Refer to the Python OBD library documentation for further coding details: http://python-obd.readthedocs.io/en/latest/
5. Wiring the Pi to Your Car (Optional)
For a permanent installation, wire the Pi to your car’s power system using a step-down converter and the Mausberry Circuits switch for safe shutdowns. How you wire your screen depends on the specific model.
6. Custom Code Development
This guide lays the foundation. You’ll need to write custom Python code to collect, process, and display the desired OBDII data.
Conclusion
Building a Raspberry Pi 3 Obdii diagnostic tool requires technical knowledge and patience. However, this project empowers you to gain deeper insights into your vehicle’s performance and health. By leveraging the resources provided, you can embark on this rewarding journey of creating your own customized car diagnostic system.
