Have you ever been riding your Yamaha motorcycle and suddenly noticed a warning light illuminate on your dashboard? That moment of uncertainty, wondering what’s wrong with your bike, is a common experience for many riders. Diagnosing motorcycle issues used to be a complex task, often requiring a trip to a mechanic. However, with the advent of OBDII scanners, motorcycle diagnostics has become more accessible to the average rider, especially for brands like Yamaha.
Just like cars, modern Yamaha motorcycles are equipped with sophisticated electronic systems that monitor various aspects of the bike’s performance. When something goes wrong, these systems generate diagnostic trouble codes (DTCs) that can be accessed using an OBDII scanner. Understanding how to use an Obdii Scanner For Yamaha Motorcycles can empower you to quickly identify problems, perform routine maintenance, and ensure your bike runs smoothly and efficiently.
Do Yamaha Motorcycles Have OBDII Ports?
The On-Board Diagnostics II (OBDII) system is a standardized system used in automobiles to monitor and diagnose engine and emission-related problems. While OBDII is standard for cars, its adoption in motorcycles has been more gradual. Fortunately, many modern Yamaha motorcycles, particularly newer models, do come equipped with OBDII-compliant ports.
However, it’s important to note that not all Yamaha bikes have the standard 16-pin OBDII port you might find in a car. Some Yamaha motorcycles may utilize different types of diagnostic connectors, often manufacturer-specific. Despite potential connector variations, the underlying diagnostic protocols are increasingly based on OBDII standards, or close derivatives, making OBDII scanners relevant.
For Yamaha motorcycles equipped with OBDII ports, using an OBDII scanner for Yamaha motorcycles is straightforward. You can directly connect the scanner to the port, typically located under the seat, near the battery, or behind a side panel. For models with non-standard connectors, you might need an adapter cable to interface with a standard OBDII scanner. Always consult your Yamaha motorcycle’s service manual to confirm the presence and location of the diagnostic port and any specific connector requirements.
Alt text: Locating the diagnostic port on a Yamaha motorcycle, often found under the seat for easy OBDII scanner connection.
Will Any OBDII Scanner Work on Yamaha Motorcycles?
While the term “OBDII scanner” might suggest universal compatibility, it’s crucial to understand that not all OBDII scanners are equally effective for all vehicles, including motorcycles. A generic OBDII scanner designed primarily for cars may not fully support the diagnostic protocols and systems used in Yamaha motorcycles.
Motorcycles, including Yamaha models, have unique engine management systems, sensor configurations, and communication protocols that differ from cars. A basic car OBDII scanner might read some generic engine codes on a Yamaha bike, but it may miss manufacturer-specific codes, ABS, and other system diagnostics that are critical for comprehensive troubleshooting.
To get the most accurate and complete diagnostic information from your Yamaha motorcycle, it’s highly recommended to use an OBDII scanner for Yamaha motorcycles specifically designed or validated for motorcycle applications. These specialized scanners are engineered to communicate effectively with the Yamaha ECU (Engine Control Unit) and other onboard systems, providing deeper insights into your bike’s health.
Using a generic car scanner on your Yamaha could lead to:
- Incomplete Data: Missing crucial fault codes and system information.
- Misleading Readings: Incorrect interpretations of motorcycle-specific codes.
- Limited Functionality: Inability to access advanced diagnostic features like ABS, immobilizer, or service resets.
- Potential Damage: In rare cases, incompatibility could potentially cause communication errors or system disruptions.
Therefore, investing in a dedicated OBDII scanner for Yamaha motorcycles ensures accurate diagnostics, saves time and frustration, and ultimately helps maintain your bike in optimal condition.
Choosing the Right OBDII Scanner for Your Yamaha
Selecting the best OBDII scanner for Yamaha motorcycles involves considering several factors to ensure you get a tool that meets your diagnostic needs. Here are key features to look for:
- Yamaha Compatibility: The scanner should explicitly state compatibility with Yamaha motorcycles. Check the manufacturer’s specifications or compatibility lists.
- Protocol Support: Ensure the scanner supports the OBDII protocols and any manufacturer-specific protocols used by Yamaha (like CAN bus, K-line, etc.).
- System Coverage: A good scanner should access not only the engine system but also other critical systems like ABS, fuel injection, ignition, transmission, and chassis electronics. “All system diagnosis” is a valuable feature.
- Functionality: Look for features beyond basic code reading, such as:
- Read and Clear DTCs: Essential for identifying and resolving fault codes.
- Live Data Stream: Displays real-time sensor data (engine temperature, RPM, etc.) for dynamic diagnostics.
- Actuation Tests: Allows you to activate components (like fuel injectors or relays) to test their function.
- Service Reset Functions: Capabilities to reset oil service lights, throttle position sensor (TPS) adaptation, ABS bleeding, and other maintenance functions.
- Auto VIN Scan: Automatically identifies your motorcycle’s model for faster diagnostics.
- Ease of Use: A user-friendly interface, clear display, and intuitive navigation are important for efficient operation.
- Update Capability: Regular software updates ensure compatibility with newer Yamaha models and access to the latest diagnostic features.
- Durability and Build Quality: Choose a scanner that is robust enough to withstand garage or workshop environments.
- Brand Reputation and Support: Opt for reputable brands known for quality diagnostic tools and reliable customer support.
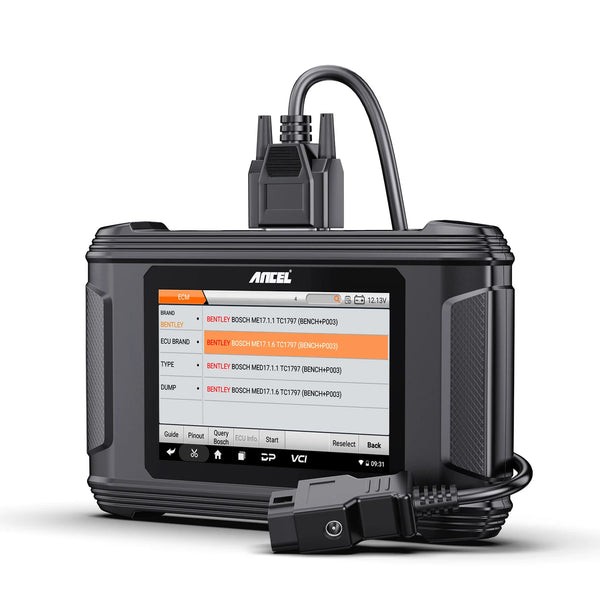
The ANCEL MT500 OBD2 Scanner for Motorcycles is an example of a tool that is widely compatible with Yamaha and other motorcycle brands, offering comprehensive diagnostics and a range of advanced features. However, other reputable brands also offer excellent OBDII scanners for Yamaha motorcycles, so research and compare models to find the best fit for your needs and budget.
Alt text: ANCEL MT500 OBD2 Scanner, a diagnostic tool offering all-system scanning and service functions for Yamaha and other motorcycle brands.
How to Read Fault Codes on Your Yamaha Motorcycle
Using an OBDII scanner for Yamaha motorcycles to read fault codes is a straightforward process:
- Prepare Your Scanner: Ensure your scanner is powered on and updated with the latest software.
- Locate the Diagnostic Port: Refer to your Yamaha motorcycle’s manual to find the diagnostic port location. It’s usually under the seat, near the battery, or behind a side cover.
- Connect the Scanner: Plug the OBDII scanner cable into the diagnostic port. Use an adapter if your Yamaha has a non-standard connector.
- Turn on the Ignition: Turn your Yamaha motorcycle’s ignition key to the “ON” position, but do not start the engine unless instructed by your scanner.
- Initiate Diagnostic Scan: Follow the scanner’s on-screen instructions to start a diagnostic scan. Select “Yamaha” as the manufacturer and, if prompted, choose your specific model.
- Read Fault Codes (DTCs): The scanner will display any stored Diagnostic Trouble Codes (DTCs). Note down the codes and their descriptions.
- Interpret the Codes: Use the scanner’s built-in code definitions or consult a Yamaha service manual or online resources to understand the meaning of each code. For example, a code like “P0131” might indicate a problem with the oxygen sensor. (Refer to the example in the original article for a detailed breakdown of code P0131).
- Address the Issue: Based on the code description, diagnose and repair the identified problem on your Yamaha motorcycle.
- Clear Fault Codes (Optional): Once the issue is resolved, you can use the scanner to clear the fault codes. This turns off the warning light on your dashboard. However, only clear codes after fixing the underlying problem.
- Verify Repair: After clearing codes, start your motorcycle and check if the warning light remains off and if the issue is resolved. Rescan to ensure no new codes appear.
Example of Common Yamaha Fault Codes:
Understanding common Yamaha fault codes can speed up diagnostics. Here are a few examples (expanded from the original article):
- Error Code 12 (Crankshaft Position Sensor): Indicates a problem with the crankshaft position sensor circuit. This can cause engine stalling, difficulty starting, or poor performance. Check sensor wiring, connections, and sensor itself.
- Error Code 17 (Oxygen Sensor Heater): Signifies a malfunction in the oxygen sensor heater circuit. This can affect fuel efficiency and emissions. Inspect sensor heater element and wiring.
- Error Code 19 (Sidestand Switch): Problem with the sidestand switch circuit. The bike may not start or may stall if the sidestand is down. Check switch functionality and wiring.
- Error Code 21 (Coolant Temperature Sensor): Issue with the coolant temperature sensor circuit. Can lead to inaccurate temperature readings, potentially causing overheating or incorrect fuel mixture. Test sensor resistance and wiring.
- Error Code 30 (Lean Angle Sensor): Malfunction in the lean angle sensor circuit. May cause the engine to shut off unexpectedly during cornering. Check sensor mounting and wiring.
- Error Code 33 (Ignition Coil): Fault in the ignition coil circuit. Can result in engine misfires, rough running, or failure to start. Test coil resistance and spark plug.
- Error Code 39 (Fuel Injector): Problem with the fuel injector circuit. A clogged or malfunctioning injector can cause poor fuel delivery, leading to lean running and performance issues. Inspect injector and fuel system.
- Error Code 41 (Lean Mixture): Indicates a lean air-fuel mixture condition. Could be caused by vacuum leaks, fuel delivery problems, or sensor issues. Investigate for air leaks and fuel pressure.
- Error Code 50 (ECU Communication Error): Signifies a communication problem between the ECU and other modules. May indicate wiring issues, ECU malfunction, or CAN bus problems. Check wiring harness and connections.
This is not an exhaustive list, but it provides a starting point for understanding common Yamaha motorcycle fault codes. Always refer to your Yamaha service manual for a complete list and detailed troubleshooting procedures.
FAQs about OBDII Scanners and Yamaha Motorcycles
Q: Where is the diagnostic port located on a Yamaha motorcycle?
A: The diagnostic port location varies by Yamaha model. Common locations include under the seat, near the battery compartment, or behind a side panel. Always consult your motorcycle’s service manual for the precise location.
Q: What types of codes can a Yamaha motorcycle display?
A: Yamaha motorcycles can display a wide range of diagnostic trouble codes (DTCs) related to engine management, fuel systems, ignition, emissions, ABS, chassis electronics, and more. The specific codes depend on the bike’s systems and the nature of the fault.
Q: Can I reset fault codes on my Yamaha motorcycle manually?
A: Some older Yamaha models may allow manual fault code resets using specific key or button sequences. However, this is not common on newer models. Using an OBDII scanner for Yamaha motorcycles is the most reliable and universal way to clear fault codes after addressing the underlying issue.
Q: Are OBDII scanners only for engine problems?
A: No. Modern OBDII scanners for Yamaha motorcycles can diagnose a wide range of systems beyond just the engine, including ABS, transmission, chassis, and body electronics, depending on the scanner’s capabilities and the motorcycle’s systems.
Q: Do I need a professional mechanic to use an OBDII scanner?
A: No. While professional mechanics use advanced diagnostic tools, basic OBDII scanners for Yamaha motorcycles are designed to be user-friendly and can be used by motorcycle owners with some basic mechanical knowledge. However, interpreting codes and performing repairs may require additional expertise or professional assistance.
Conclusion
Investing in a quality OBDII scanner for Yamaha motorcycles is a smart decision for any Yamaha owner who wants to take a proactive approach to motorcycle maintenance and diagnostics. By understanding how to use these tools and interpret fault codes, you can save time, money, and ensure your Yamaha bike remains in peak riding condition. Remember to choose a scanner specifically designed for motorcycles and Yamaha compatibility to get the most accurate and comprehensive diagnostic information. Regular diagnostic scans can help you catch minor issues before they escalate into major problems, keeping you safely on the road and enjoying your Yamaha ride.