
Are you a car enthusiast eager to peek under the hood of your vehicle’s digital systems? Or perhaps a maker interested in harnessing the power of data directly from your car’s computer? Combining a Raspberry Pi with an OBDII (On-Board Diagnostics II) adapter opens up a world of possibilities for DIY car diagnostics, data logging, and custom automotive projects. This guide will walk you through the essentials of setting up an Obdii Raspberry Pi system, empowering you to understand your vehicle’s performance and health like never before.
This project is perfect for those who are comfortable with a bit of tech tinkering and are looking to delve into the fascinating intersection of automotive technology and DIY electronics. Whether you’re aiming to create a custom dashboard display, log vehicle performance data, or build a smart car system, this guide will provide the foundation you need.
Skills and Tools You’ll Need
Before diving in, let’s ensure you have the necessary skills and tools for this project. While not requiring expert-level knowledge, familiarity with the following will be beneficial:
- Wiring: From basic automotive wiring to handling delicate electronics, some wiring skills are essential.
- Basic Circuits: A fundamental understanding of electrical circuits will help in powering your Raspberry Pi and connecting components.
- Python Programming: Python is the go-to language for interacting with OBDII data on a Raspberry Pi, so basic Python knowledge is crucial.
- Soldering: Depending on your power supply setup and screen integration, soldering might be necessary.
- Linux Command Line: Raspberry Pi OS is Linux-based, so navigating and using the command line interface is important for software installation and configuration.
Here’s a list of tools you’ll likely need:
- Wire Strippers: For preparing wires for connections.
- Soldering Iron: For soldering wires and electronic components (if required).
- Computer or Laptop: To program your Raspberry Pi and access it remotely.
- Computer Monitor or TV: Initially for setting up your Raspberry Pi, you can use your existing computer monitor.
Parts List: Essential Components for Your OBDII Raspberry Pi Project
To get started, you’ll need to gather these components. Choosing the right parts is crucial for a smooth and successful project:
-
Raspberry Pi Zero W or Raspberry Pi 3/4: These models are recommended due to their built-in Wi-Fi and Bluetooth capabilities, essential for wireless OBDII communication and remote access.
-
MicroSD Card: To install the Raspberry Pi operating system and store your data. Ensure it’s a reputable brand and has sufficient storage (at least 16GB recommended).
-
OBDII Bluetooth Adapter: This device plugs into your car’s OBDII port and wirelessly transmits vehicle data. Look for adapters that are known to work well with Raspberry Pi and Python OBD libraries. The Veepeak OBDCheck BLE Bluetooth OBD2 Scanner is a popular and reliable option. You can find a variety of OBDII adapters on Amazon.
-
Power Supply for Raspberry Pi: Raspberry Pis are powered via MicroUSB. A reliable 5V power source is needed. Car USB ports might not provide consistent power, so consider alternatives. A Hobbywing 5V Switch-Mode UBEC (User Battery Elimination Circuit) is an excellent choice to step down your car’s 12V power to the required 5V for the Pi. This is often used in RC models and provides a stable power supply. You can find options like the Hobbywing UBEC on Amazon.
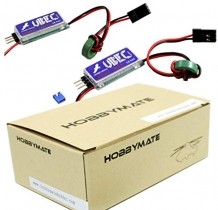 Hobbywing UBEC Power Supply for Raspberry Pi
-
Optional Screen: If you want a dedicated display in your car, a small LCD screen is ideal. The Adafruit 2.8″ TFT Touchscreen for Raspberry Pi is a popular choice for its compact size and ease of integration. Raspberry Pis also have HDMI output if you prefer to use a larger HDMI monitor for testing or a different type of in-car display. You can explore the Adafruit 2.8″ Touchscreen here.
-
Optional Power Switch: A power switch like the Mausberry Circuits 3A Car Supply Switch can greatly simplify your setup. It not only provides power but also allows for a graceful shutdown of your Raspberry Pi when you turn off your car’s ignition, preventing SD card corruption. This is a highly recommended addition for in-car installations. Check out the Mausberry Car Supply Switch.
-
Fuse Taps (Add-a-circuit): These are useful for safely tapping into your car’s fuse box to draw power for your Raspberry Pi setup without cutting or splicing existing vehicle wiring.
Step-by-Step Guide: Setting Up Your OBDII Raspberry Pi
Let’s break down the process into manageable steps to get your OBDII Raspberry Pi project off the ground.
Step 1: Initial Raspberry Pi Setup
Before connecting to your car, it’s best to get your Raspberry Pi configured and working independently.
Part 1: Setting up the OS
Most Raspberry Pis come without a pre-installed operating system. The official Raspberry Pi OS (formerly Raspbian) is highly recommended and easy to install. Follow the official Raspberry Pi Foundation’s guide for installing the OS onto your microSD card. You can find a comprehensive tutorial here: Raspberry Pi Software Guide. This guide will walk you through downloading the Raspberry Pi Imager software and installing the OS onto your SD card.
Part 2: Enabling Remote Access (VNC and/or SSH)
For in-car use, you’ll likely want to access your Raspberry Pi remotely without needing a monitor, keyboard, and mouse connected directly. VNC (Virtual Network Computing) and SSH (Secure Shell) are essential for remote access. VNC allows you to see the Raspberry Pi desktop interface remotely, while SSH provides command-line access. Enable either or both of these following the official Raspberry Pi documentation: Remote Access Options for Raspberry Pi. The documentation provides clear instructions on how to enable VNC and SSH through the Raspberry Pi configuration settings.
Part 3: Installing Necessary Software
With the OS installed and remote access enabled, you’ll need to install the software libraries required for OBDII communication in Python. Open a terminal window on your Raspberry Pi (either directly connected or via SSH).
First, ensure your system’s package lists are up to date:
sudo apt-get updateNext, install PIP, the Python package installer. It might already be installed on recent Raspberry Pi OS versions, but running the command ensures it’s present:
sudo apt-get -y install python3-pipNow, install the primary OBD library for Python, which simplifies OBDII interactions:
sudo pip3 install obdFinally, install the python-serial library, which is needed for Bluetooth serial communication with the OBDII adapter:
sudo apt-get install python3-serialWith these packages installed, your Raspberry Pi is software-ready for OBDII communication.
Step 2: Connecting to the OBDII Bluetooth Reader
Now it’s time to interface with your car.
First, locate the OBDII port in your vehicle. It’s typically found under the dashboard on the driver’s side. In many vehicles like the Toyota Tacoma (as mentioned in the original article), it’s often near the door, under the dash.
Plug your OBDII Bluetooth adapter securely into the OBDII port.
Optionally, before connecting to the Raspberry Pi, you can test the OBDII reader with a smartphone app (like Torque Pro on Android or OBD Fusion on iOS) to ensure the adapter is working and communicating with your car. This step can help isolate issues later on.
Step 3: Pairing Raspberry Pi with OBDII Bluetooth Adapter
This step can sometimes be a bit tricky, and the process might vary slightly depending on your specific OBDII adapter and Raspberry Pi OS version. You’ll need to pair, trust, and connect to the OBDII reader via Bluetooth and then assign a serial port for the Python OBD library to use.
For detailed Bluetooth setup instructions, refer to this helpful forum post: Raspberry Pi Bluetooth OBDII Connection Forum. Focus on the top post on page 2 of the forum thread, as it provides a tested method for establishing a reliable Bluetooth connection between a Raspberry Pi and an OBDII adapter.
Once you’ve followed the Bluetooth pairing and connection steps from the forum, your Raspberry Pi should be connected to your OBDII reader.
Note: You will likely need to run a command each time your Raspberry Pi boots to establish the Bluetooth serial connection. The command is typically in the format:
sudo rfcomm connect hci0 XX:XX:XX:XX:XX:XXReplace XX:XX:XX:XX:XX:XX with the Bluetooth MAC address of your OBDII adapter. You can automate this command to run on boot using various methods like rc.local or systemd services, but for initial testing, running it manually is sufficient.
To verify the connection and explore available OBDII commands, use the following Python code snippet. Save this code as a Python file (e.g., obd_test.py) on your Raspberry Pi and run it using python3 obd_test.py.
import obd

connection = obd.OBD() # auto-connects to USB or RF port
print ("Connection Status: " + connection.status())
print ("Protocol Name: " + connection.protocol_name())

commands = connection.supported_commands
print("Supported Commands:")
for command in commands:
    print(command.name)
This code will attempt to connect to the OBDII adapter, print the connection status and protocol, and list the supported OBDII commands for your vehicle. A successful connection and a list of commands indicate that your Raspberry Pi is communicating correctly with your car’s OBDII system.
For comprehensive documentation on using the Python OBD library and exploring its capabilities, refer to the official documentation: Python OBD Library Documentation. This documentation is an invaluable resource for understanding how to send OBDII commands, retrieve vehicle data, and build your custom applications.
Step 4: Wiring Raspberry Pi to Your Vehicle
Integrating your Raspberry Pi permanently into your car requires careful consideration of power and shutdown procedures. Simply cutting power to a Raspberry Pi can lead to SD card corruption and data loss.
Using a power switch like the Mausberry Circuits Car Supply Switch mentioned earlier is highly recommended. It simplifies wiring and provides a clean shutdown signal to the Raspberry Pi when the ignition is turned off.
For power, you need to step down your car’s 12V electrical system to the 5V required by the Raspberry Pi. The Hobbywing UBEC is a robust and efficient way to do this. Solder the UBEC to a MicroUSB cable, connecting the output to the Raspberry Pi’s power input. Connect the UBEC input to a 12V source in your car, ideally through fuse taps in the fuse box for a safe and reversible connection.
Consider whether you want your Raspberry Pi to be powered on continuously or only when the ignition is on. For continuous operation (e.g., for data logging even when the car is off), connect to a constant 12V source. For ignition-switched operation (to prevent battery drain), connect to a circuit that is only powered when the ignition is on. Fuse taps make both approaches easy and safe.
Wiring a screen, if you choose to use one, will depend on the specific screen you select. Refer to the screen’s documentation for wiring instructions. Typically, small LCD screens for Raspberry Pi connect directly to the GPIO pins for both power and data.
Step 5: Diving into Code and Data
With the hardware setup complete and communication established, the real fun begins: writing Python code to retrieve, process, and display vehicle data.
The Python OBD library provides a straightforward interface for sending OBDII commands and receiving responses. Explore the library’s documentation to learn how to request specific PIDs (Parameter IDs) like engine RPM, vehicle speed, coolant temperature, and many others.
You can then use Python to process this data, log it to files, display it on a screen, send it to a cloud service, or trigger custom actions based on vehicle conditions. The possibilities are vast and depend on your specific project goals.
If there is interest, more advanced code examples and project ideas can be shared. However, for those embarking on this project, diving into the Python OBD library documentation and experimenting with code is the best way to learn and customize your OBDII Raspberry Pi system.
Conclusion
This guide provides a starting point for your OBDII Raspberry Pi journey. By combining the versatility of the Raspberry Pi with the wealth of data available through your car’s OBDII port, you can create a wide range of innovative and insightful automotive projects. From simple data logging to sophisticated custom dashboards and vehicle telematics systems, the OBDII Raspberry Pi opens up exciting avenues for car enthusiasts and DIY makers alike. Embrace the learning process, experiment with code, and unlock the hidden potential of your vehicle’s data!