Frustrated with recurring car issues and expensive garage visits? Modern vehicles are equipped with On-Board Diagnostics (OBDII) systems, and you can access this powerful data yourself using Linux and open-source software. This guide will show you how to use an inexpensive OBDII connector with your Linux machine to read and clear error codes, and even monitor live sensor data from your car, all without needing to be a mechanic.
Understanding OBD-II and Why Linux is a Great Choice
Since 2004 in Europe, and even earlier in other regions, OBDII has become a standard. Regulations mandate that all cars have a standardized OBDII port, typically located within easy reach of the driver, usually within 0.61m of the steering wheel. This port is designed to provide access to your car’s computer, allowing you to diagnose problems and monitor performance. For car enthusiasts and those who like to understand their vehicle better, OBDII is invaluable.
OBDII connectors are readily available in USB and Bluetooth versions. While professional-grade scanners can cost a significant amount, budget-friendly options, including generic USB OBDII adapters from online marketplaces, work perfectly well for basic diagnostics. Choosing Linux for OBDII diagnostics offers several advantages:
- Open Source Software: Linux boasts a wealth of free and open-source tools specifically designed for OBDII interaction, like Scantool, providing transparency and community support.
- Flexibility and Control: Linux gives you direct access to hardware and system configurations, essential for interfacing with OBDII devices via serial ports like
/dev/ttyUSB0. - Cost-Effective Solution: Combined with a cheap OBDII adapter and free software, Linux provides a powerful and affordable alternative to expensive proprietary scan tools.
Installing Scantool on Your Linux System (Ubuntu/Debian)
For this guide, we’ll use Scantool, a user-friendly, open-source OBDII software available on Linux. Installation on Debian and Ubuntu-based distributions is straightforward using the apt-get package manager:
sudo apt-get update
sudo apt-get install scantool
After installation, you need to grant your user account permission to access the OBDII device. OBDII USB adapters are typically recognized as serial devices at /dev/ttyUSB0. This device file is usually owned by the root user and the dialout group, which is designed for serial port access. To run Scantool without root privileges, add your user to the dialout group:
sudo usermod -a -G dialout your_usernameReplace your_username with your actual username. It’s tempting to run Scantool with sudo, but this is bad practice. Running applications with unnecessary root privileges violates the principle of least privilege and poses a security risk. Granting dialout group membership is the correct and secure way to allow Scantool to access the OBDII interface.
Using Scantool to Read Error Codes and Sensor Data
For the group changes to take effect, you need to log out and log back in, or use the newgrp command. newgrp dialout will immediately switch your current session to use the dialout group:
newgrp dialoutVerify your group membership with the groups command. You should see dialout listed among your groups. Now, ensure your car’s ignition is turned to the “on” position (engine doesn’t need to be running for reading codes, but needs to be running for sensor data). Then, launch Scantool from your terminal:
scantoolThe Scantool main menu will appear, offering options to “Read Codes”, “Clear Codes”, “Sensor Data”, and “Tests”.
Selecting “Read Codes” will display any current error codes stored in your car’s computer, along with descriptions of what they mean. OBDII codes are standardized, but car manufacturers sometimes add their own specific interpretations, so Scantool may provide multiple possible explanations for each code.
If you understand the error code and are confident in clearing it (for example, after fixing the underlying issue), you can use the “Clear Codes” option.
Important Disclaimer: DIY car diagnostics should be approached with caution. If you are unsure about the meaning of error codes, consult a qualified mechanic before clearing them. Clearing codes without addressing the root cause will only temporarily hide the problem and could lead to more serious issues.
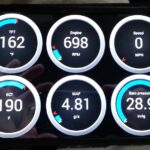
Back in the main menu, choose “Sensor Data” to view real-time data from your car’s sensors. This option requires the car engine to be running to provide live readings.
While the “Tests” option might not be fully implemented in all Scantool versions, the software provides more than enough functionality for basic DIY OBDII diagnostics, especially for reading and clearing codes and monitoring sensor data using Linux. By leveraging the power of Linux and open-source tools, you can gain valuable insights into your car’s health and potentially save money on garage visits.

