This comprehensive guide provides step-by-step instructions for pairing your OBDII Bluetooth scanner with a Windows 10 computer. Successfully connect your vehicle to diagnostic software and unlock valuable insights into your car’s performance.
Connecting your car to a Windows 10 computer using an OBDII Bluetooth adapter opens up a world of possibilities for diagnosing and monitoring your vehicle’s health. By following these simple steps, you can establish a reliable connection and start using OBDII software to access real-time data from your car’s engine control unit (ECU).
Step 1: Locate and Connect the OBDII Adapter
The first step is to find your car’s OBDII port. It’s typically located under the dashboard on the driver’s side, near the steering wheel.
Once you’ve located the port, plug the OBDII Bluetooth adapter firmly into the connector. Ensure a secure connection. If you’re having trouble finding the port, online resources like the InstallerNet Fit Guide can help.
Step 2: Power Up Your Vehicle
Turn your car’s ignition on. This powers up the OBDII port, enabling the adapter to communicate with your car’s computer system. You don’t need to start the engine, just turn the key to the “on” position.
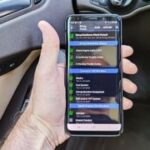
Step 3: Pair the OBDII Adapter with Windows 10
Now, it’s time to connect the adapter to your Windows 10 computer.
- Access Bluetooth Settings: Right-click the Bluetooth icon in the system tray and select “Add a Bluetooth Device.”
-
Discover the Adapter: Windows will start searching for available Bluetooth devices. Look for your OBDII adapter in the list. It might appear under various names, such as “OBDII,” “OBD-II,” “VLink,” or the specific brand name of your adapter.
-
Enter Pairing Code: Select the adapter and click “Pair.” You’ll likely be prompted for a pairing code. The most common codes are “1234” or “0000.”
-
Confirm Pairing: Once the pairing code is accepted, Windows will complete the pairing process. You’ll see a confirmation message indicating that the adapter is connected. Note the COM port assigned to the adapter, as you’ll need this for your OBDII software.
Step 4: Connect to Your Vehicle with OBDII Software
Finally, launch your chosen OBDII software. Popular options include TOAD, FORScan, and OBD Auto Doctor. Select the correct COM port associated with your adapter and click “Connect.” The software should establish communication with your vehicle’s ECU.
Troubleshooting Connection Problems
Occasionally, you might encounter connection issues. If your software can’t connect, try adjusting the baud rate in your software or Windows Device Manager to 9600 or 110.
By following these steps, you can successfully connect your car to your Windows 10 computer using an OBDII Bluetooth adapter. You’ll then be ready to utilize the power of OBDII software to diagnose car problems, monitor performance data, and gain valuable insights into your vehicle’s overall health.