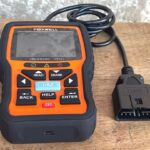
A flashing clock on a 2012 Mustang’s radio often indicates a communication problem within the vehicle’s network, potentially related to the OBDII system. While this article outlines a successful repair involving baking the radio’s circuit board, it’s crucial to first diagnose the issue using an OBDII scanner to identify any underlying fault codes related to the radio or network communication modules. This step can pinpoint the root cause and potentially save you from unnecessary disassembly.
This article describes a DIY solution for a common issue: a malfunctioning radio in a 2012 Mustang V6, characterized by a flashing clock and inoperability. Before resorting to this fix, using an OBDII scanner to diagnose the problem is recommended. The scanner might reveal specific error codes related to the radio or associated modules, potentially offering a simpler solution. However, if no relevant codes are found, the following steps may resolve the issue.
The initial symptoms included a sudden loud pop followed by a complete radio shutdown, leaving only the flashing clock. Typical troubleshooting steps like power cycling and fuse replacement provided only temporary relief. After exhausting these options, a more in-depth investigation began.
Accessing the radio requires careful removal of the center console. Begin by disconnecting the negative battery terminal. Then, pry up the console from the rear, working your way forward to release the clips. For manual transmission models, the shifter boot adds some complexity, requiring disconnection of the trunk release/traction control/hazard lights connector. Once the console is out, remove two screws to detach the front panel, exposing the radio.
Four screws secure the radio unit. Removing these reveals the connections on the back: two plugs (one wide, one narrow), and the antenna wire. Disconnecting these requires patience and dexterity due to the limited space. Start with the antenna wire, followed by the narrow plug, and finally the wide plug. Protect the console with a cloth to avoid scratches.
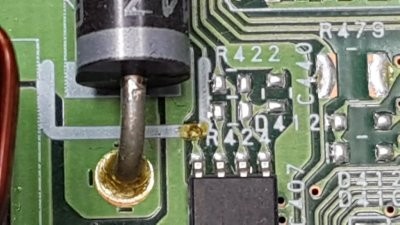
With the radio removed, six screws release the top housing, exposing the circuit board. Inspection might reveal potential issues like bad solder connections or excess flux. While cleaning the board with electrical contact cleaner is a good step, it didn’t resolve the issue in this case.
A less conventional solution found online involved baking the circuit board in an oven. This method, sometimes used to reflow solder connections on other automotive electronics, was attempted as a last resort.
The process involved carefully removing the circuit board from its housing, placing it on a paper plate supported by small aluminum foil balls at each corner to allow heat circulation, and baking it at 385°F for 10 minutes. Ensure the heatsink paste remains undisturbed and avoid touching the board until completely cool. Allow several hours for cooling before reassembly.
Remarkably, this unconventional method worked, restoring the radio to full functionality. The theory is that the heat reflows the solder, mending any broken connections. Remember, this is a last resort solution and should be performed with extreme caution.
In conclusion, while baking a circuit board might seem unorthodox, it proved effective in this instance. However, always start with a proper OBDII diagnostic scan to potentially identify simpler solutions related to the Mustang Radio Obdii system. If all else fails, this unconventional method might be worth considering. Remember to exercise caution throughout the process.