The Autel AutoLink AL519 is a valuable tool for diagnosing car problems, providing quick access to vital vehicle information. With CARDIAGTECH.NET, you’re not just buying a tool, you’re gaining a partner in automotive diagnostics. Discover how this device simplifies complex tasks and enhances your diagnostic capabilities. Unlock the full potential of your vehicle’s diagnostic system with ease.
1. Understanding the Autel AutoLink AL519
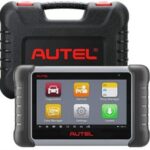
The Autel AutoLink AL519 is an OBDII/EOBD scanner designed to help users diagnose car problems efficiently. This diagnostic tool supports all 10 modes of OBDII testing, offering a comprehensive approach to vehicle diagnostics. Its user-friendly features and robust capabilities make it a favorite among both professionals and DIY enthusiasts.
1.1 Key Features of the Autel AutoLink AL519
The Autel AutoLink AL519 boasts several key features that enhance its usability and effectiveness:
- One-Click I/M Readiness Key: This patented feature allows for quick State Emissions readiness checks and drive cycle verification.
- AVOmeter: Simplifies testing voltage, continuity, and current.
- 12V System Diagnostics: Capable of diagnosing 12V charging and starting systems, as well as assessing battery condition.
- Visual and Audible Tone: Bright color-coded LEDs and a built-in speaker provide instant feedback on readiness verification.
- Check Engine Light (MIL) Diagnosis: Quickly identifies the cause of the Check Engine Light.
- Code Retrieval: Retrieves generic (P0, P2, P3, and U0), manufacturer-specific (P1, P3, and U1), and pending codes.
- Code Clearing: Turns off the Check Engine Light, clears codes, and resets monitors.
- Emissions Status: Displays monitor and I/M readiness status for emissions testing.
- Live Data Stream: Reads live PCM datastream and live O2 sensor test data.
- Freeze Frame Data: Captures and displays freeze frame data for detailed analysis.
- Data Graphing: Graphs data for 1996 and newer vehicles.
- Troubleshooter Code Tips: Provides tips to help technicians diagnose issues faster.
- Memory Backup: Allows for off-vehicle data review and analysis.
- Multilingual Support: Supports multiple languages, including English, Spanish, and French.
- Vehicle Information Retrieval: Retrieves VIN, CIN, and CVN.
- Internet Updatable: Keeps the tool up-to-date with the latest software.
- PC Printing: Prints data via PC for record-keeping.
1.2 Benefits of Using the Autel AutoLink AL519
Using the Autel AutoLink AL519 offers numerous benefits:
- Faster Diagnostics: The One-Click I/M Readiness Key and troubleshooter code tips significantly reduce diagnostic time.
- Comprehensive Testing: Supports all 10 modes of OBDII testing for thorough diagnostics.
- User-Friendly Interface: The TFT color display and intuitive menu make it easy to use.
- Cost Savings: Allows users to diagnose and potentially fix issues themselves, saving on mechanic fees.
- Enhanced Vehicle Knowledge: Provides a deeper understanding of your vehicle’s health and performance.
- Emission Readiness: Ensures your vehicle is ready for state emissions tests.
- Versatile Applications: Suitable for both professional mechanics and DIY car enthusiasts.
2. Preparing to Use the Autel AutoLink AL519
Before using the Autel AutoLink AL519, it’s essential to prepare properly to ensure accurate and efficient diagnostics. This preparation involves understanding the tool’s components, updating its software, and familiarizing yourself with your vehicle’s OBDII port.
2.1 Unboxing and Initial Inspection
Upon receiving your Autel AutoLink AL519, carefully unbox the package and verify that all components are included:
- Autel AutoLink AL519 unit
- User’s manual
- CD (containing software and updates)
- USB cable
- OBDII cable
- Carry case
Inspect each component for any signs of damage. If anything is missing or damaged, contact CARDIAGTECH.NET immediately for assistance.
2.2 Software Update and Installation
To ensure optimal performance, update the Autel AutoLink AL519 to the latest software version. Follow these steps:
- Download the Update Software: Visit the Autel website and download the update software to your computer.
- Install the Software: Install the software on your computer, following the on-screen instructions.
- Connect the AL519: Connect the Autel AutoLink AL519 to your computer using the provided USB cable.
- Run the Update: Launch the update software and follow the prompts to update the scanner’s firmware.
Keeping your device updated ensures compatibility with the latest vehicle models and access to the newest features and diagnostic capabilities.
2.3 Locating the OBDII Port
The OBDII (On-Board Diagnostics II) port is a standardized port found in all vehicles manufactured after 1996. It is typically located under the dashboard on the driver’s side. Common locations include:
- Under the dashboard near the steering column
- Below the dashboard to the left of the steering wheel
- Below the dashboard in the center console area
Refer to your vehicle’s owner’s manual if you have difficulty locating the OBDII port.
3. Step-by-Step Guide to Using the Autel AutoLink AL519
Once you have prepared the Autel AutoLink AL519, you can start diagnosing your vehicle. This section provides a detailed, step-by-step guide on how to use the scanner effectively.
3.1 Connecting the Scanner
- Turn Off the Ignition: Ensure your vehicle’s ignition is turned off before connecting the scanner.
- Locate the OBDII Port: Find the OBDII port in your vehicle.
- Connect the OBDII Cable: Plug the OBDII cable into the Autel AutoLink AL519 unit and then into the OBDII port in your vehicle. Ensure the connection is secure.
- Turn On the Ignition: Turn the vehicle’s ignition to the “ON” position, but do not start the engine.
3.2 Navigating the Main Menu
Once the scanner is connected and powered on, you will see the main menu on the TFT color display. The main menu typically includes the following options:
- Diagnostics: Used for reading and clearing diagnostic trouble codes (DTCs).
- I/M Readiness: Checks the status of emissions-related systems.
- Live Data: Displays real-time data from the vehicle’s sensors.
- Freeze Frame: Shows the data recorded when a DTC was triggered.
- O2 Sensor Test: Tests the performance of the oxygen sensors.
- On-Board Monitor Test: Checks the on-board diagnostic monitoring systems.
- Component Test: Activates and tests specific vehicle components.
- Vehicle Information: Retrieves vehicle information such as VIN, CIN, and CVN.
- Setup: Configures the scanner’s settings, such as language and units.
Use the arrow keys to navigate the menu and the “Enter” button to select an option.
3.3 Reading Diagnostic Trouble Codes (DTCs)
Reading DTCs is one of the primary functions of the Autel AutoLink AL519. Follow these steps to read the codes:
- Select “Diagnostics”: From the main menu, select the “Diagnostics” option.
- Select Vehicle Type: The scanner may prompt you to select the vehicle’s make and model. Follow the on-screen instructions.
- Read Codes: Select “Read Codes” or a similar option to retrieve the DTCs stored in the vehicle’s computer.
- View Codes: The scanner will display the DTCs, along with a brief description of each code.
Write down the codes and their descriptions for further analysis.
3.4 Understanding DTCs
DTCs are standardized codes that indicate a specific problem within the vehicle. These codes are typically five characters long and follow a specific format:
- First Character: Indicates the system (e.g., P for Powertrain, B for Body, C for Chassis, U for Network).
- Second Character: Indicates whether the code is generic (0) or manufacturer-specific (1).
- Third Character: Indicates the specific subsystem (e.g., Fuel System, Ignition System).
- Fourth and Fifth Characters: Indicate the specific fault within the subsystem.
For example, a code like “P0300” indicates a generic powertrain code for random/multiple cylinder misfire detected.
3.5 Clearing Diagnostic Trouble Codes
After addressing the issues indicated by the DTCs, you can clear the codes using the Autel AutoLink AL519. Follow these steps:
- Select “Diagnostics”: From the main menu, select the “Diagnostics” option.
- Select Vehicle Type: If prompted, select the vehicle’s make and model.
- Erase Codes: Select “Erase Codes” or a similar option to clear the DTCs.
- Confirm Clearing: The scanner will ask you to confirm that you want to erase the codes. Select “Yes” to proceed.
- Verify Clearing: After clearing the codes, start the engine and run the scanner again to ensure the codes do not reappear.
3.6 Using the I/M Readiness Function
The I/M Readiness function checks the status of various emissions-related systems to ensure your vehicle is ready for an emissions test. Follow these steps:
- Select “I/M Readiness”: From the main menu, select the “I/M Readiness” option.
- View Status: The scanner will display the status of each system, indicating whether it is ready for testing.
Common I/M Readiness monitors include:
- Misfire Monitor
- Fuel System Monitor
- Comprehensive Components Monitor
- Catalyst Monitor
- Heated Catalyst Monitor
- Evaporative System Monitor
- Secondary Air System Monitor
- Oxygen Sensor Monitor
- Oxygen Sensor Heater Monitor
- EGR System Monitor
3.7 Viewing Live Data
The Live Data function allows you to view real-time data from the vehicle’s sensors. This can be useful for diagnosing intermittent problems or monitoring the performance of specific components. Follow these steps:
- Select “Live Data”: From the main menu, select the “Live Data” option.
- Select Data Parameters: The scanner will display a list of available data parameters. Select the parameters you want to monitor.
- View Live Data: The scanner will display the real-time data for the selected parameters.
You can graph the data to visualize changes over time, making it easier to identify trends or anomalies.
3.8 Using the Freeze Frame Function
The Freeze Frame function captures a snapshot of the vehicle’s data when a DTC is triggered. This can provide valuable information about the conditions that led to the problem. Follow these steps:
- Select “Freeze Frame”: From the main menu, select the “Freeze Frame” option.
- View Freeze Frame Data: The scanner will display the data that was captured when the DTC was triggered.
This data can include parameters such as engine speed, coolant temperature, and fuel trim.
3.9 Performing the O2 Sensor Test
The O2 Sensor Test function allows you to test the performance of the vehicle’s oxygen sensors. Follow these steps:
- Select “O2 Sensor Test”: From the main menu, select the “O2 Sensor Test” option.
- Follow On-Screen Instructions: The scanner will provide instructions on how to perform the test.
- View Test Results: The scanner will display the results of the test, indicating whether the oxygen sensors are functioning properly.
3.10 Retrieving Vehicle Information
The Vehicle Information function allows you to retrieve important information about the vehicle, such as the VIN, CIN, and CVN. Follow these steps:
- Select “Vehicle Information”: From the main menu, select the “Vehicle Information” option.
- View Vehicle Information: The scanner will display the vehicle’s VIN, CIN, and CVN.
This information can be useful for verifying the vehicle’s identity and ensuring that you are using the correct parts and procedures for repairs.
4. Advanced Features and Tips
In addition to the basic functions, the Autel AutoLink AL519 offers several advanced features and tips that can help you get the most out of the scanner.
4.1 Using Troubleshooter Code Tips
The Autel AutoLink AL519 includes a troubleshooter code tips feature that provides guidance on diagnosing and repairing specific DTCs. When viewing a DTC, look for an option to access the troubleshooter code tips. This feature can save you time and effort by providing targeted diagnostic information.
4.2 Diagnosing Charging and Starting Systems
The Autel AutoLink AL519 is capable of diagnosing 12V charging and starting systems. This feature can help you identify problems with the battery, alternator, and starter. To use this feature, select the appropriate option from the main menu and follow the on-screen instructions.
4.3 Performing Component Tests
The Component Test function allows you to activate and test specific vehicle components, such as relays and solenoids. This can be useful for verifying that a component is functioning properly. To use this feature, select the “Component Test” option from the main menu and follow the on-screen instructions.
4.4 Utilizing the AVOmeter
The built-in AVOmeter allows you to test voltage, continuity, and current at the fingertip. This feature can be useful for diagnosing electrical problems. To use the AVOmeter, connect the appropriate test leads to the scanner and the circuit you want to test, and then select the “AVOmeter” option from the main menu.
4.5 Data Logging and Analysis
The Autel AutoLink AL519 allows you to log data for later analysis. This can be useful for diagnosing intermittent problems or monitoring the performance of specific components over time. To log data, select the “Live Data” option from the main menu and choose the parameters you want to log. The scanner will save the data to its internal memory, which you can then transfer to your computer for analysis.
4.6 Printing Data via PC
The Autel AutoLink AL519 allows you to print data via PC for record-keeping. To print data, connect the scanner to your computer using the provided USB cable and use the update software to transfer the data to your computer. You can then print the data using your computer’s printing capabilities.
5. Maintaining and Troubleshooting the Autel AutoLink AL519
Proper maintenance and troubleshooting are essential to keep your Autel AutoLink AL519 in good working condition. This section provides tips on how to maintain the scanner and troubleshoot common problems.
5.1 Cleaning and Storage
To keep your Autel AutoLink AL519 in good condition, clean it regularly with a soft, dry cloth. Avoid using solvents or harsh chemicals, as these can damage the scanner. When not in use, store the scanner in its carry case to protect it from dust and damage.
5.2 Common Issues and Solutions
Here are some common issues that you may encounter with the Autel AutoLink AL519, along with possible solutions:
| Issue | Possible Solutions |
|---|---|
| Scanner won’t power on | Check the OBDII connection, ensure the vehicle’s ignition is on, check the scanner’s battery (if applicable). |
| Unable to connect to vehicle | Verify the OBDII connection, check vehicle compatibility, update scanner software. |
| Inaccurate data | Ensure proper sensor connections, verify sensor functionality, update scanner software. |
| Software update issues | Check internet connection, ensure correct software version, contact Autel support. |
5.3 Updating the Firmware
Keeping the firmware updated is crucial for the optimal performance of the Autel AutoLink AL519. Regularly check for updates on the Autel website and follow the instructions provided to update the firmware.
5.4 Contacting Support
If you encounter any problems with the Autel AutoLink AL519 that you cannot resolve on your own, contact Autel support for assistance. You can find contact information on the Autel website or in the user’s manual.
6. Optimizing Your Purchase from CARDIAGTECH.NET
Purchasing your Autel AutoLink AL519 from CARDIAGTECH.NET offers several advantages. Here’s how to optimize your purchase experience.
6.1 Why Choose CARDIAGTECH.NET?
CARDIAGTECH.NET is a trusted supplier of automotive diagnostic tools. Buying from CARDIAGTECH.NET ensures you receive:
- Genuine Products: Guaranteed authentic Autel products.
- Competitive Pricing: Affordable prices with potential discounts.
- Expert Support: Access to knowledgeable support staff.
- Warranty and Returns: Reliable warranty and return policies.
6.2 Understanding Warranty and Support
CARDIAGTECH.NET provides comprehensive warranty and support for the Autel AutoLink AL519. Make sure to understand the terms of the warranty and how to access support if needed. This includes knowing the duration of the warranty, what it covers, and the steps to take if you need to make a claim.
6.3 Maximizing Tool Usage with CARDIAGTECH.NET Resources
CARDIAGTECH.NET offers resources to help you maximize the use of your Autel AutoLink AL519. These resources may include:
- Tutorial Videos: Step-by-step video tutorials on using the scanner.
- User Guides: Detailed user guides with tips and tricks.
- FAQ Sections: Answers to frequently asked questions.
- Community Forums: Forums where you can connect with other users and share tips and experiences.
By leveraging these resources, you can become proficient in using the Autel AutoLink AL519 and get the most out of your investment.
7. Real-World Applications of the Autel AutoLink AL519
The Autel AutoLink AL519 is a versatile tool that can be used in a variety of real-world applications. This section provides examples of how the scanner can be used to diagnose and repair common vehicle problems.
7.1 Diagnosing a Check Engine Light
One of the most common uses of the Autel AutoLink AL519 is diagnosing a Check Engine Light. When the Check Engine Light comes on, the scanner can be used to read the DTCs and identify the cause of the problem.
Example:
- Connect the scanner to the vehicle.
- Select “Diagnostics” from the main menu.
- Read the DTCs.
- The scanner displays a code “P0171” indicating “System Too Lean (Bank 1).”
- Use the troubleshooter code tips to diagnose the problem.
- The tips suggest checking for vacuum leaks, faulty oxygen sensors, or a dirty mass airflow sensor.
- Inspect the vehicle and find a vacuum leak.
- Repair the leak and clear the DTCs.
- Verify that the Check Engine Light does not reappear.
7.2 Checking Emissions Readiness
The Autel AutoLink AL519 can be used to check the emissions readiness of a vehicle before taking it for an emissions test. This can save you time and money by ensuring that the vehicle will pass the test.
Example:
- Connect the scanner to the vehicle.
- Select “I/M Readiness” from the main menu.
- The scanner displays the status of each emissions-related system.
- All systems are marked as “Ready.”
- The vehicle is ready for an emissions test.
7.3 Monitoring Live Data for Performance Issues
The Autel AutoLink AL519 can be used to monitor live data for performance issues. This can help you identify problems that may not trigger a DTC.
Example:
- Connect the scanner to the vehicle.
- Select “Live Data” from the main menu.
- Select the parameters you want to monitor, such as engine speed, coolant temperature, and fuel trim.
- Drive the vehicle and monitor the data.
- Notice that the fuel trim values are consistently high, indicating a lean condition.
- Diagnose the problem and find a faulty fuel injector.
- Replace the fuel injector and verify that the fuel trim values return to normal.
7.4 Diagnosing Battery and Charging System Problems
The Autel AutoLink AL519 can diagnose issues with the battery and charging system, providing insights into the health of these critical components.
Example:
- Connect the scanner to the vehicle.
- Navigate to the “12V System Diagnostics” option.
- Run the battery test to check the battery’s voltage and condition.
- Run the charging system test to check the alternator’s output.
- The results indicate that the battery voltage is low, and the alternator is not charging properly.
- Further diagnose the alternator and find a faulty voltage regulator.
- Replace the voltage regulator and retest the charging system to ensure it is functioning correctly.
8. The Future of Automotive Diagnostics with CARDIAGTECH.NET
As automotive technology advances, diagnostic tools like the Autel AutoLink AL519 will become even more essential. CARDIAGTECH.NET is committed to providing the latest and most advanced diagnostic tools to help you stay ahead of the curve.
8.1 Emerging Trends in Automotive Diagnostics
Several emerging trends are shaping the future of automotive diagnostics:
- Increased Complexity: Modern vehicles are equipped with increasingly complex electronic systems, requiring advanced diagnostic tools.
- Remote Diagnostics: Remote diagnostics allow technicians to diagnose and repair vehicles from a remote location.
- Artificial Intelligence (AI): AI is being used to analyze diagnostic data and provide more accurate and efficient diagnoses.
- Cloud-Based Diagnostics: Cloud-based diagnostics allow technicians to access diagnostic data and software updates from the cloud.
8.2 CARDIAGTECH.NET’s Commitment to Innovation
CARDIAGTECH.NET is committed to staying at the forefront of these emerging trends. We offer a wide range of advanced diagnostic tools and resources to help you meet the challenges of modern automotive diagnostics. Our commitment to innovation ensures that you have access to the latest technology and support to keep your business running smoothly.
8.3 Staying Updated with New Technologies
To stay updated with new technologies, consider the following:
- Attend Training Courses: Attend training courses on the latest diagnostic techniques and tools.
- Read Industry Publications: Stay informed about the latest developments in automotive technology.
- Join Online Communities: Participate in online communities and forums to share tips and experiences with other technicians.
- Follow CARDIAGTECH.NET: Follow CARDIAGTECH.NET for updates on new products, technologies, and training opportunities.
By staying updated with new technologies, you can ensure that you have the skills and knowledge to diagnose and repair even the most complex vehicle problems.
9. Customer Success Stories with Autel AutoLink AL519
Many customers have found success using the Autel AutoLink AL519 for their automotive diagnostic needs. Here are a few examples:
9.1 Case Study 1: Saving Time and Money
John, a DIY car enthusiast, purchased the Autel AutoLink AL519 from CARDIAGTECH.NET to diagnose a Check Engine Light on his car. Using the scanner, he quickly identified the problem as a faulty oxygen sensor. He replaced the sensor himself and cleared the code, saving hundreds of dollars in mechanic fees.
9.2 Case Study 2: Enhancing Diagnostic Accuracy
Maria, a professional mechanic, used the Autel AutoLink AL519 to diagnose a complex engine problem on a customer’s car. The scanner’s live data feature allowed her to monitor the engine’s performance in real-time and identify a faulty fuel injector. She replaced the injector and resolved the problem, earning the customer’s trust and loyalty.
9.3 Case Study 3: Improving Emissions Readiness
Tom, a car owner, used the Autel AutoLink AL519 to check the emissions readiness of his car before taking it for an emissions test. The scanner indicated that one of the systems was not ready. He took the car for a short drive, and the system became ready. He then took the car for the emissions test and passed with flying colors.
These success stories highlight the value and versatility of the Autel AutoLink AL519 as a diagnostic tool.
10. Frequently Asked Questions (FAQs)
Here are some frequently asked questions about using the Autel AutoLink AL519:
-
What vehicles are compatible with the Autel AutoLink AL519?
The Autel AutoLink AL519 is compatible with most 1996 and newer vehicles that are OBDII compliant, including domestic and import models. -
How do I update the software on my Autel AutoLink AL519?
Download the update software from the Autel website, install it on your computer, connect the scanner to your computer via USB, and follow the on-screen instructions to update the firmware. -
What do I do if the scanner won’t connect to my vehicle?
Ensure the OBDII cable is securely connected, verify that the vehicle’s ignition is on, and check the vehicle’s compatibility. If the problem persists, update the scanner’s software. -
How do I interpret the diagnostic trouble codes (DTCs)?
DTCs are standardized codes that indicate specific problems. Refer to the user’s manual or online resources to understand the meaning of each code. The Autel AutoLink AL519 also provides troubleshooter code tips for guidance. -
Can I clear the Check Engine Light with the Autel AutoLink AL519?
Yes, the Autel AutoLink AL519 can clear the Check Engine Light after you have addressed the underlying issue. -
What is the I/M Readiness function used for?
The I/M Readiness function checks the status of emissions-related systems to ensure your vehicle is ready for an emissions test. -
How do I view live data with the Autel AutoLink AL519?
Select the “Live Data” option from the main menu and choose the parameters you want to monitor. The scanner will display real-time data for the selected parameters. -
Does the Autel AutoLink AL519 support multiple languages?
Yes, the Autel AutoLink AL519 supports multiple languages, including English, Spanish, and French. -
Where can I find the OBDII port in my vehicle?
The OBDII port is typically located under the dashboard on the driver’s side. Refer to your vehicle’s owner’s manual if you have difficulty locating it. -
What is the warranty on the Autel AutoLink AL519 purchased from CARDIAGTECH.NET?
CARDIAGTECH.NET provides a standard warranty on the Autel AutoLink AL519. Check the terms of the warranty on our website or contact our support team for more information.
Conclusion
The Autel AutoLink AL519 is an indispensable tool for anyone looking to diagnose and maintain their vehicle effectively. Its comprehensive features, user-friendly interface, and reliable performance make it a top choice for both professionals and DIY enthusiasts. By purchasing from CARDIAGTECH.NET, you gain access to genuine products, expert support, and valuable resources to maximize your tool’s potential. Equip yourself with the Autel AutoLink AL519 and take control of your automotive diagnostics today.
Ready to enhance your diagnostic capabilities? Contact CARDIAGTECH.NET at 276 Reock St, City of Orange, NJ 07050, United States or Whatsapp at +1 (641) 206-8880. Visit our website CARDIAGTECH.NET now for expert advice and to order your Autel AutoLink AL519 today and experience the difference!