
Connecting your Autel J2534 device to your computer is crucial for effective vehicle diagnostics and ECU reprogramming. This guide, brought to you by CARDIAGTECH.NET, will provide a detailed, step-by-step process to ensure a seamless connection, allowing you to maximize the capabilities of your Autel J2534 tool. By understanding the Autel J2534 setup, ECU programming software, and J2534 interface, you can unlock advanced functionalities in your vehicle maintenance and repair processes.
1. Understanding the Autel J2534 Device and Its Importance
The Autel MaxiFlash Elite J2534 ECU Programming Tool is a game-changer for automotive technicians. It’s not just another diagnostic tool; it’s a gateway to advanced vehicle customization and repair. But what exactly is a J2534 device, and why is it so vital for modern auto repair?
1.1 What is a J2534 Device?
A J2534 device is a standardized interface that allows a computer to communicate with a vehicle’s electronic control units (ECUs). This communication enables technicians to perform various functions, including:
- ECU Reprogramming (Flashing): Updating the software on a vehicle’s ECUs to improve performance, fix bugs, or install new features.
- Diagnostics: Reading and clearing diagnostic trouble codes (DTCs) to identify and resolve vehicle issues.
- Data Logging: Collecting sensor data and other vehicle information for analysis.
The J2534 standard ensures compatibility across different vehicle makes and models, making it a versatile tool for any auto repair shop.
1.2 Why is Connecting Autel J2534 to Your Computer Essential?
Connecting your Autel J2534 device to a computer unlocks its full potential. Here’s why it’s essential:
- Access to OEM Software: By connecting to a computer, you can use the J2534 device with OEM (Original Equipment Manufacturer) software. This gives you access to the same diagnostic and reprogramming capabilities as dealerships, allowing for precise and accurate repairs.
- Firmware Updates: Keeping your J2534 device’s firmware up-to-date ensures compatibility with the latest vehicle models and software versions.
- Expanded Functionality: A computer connection enables advanced features like data logging, module programming, and access to online databases for troubleshooting.
- Efficiency and Accuracy: With the right software and a stable connection, you can diagnose and repair vehicles more quickly and accurately, saving time and reducing the risk of errors.
1.3 Maximizing Your Investment with CARDIAGTECH.NET
Investing in an Autel J2534 device is a smart move for any serious automotive professional. At CARDIAGTECH.NET, we understand the importance of having the right tools and knowledge to excel in the automotive industry. That’s why we offer not only high-quality diagnostic tools but also comprehensive support and training to help you get the most out of your investment.
We ensure that you are equipped to handle any diagnostic or reprogramming task. Ready to take your auto repair capabilities to the next level? Explore the possibilities with Autel J2534 and CARDIAGTECH.NET today.
2. Essential Equipment and Software Requirements
Before you begin the process of connecting your Autel J2534 device to your computer, it’s crucial to gather all the necessary equipment and ensure your system meets the software requirements. This preparation will help ensure a smooth and successful connection.
2.1 Hardware Checklist
Here’s a detailed list of the hardware you’ll need:
- Laptop (Windows-Based): A Windows operating system is typically required for compatibility with Autel’s software and OEM reprogramming applications. Windows 10 or 11 is highly recommended for optimal performance.
- Autel MaxiFlash Elite J2534 Device: This is the core interface that connects your computer to the vehicle’s ECU.
- AC/DC Adapter (12V): Provides a stable power supply to the Autel J2534 device during programming and diagnostics.
- Main Cable: Used to connect the Autel J2534 device to the vehicle’s OBDII port.
- USB Cable: Connects the Autel J2534 device to your computer for data transfer and communication.
- Stable Internet Connection: Required for software downloads, updates, and accessing online databases.
2.2 Software Requirements
Ensure your computer meets these software prerequisites:
- Autel PC Suite: This software package includes the necessary drivers and utilities for your Autel J2534 device. You can typically find it on the CD included with the device or download it from the Autel website.
- J2534 Device Driver: The correct driver is essential for your computer to recognize and communicate with the Autel J2534 device. This is usually installed as part of the Autel PC Suite.
- OEM Reprogramming Software: To perform ECU reprogramming, you’ll need to subscribe to the OEM software for the specific vehicle makes you’ll be working on. Examples include GM’s AC Delco TDS, Ford’s Motorcraft PTS, and Toyota’s TIS Techstream.
- Java Runtime Environment (JRE): Some OEM software may require Java to function correctly. Make sure you have the latest version installed.
- Anti-Virus Software: While it’s essential to protect your computer from malware, some anti-virus programs can interfere with the J2534 device and OEM software. You may need to temporarily disable your anti-virus or add exceptions for the Autel and OEM software.
2.3 Importance of Genuine Autel Products from CARDIAGTECH.NET
When it comes to diagnostic and reprogramming tools, quality and reliability are paramount. CARDIAGTECH.NET is your trusted source for genuine Autel products, ensuring that you receive a high-quality device that performs as expected.
- Guaranteed Compatibility: Genuine Autel products are designed to work seamlessly with Autel’s software and OEM applications, reducing the risk of compatibility issues.
- Reliable Performance: Counterfeit or knock-off devices may not meet the same quality standards as genuine Autel products, leading to unreliable performance and potential damage to vehicle ECUs.
- Access to Support and Updates: When you purchase from CARDIAGTECH.NET, you gain access to Autel’s technical support and software updates, ensuring that you always have the latest features and security patches.
- Warranty Protection: Genuine Autel products come with a warranty that protects you against defects in materials and workmanship.
Investing in genuine Autel products from CARDIAGTECH.NET is an investment in the long-term success of your auto repair business. Contact us today via Whatsapp at +1 (641) 206-8880 for assistance and guidance.
3. Step-by-Step Guide: Installing the J2534 Device Driver
Installing the J2534 device driver is a critical first step in connecting your Autel MaxiFlash Elite to your computer. This process ensures that your computer can recognize and communicate with the device, allowing you to perform diagnostics and ECU programming. Follow these detailed steps for a successful installation.
3.1 Preparing for Installation
Before you begin, make sure you have the following:
- Autel MaxiFlash Elite J2534 Device: Ensure it is readily accessible.
- Driver Installation CD: This CD comes with your Autel device and contains the necessary software. If you don’t have the CD, you can usually download the software from the Autel website.
- Windows-Based Computer: Ensure your computer is running a compatible version of Windows (preferably Windows 10 or 11).
- USB Cable: To connect the Autel device to your computer.
3.2 Step-by-Step Driver Installation Process
Follow these steps to install the J2534 device driver:
- Insert the Driver Installation CD: Place the CD into your computer’s CD/DVD drive. If the installation doesn’t start automatically, navigate to the CD drive in Windows Explorer and open it.
- Run the Autel Setup Program:
- Look for a file named “Autel Run.exe” or similar.
- Double-click this file to start the setup program.
- Select MaxiFlash Elite Icon:
- The MaxiSys PC Suite screen will appear.
- Click on the MaxiFlash Elite icon to begin the driver installation.
- Choose Installation Language:
- Select your preferred language from the options provided.
- The installation wizard will load after you select the language.
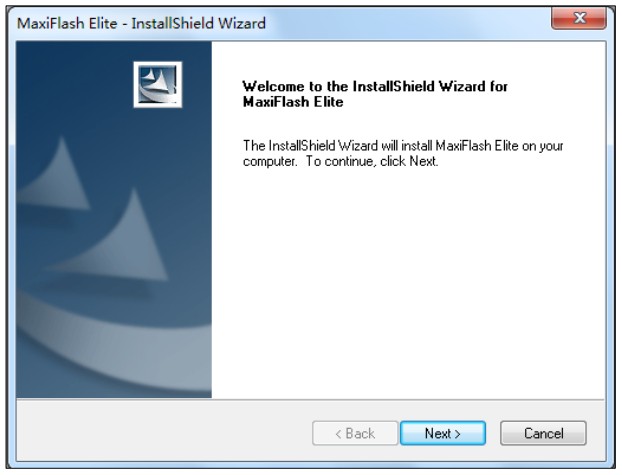
- Follow the Wizard Instructions:
- Click “Next” to proceed through the installation wizard.
- Read the license agreement and accept the terms to continue.
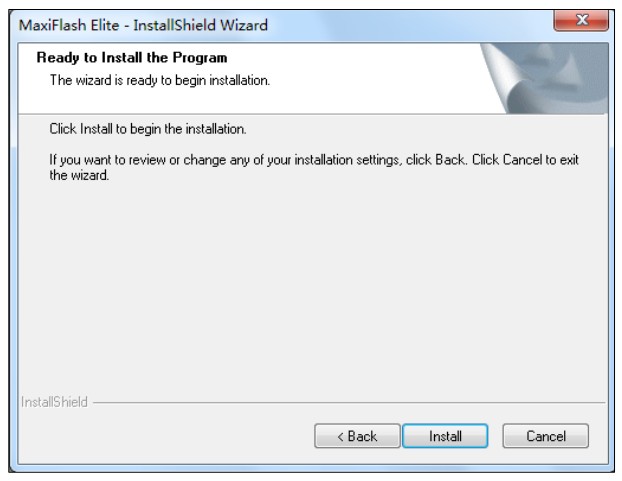
- Install the Driver Program:
- Click on “Install” to begin the driver installation process.
- The wizard will copy the necessary files to your computer.
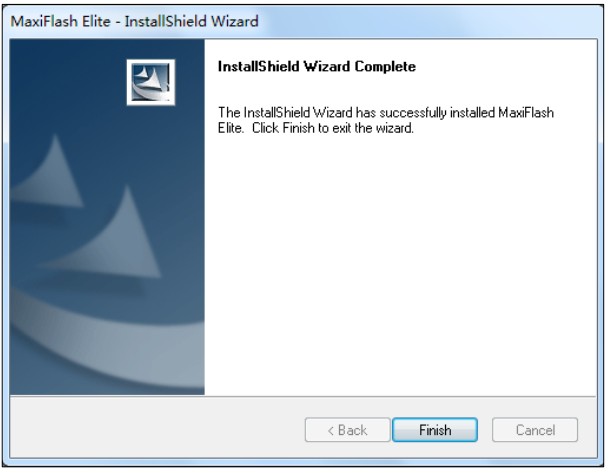
- Complete the Installation:
- Once the driver is successfully installed, a confirmation window will appear.
- Click on “Finish” to complete the installation procedure.
- Restart Your Computer (if prompted): In some cases, the installation wizard may prompt you to restart your computer. If so, save your work and restart to ensure the changes take effect.
3.3 Verifying the Driver Installation
After installing the driver, it’s essential to verify that it was installed correctly. Here’s how:
- Open Device Manager:
- Press the Windows key, type “Device Manager,” and press Enter.
- Locate the Autel Device:
- In Device Manager, look for a category called “Ports (COM & LPT)” or “Autel Devices”.
- Expand the category to find your Autel MaxiFlash Elite device. It might be listed as “Autel USB VCI” or similar.
- Check Device Status:
- If the device is listed without any yellow exclamation marks or red crosses, the driver is installed correctly.
- If you see an error icon, the driver installation may have failed. In this case, try reinstalling the driver or contact Autel support for assistance.
3.4 Troubleshooting Common Installation Issues
If you encounter problems during the installation process, here are some common issues and their solutions:
- Driver Installation Fails:
- Ensure that you have administrator privileges on your computer.
- Disable any antivirus software temporarily, as it may interfere with the installation.
- Try reinstalling the driver from the CD or downloaded file.
- Device Not Recognized:
- Make sure the USB cable is securely connected to both the Autel device and your computer.
- Try using a different USB port on your computer.
- Check Device Manager to see if the device is listed with an error icon. If so, try updating the driver manually.
- Compatibility Issues:
- Ensure that your computer meets the minimum system requirements for the Autel software.
- Try running the installation program in compatibility mode for an older version of Windows.
3.5 Superior Support from CARDIAGTECH.NET
At CARDIAGTECH.NET, we’re committed to providing our customers with exceptional support and guidance. If you encounter any difficulties during the driver installation process, our team of experts is here to help.
We pride ourselves on offering unparalleled customer service and technical expertise. Contact us via Whatsapp at +1 (641) 206-8880 or visit our website at CARDIAGTECH.NET for assistance.
4. Updating the J2534 ECU Programming Software
Keeping your Autel J2534 ECU programming software up to date is crucial for optimal performance and compatibility with the latest vehicle models. This section provides a detailed guide on how to update the software, ensuring you have access to the newest features and bug fixes.
4.1 Preparing for the Software Update
Before you begin the update process, ensure you have the following:
- Autel MaxiFlash Elite J2534 Device: Make sure it is powered on and connected to your computer.
- Stable Internet Connection: A reliable internet connection is required to download the latest software updates.
- Windows-Based Computer: Ensure your computer is running a compatible version of Windows.
- External Power Supply: Use the AC/DC adapter to power the Autel device during the update process to prevent interruptions.
4.2 Step-by-Step Software Update Process
Follow these steps to update the J2534 ECU programming software:
- Power Up the Device:
- Connect the Autel MaxiFlash Elite to the external power supply.
- Verify that the green Power LED on the front panel is on, indicating that the device is receiving power.
- Connect to the Computer:
- Use the supplied USB cable to connect the Autel device to your computer.
- Verify that the green Connection LED on the front panel is on, indicating a successful connection.
- Launch the MaxiFlash Elite Program:
- From the Windows Start Menu, find and double-click the “MaxiFlash Elite” icon.
- Wait for the program interface to appear.
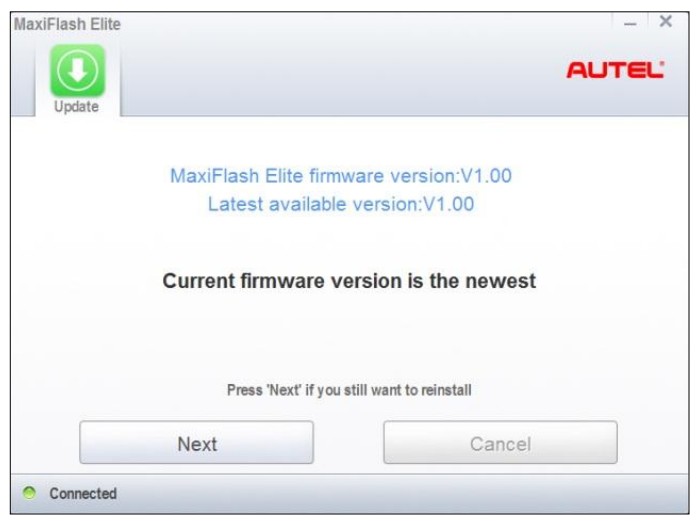
- Check for Updates Automatically:
- The update agent will automatically check for available updates online.
- This process may take a few minutes, depending on your internet connection speed.
- Install the Newest Firmware:
- If an update is available, a prompt will appear on the screen.
- Press the “Next” button to begin installing the newest firmware.
- Follow the on-screen instructions to complete the update process.
- Cancel the Update (if needed):
- If you prefer to skip the update, press the “Cancel” button to exit.
- However, it is highly recommended to install the latest updates to ensure optimal performance and compatibility.
4.3 Verifying the Software Update
After the update process is complete, it’s essential to verify that the software has been updated successfully. Here’s how:
- Restart the MaxiFlash Elite Program:
- Close the MaxiFlash Elite program and relaunch it from the Windows Start Menu.
- Check the Software Version:
- In the program interface, look for an “About” or “Version Information” section.
- Verify that the software version matches the latest version available on the Autel website or in the update prompt.
- Test the Device Connection:
- Connect the Autel device to a vehicle and perform a quick diagnostic test to ensure that the device is communicating correctly with the vehicle’s ECU.
4.4 Troubleshooting Common Update Issues
If you encounter problems during the software update process, here are some common issues and their solutions:
- Update Fails to Start:
- Ensure that the Autel device is properly connected to both the computer and the external power supply.
- Check your internet connection to make sure it is stable.
- Restart the MaxiFlash Elite program and try again.
- Update Freezes or Gets Interrupted:
- Avoid using your computer for other tasks during the update process, as this can cause interruptions.
- Disable any antivirus software temporarily, as it may interfere with the update.
- If the update freezes, try restarting the Autel device and your computer, and then try again.
- Device Not Recognized After Update:
- Check Device Manager to see if the Autel device is listed with an error icon. If so, try reinstalling the driver manually.
- Contact Autel support for assistance.
4.5 Dependable Support from CARDIAGTECH.NET
At CARDIAGTECH.NET, we are dedicated to ensuring your Autel diagnostic tools operate at their peak. Should you face any challenges during the software update, our knowledgeable support team is ready to assist you.
With our expert assistance, you can maintain your tools effectively and reduce downtime. Contact us via Whatsapp at +1 (641) 206-8880 or visit CARDIAGTECH.NET for more information.
5. Reprogramming ECUs with Your J2534 Device: A Detailed Walkthrough
Reprogramming ECUs (Electronic Control Units) using your Autel J2534 device is a powerful capability that allows you to update vehicle software, fix bugs, and improve performance. This section provides a detailed walkthrough of the reprogramming process.
5.1 Understanding ECU Reprogramming
ECU reprogramming, also known as “flashing,” involves replacing the existing software in a vehicle’s ECU with a new version. This can be done for various reasons, including:
- Software Updates: Applying the latest software updates from the vehicle manufacturer to fix known issues and improve performance.
- Bug Fixes: Resolving software bugs that can cause drivability problems, error codes, or other issues.
- Performance Enhancements: Installing new software that can improve engine performance, fuel economy, or other vehicle functions.
- Module Replacement: Reprogramming a new ECU to match the vehicle’s specifications after replacing a faulty module.
5.2 Prerequisites for ECU Reprogramming
Before you begin the ECU reprogramming process, ensure you have the following:
- Autel MaxiFlash Elite J2534 Device: Properly connected to your computer and the vehicle.
- Stable Power Supply: Connect a battery maintainer to the vehicle to ensure a stable voltage during the reprogramming process. Voltage fluctuations can cause the reprogramming to fail and potentially damage the ECU.
- OEM Reprogramming Software: Subscribe to the OEM software for the specific vehicle make you are working on.
- Vehicle Information: Obtain the vehicle’s VIN (Vehicle Identification Number) and any other required information.
- Internet Connection: A stable internet connection is required to access OEM software and download reprogramming files.
5.3 Step-by-Step Reprogramming Process
Follow these steps to reprogram an ECU using your Autel J2534 device:
- Connect the Autel Device:
- Connect the Autel MaxiFlash Elite to the vehicle’s OBDII port.
- Connect the Autel device to your computer via USB.
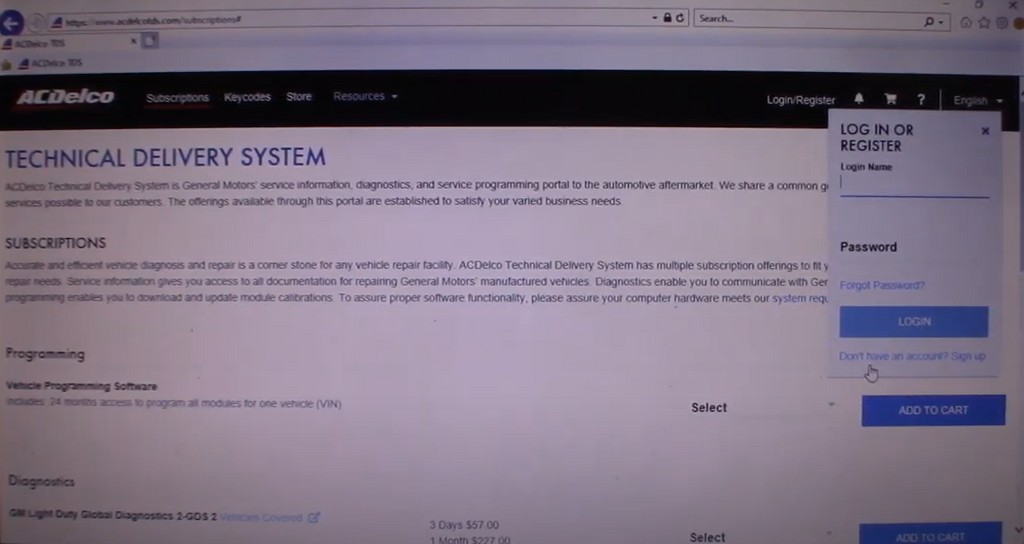
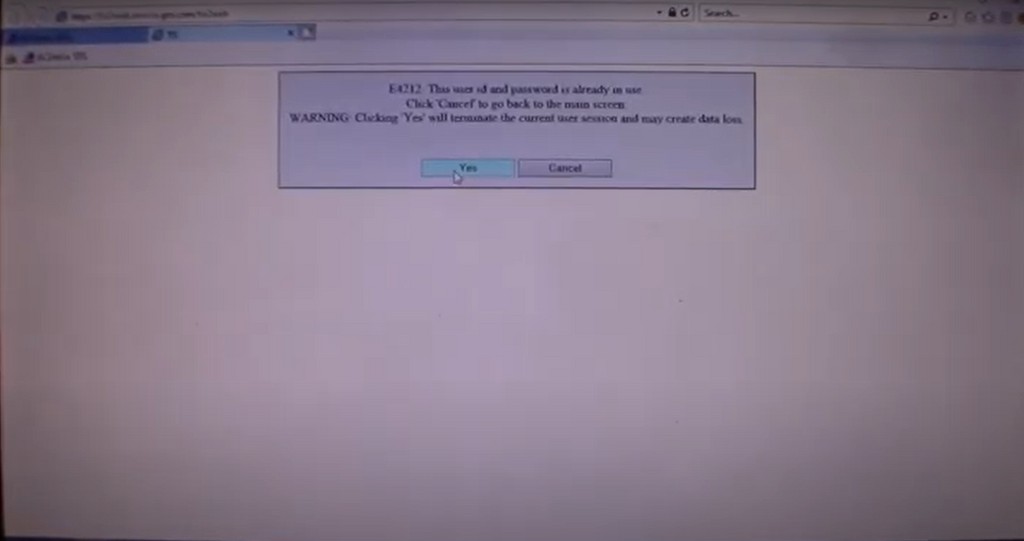
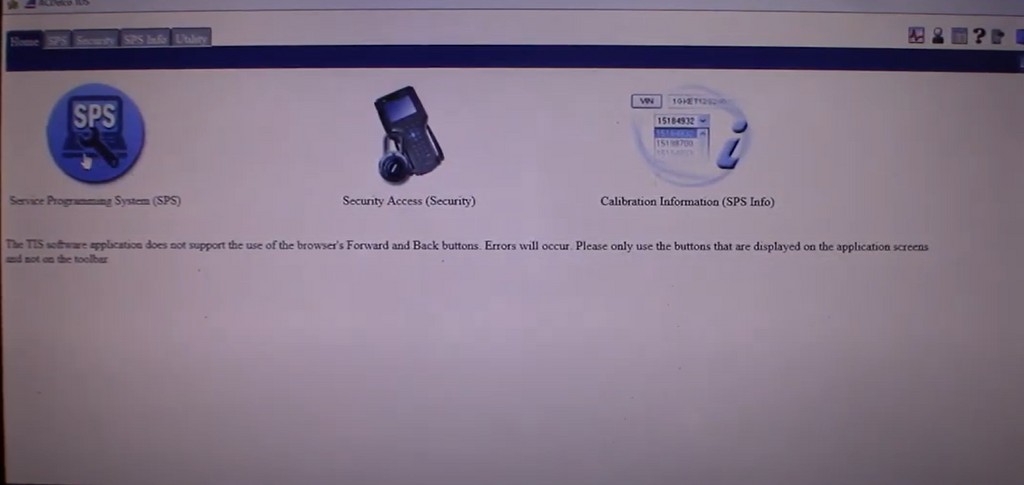
- Launch OEM Reprogramming Software:
- Open the OEM reprogramming software for the vehicle make you are working on.
- Log in to your account using your subscription credentials.
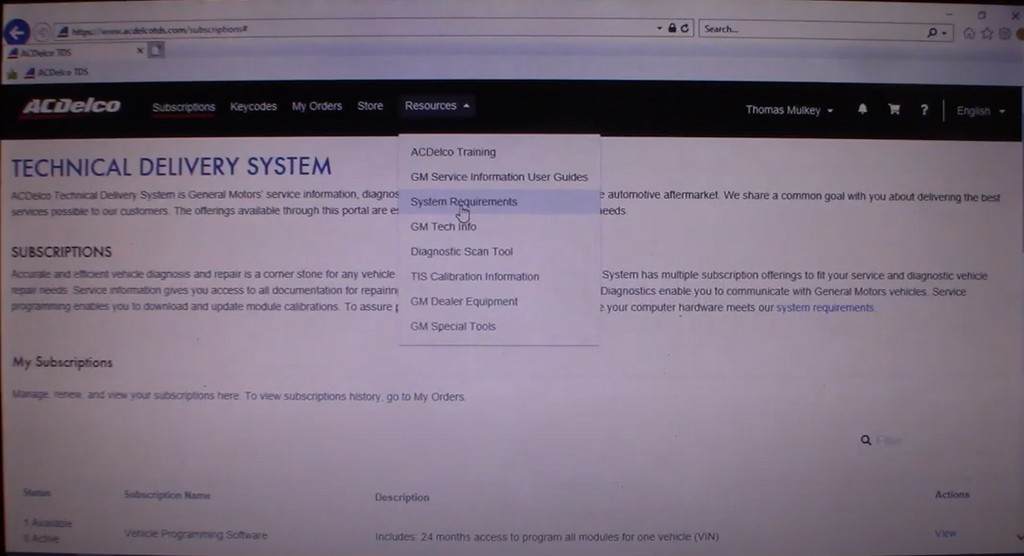
- Download System Requirements:
- Download any necessary system requirements or software updates as prompted by the OEM software.
- Download any necessary system requirements or software updates as prompted by the OEM software.
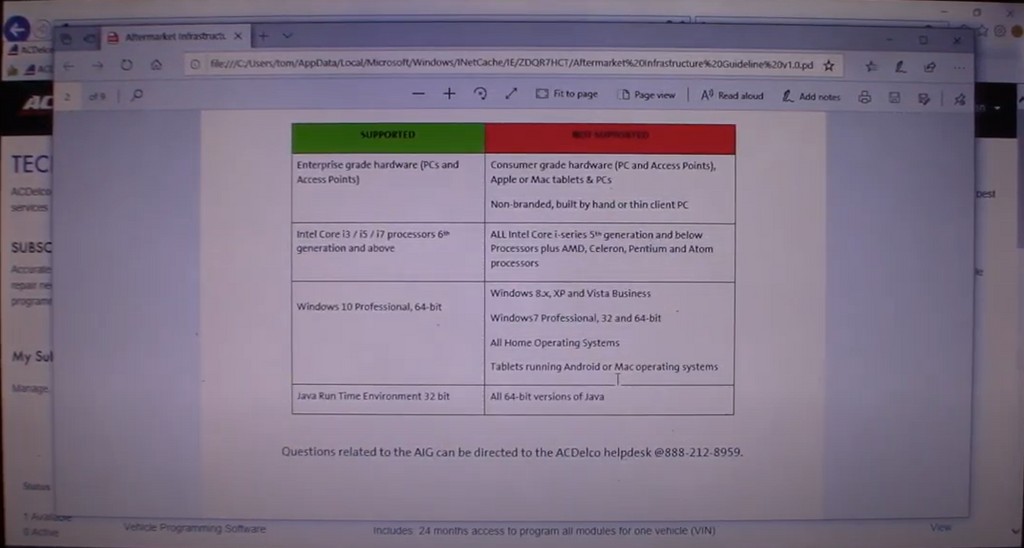
- Check the Requirements
- Verify that your computer meets the system requirements for the OEM software.
- Verify that your computer meets the system requirements for the OEM software.
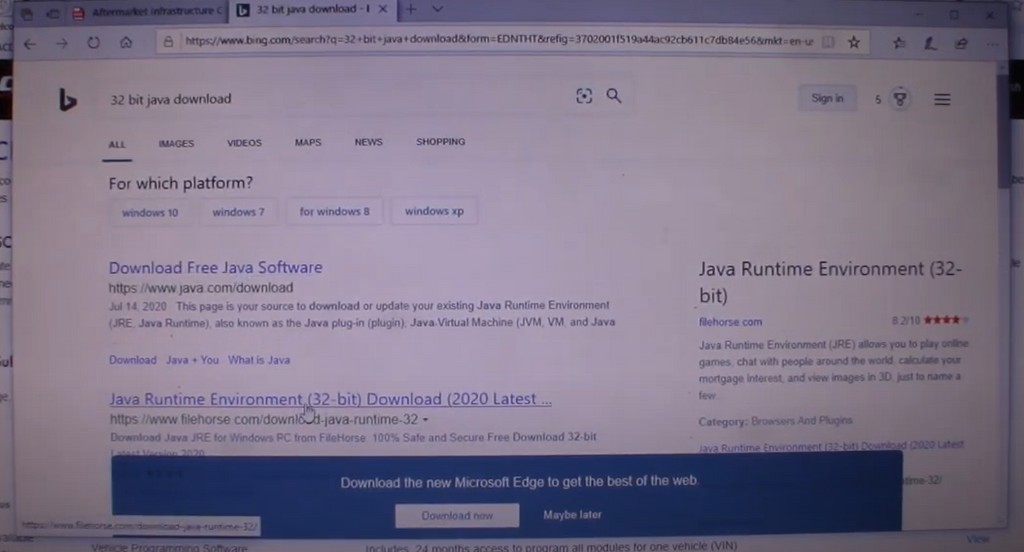
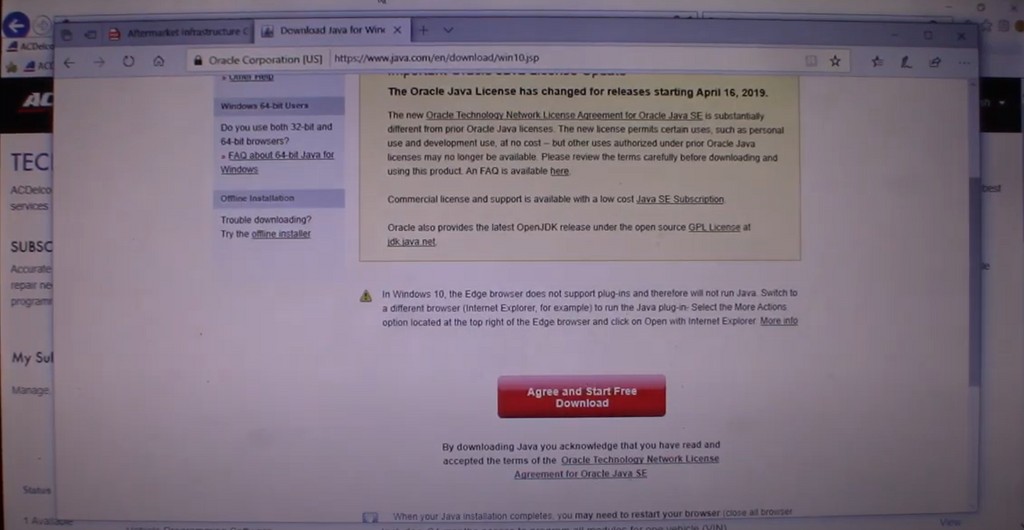
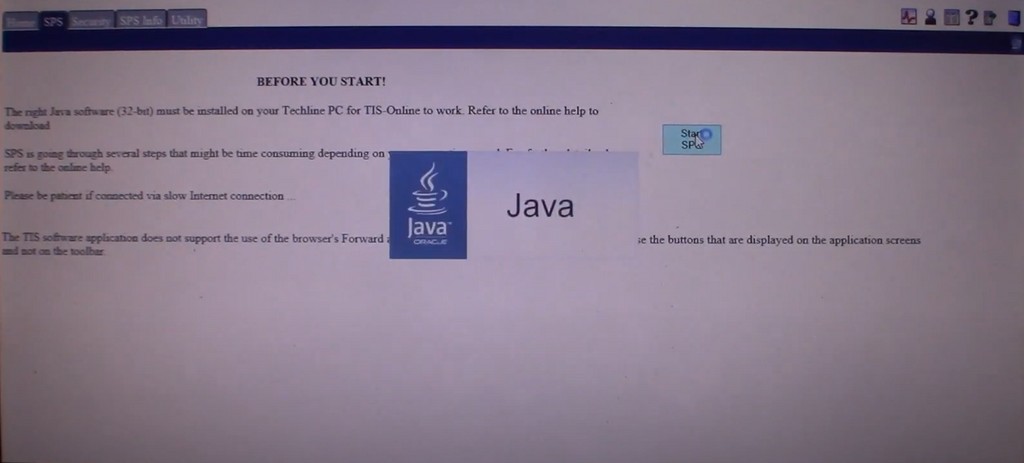
- Download and Install Java:
- If required, download and install the latest version of Java Runtime Environment (JRE).
- If required, download and install the latest version of Java Runtime Environment (JRE).
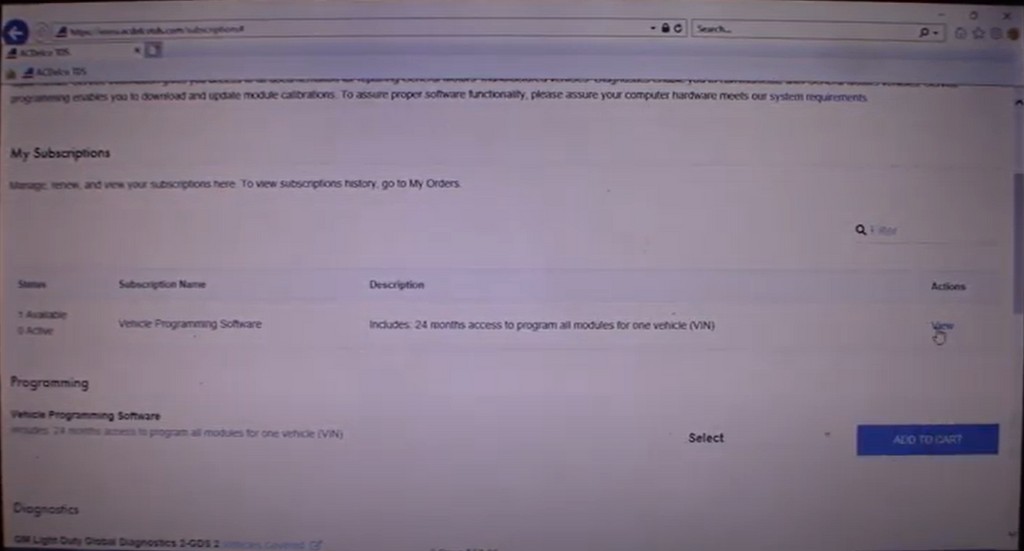
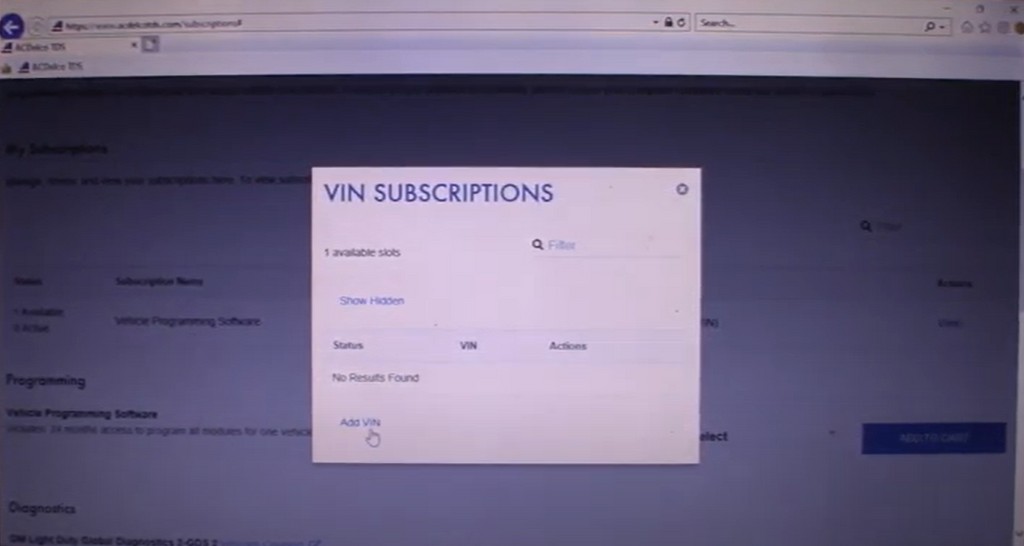
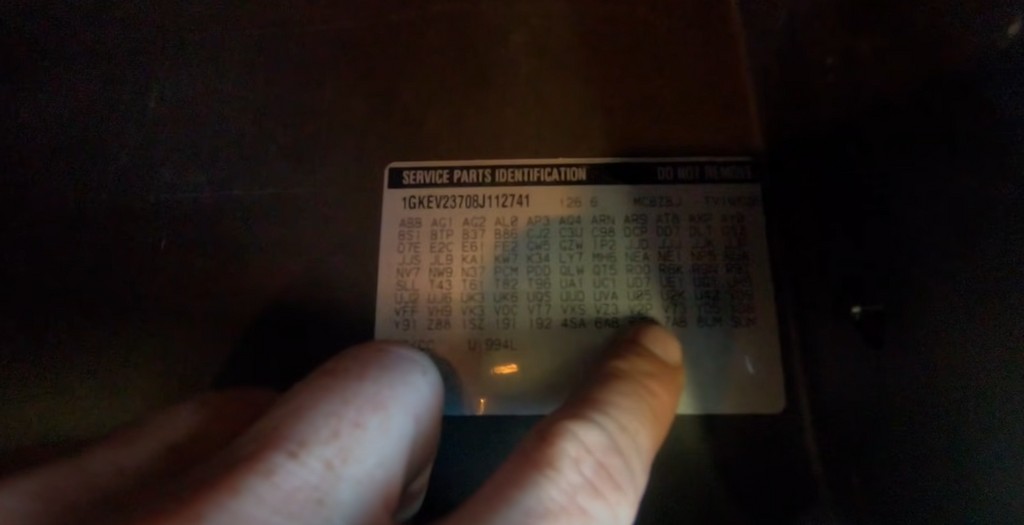
- Enter Vehicle Information:
- Enter the vehicle’s VIN and any other required information into the OEM software.
- Enter the vehicle’s VIN and any other required information into the OEM software.
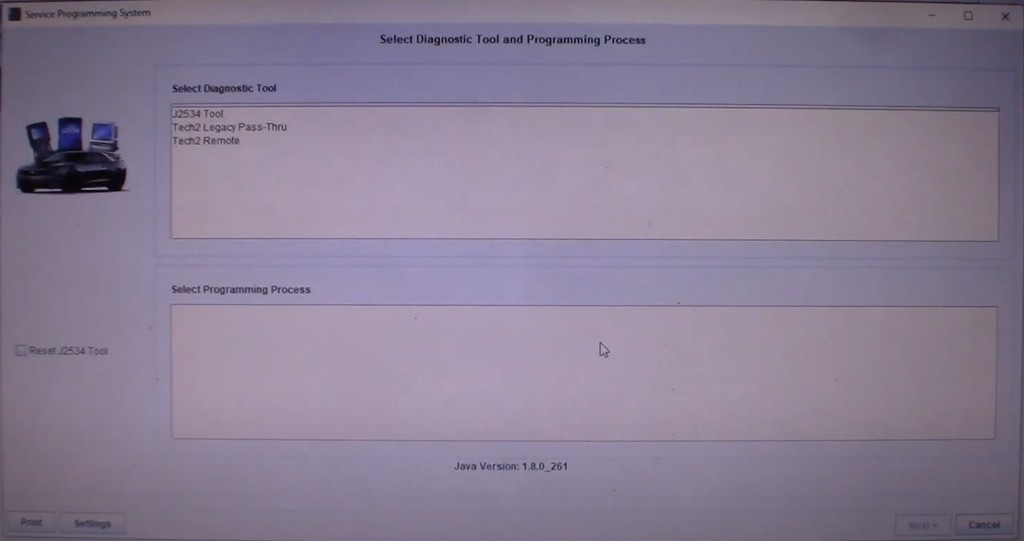
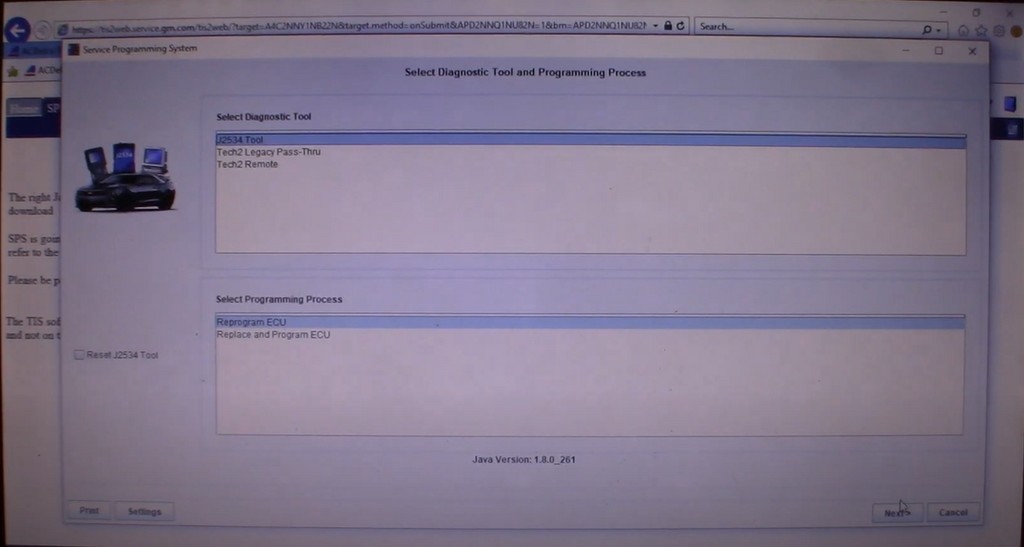
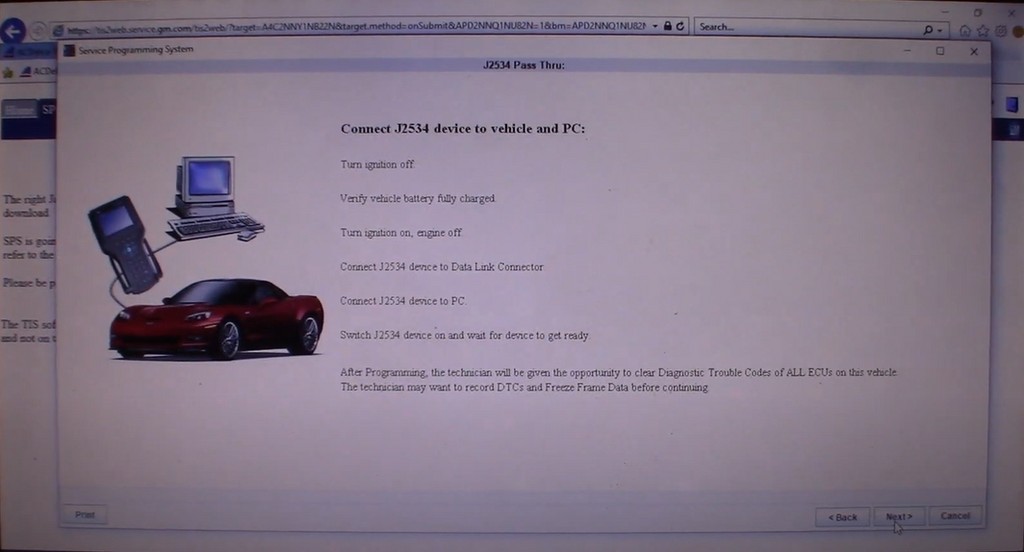
- Select Diagnostic Tool and Programming Process:
- Choose the Autel MaxiFlash Elite as the diagnostic tool.
- Select the appropriate programming process for the ECU you want to reprogram.
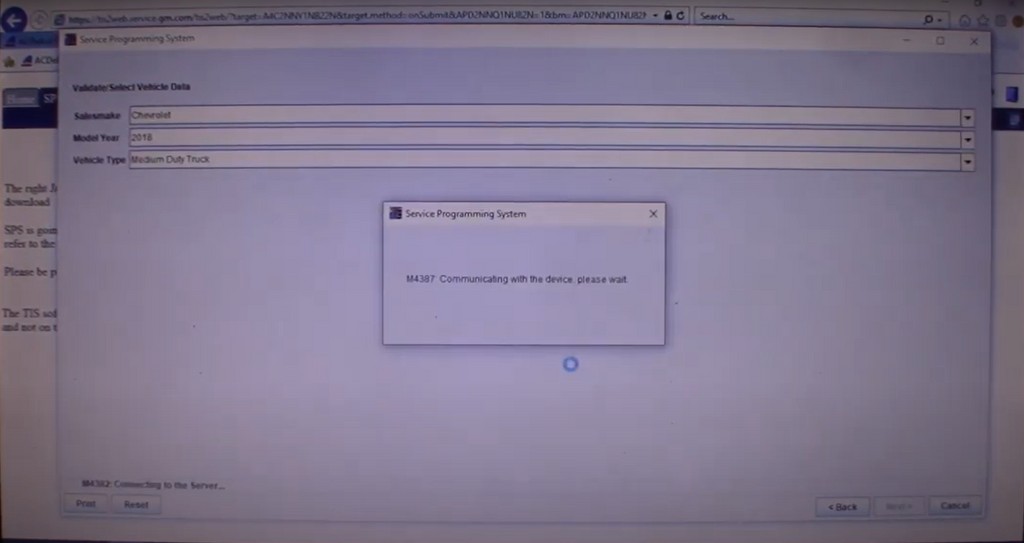
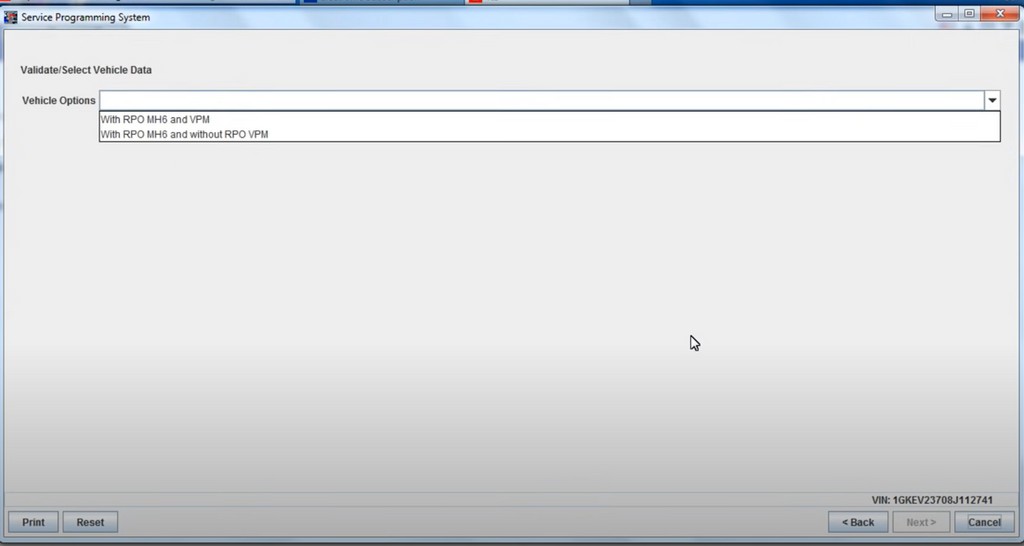
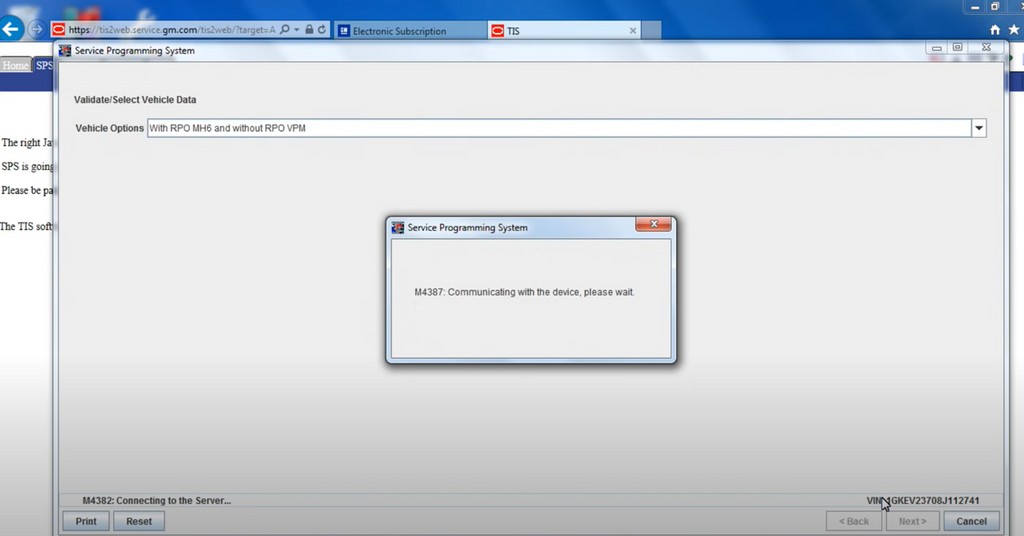
- Select Vehicle Data
- Confirm all the vehicle data.
- Confirm all the vehicle data.
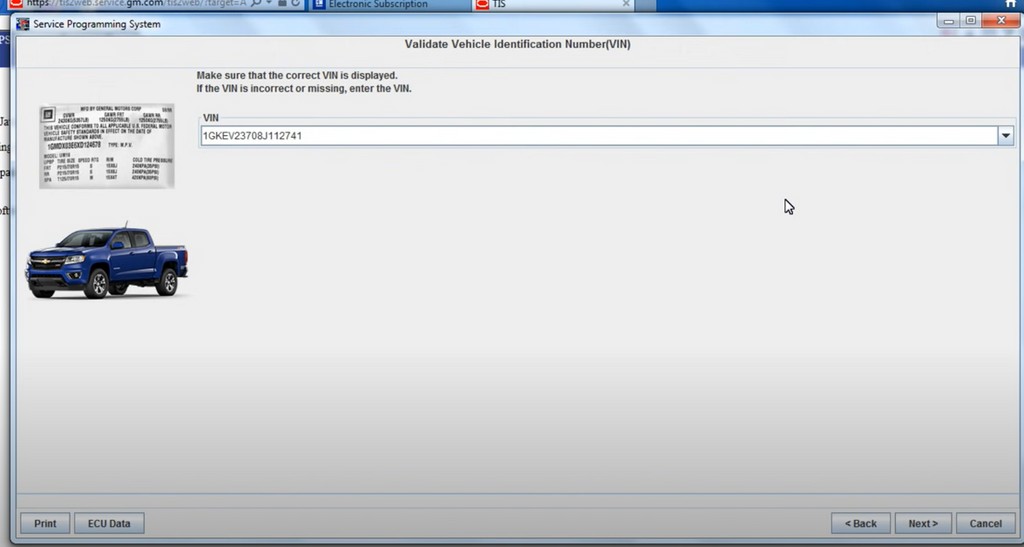
- Validate VIN
- Validate the VIN.
- Validate the VIN.
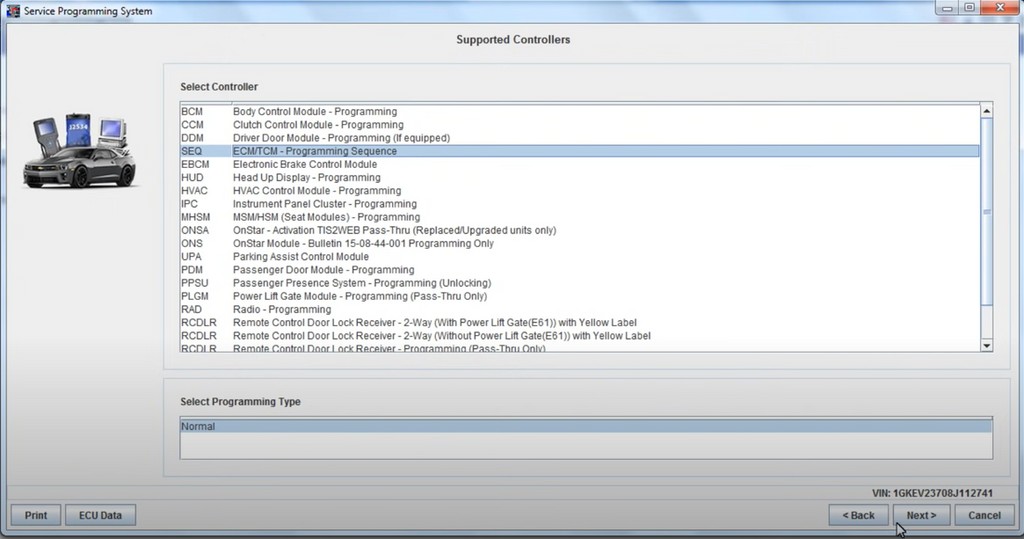
- Select Controller
- Select the controller.
- Select the controller.
- Select Vehicle Data
- Select the vehicle data.
- Select the vehicle data.
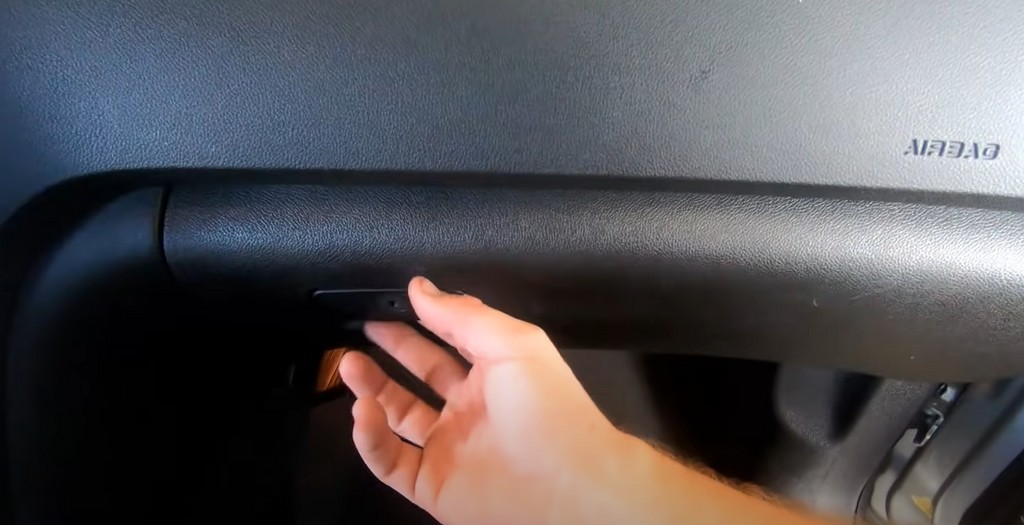
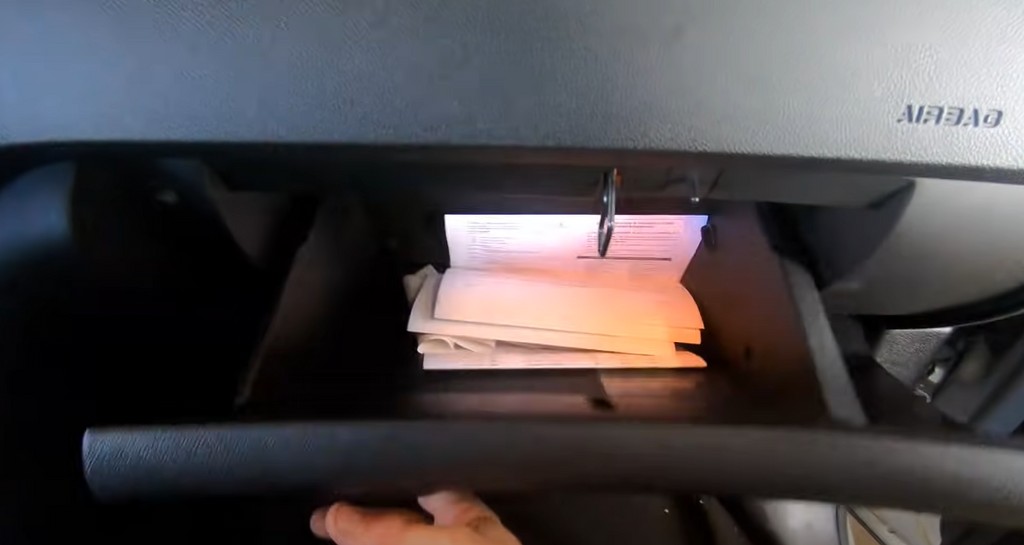
- Find your VIN
- Find your VIN.
- Find your VIN.
- Select vehicle data
- Select the vehicle data
- Select the vehicle data
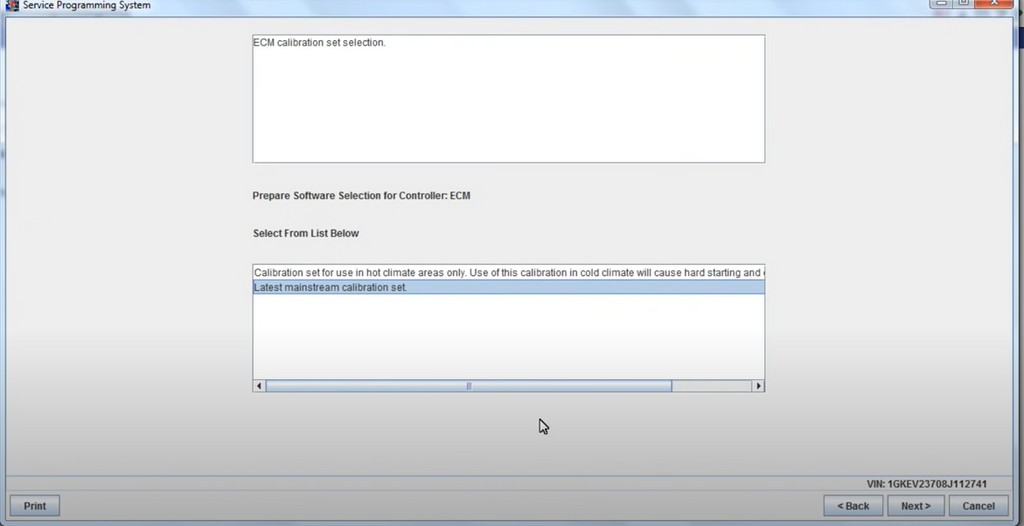
- Software selection for controller
- Select the software selection for the controller.
- Select the software selection for the controller.
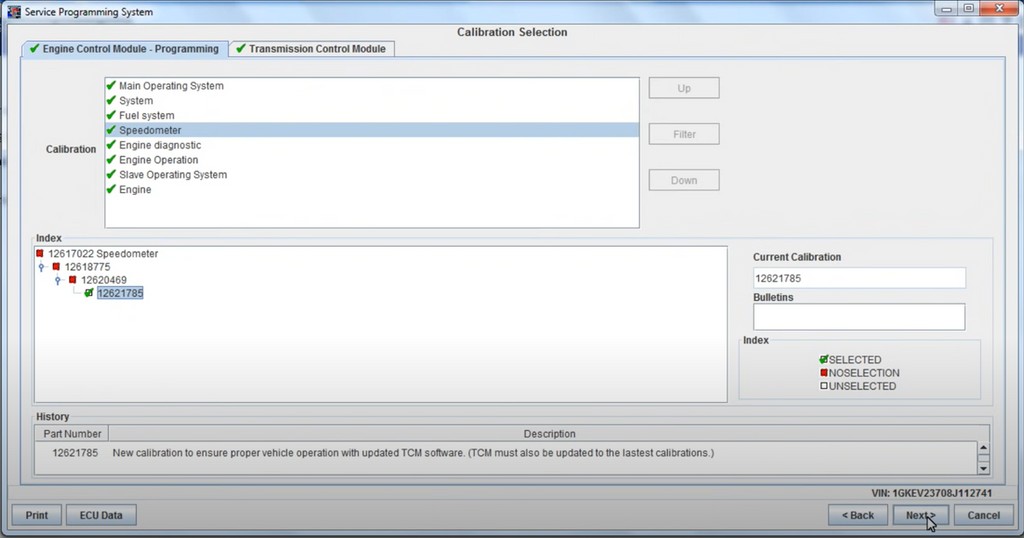
- Calibration selection
- Select the calibration selection.
- Select the calibration selection.
- Summary
- Here is a summary of the steps.
- Here is a summary of the steps.
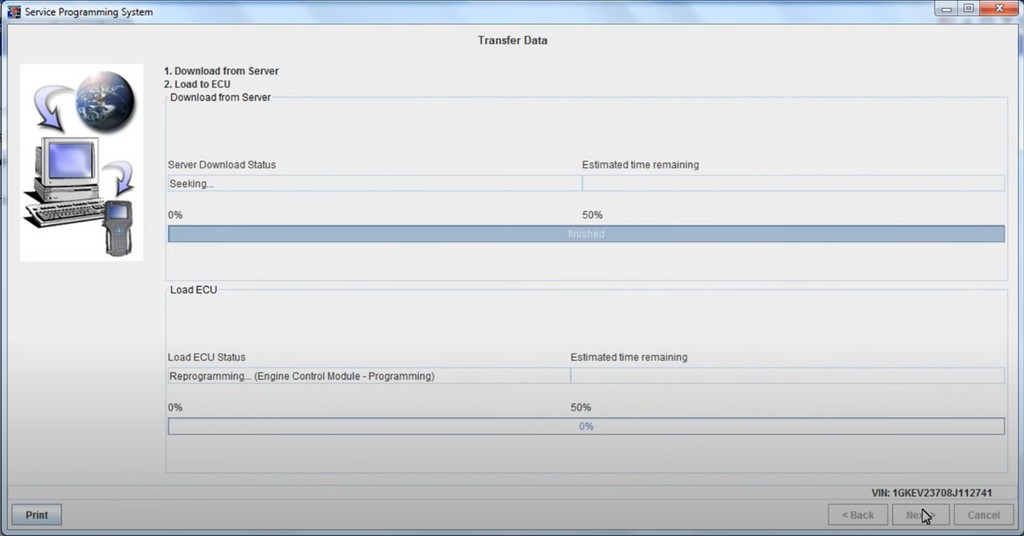
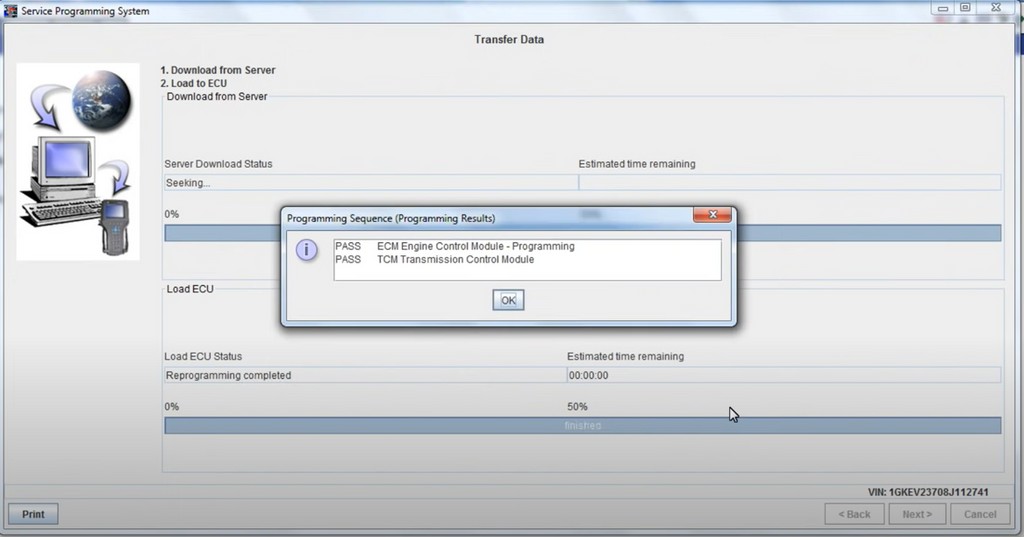
- Transfer data
- Transfer the data.
- Transfer the data.
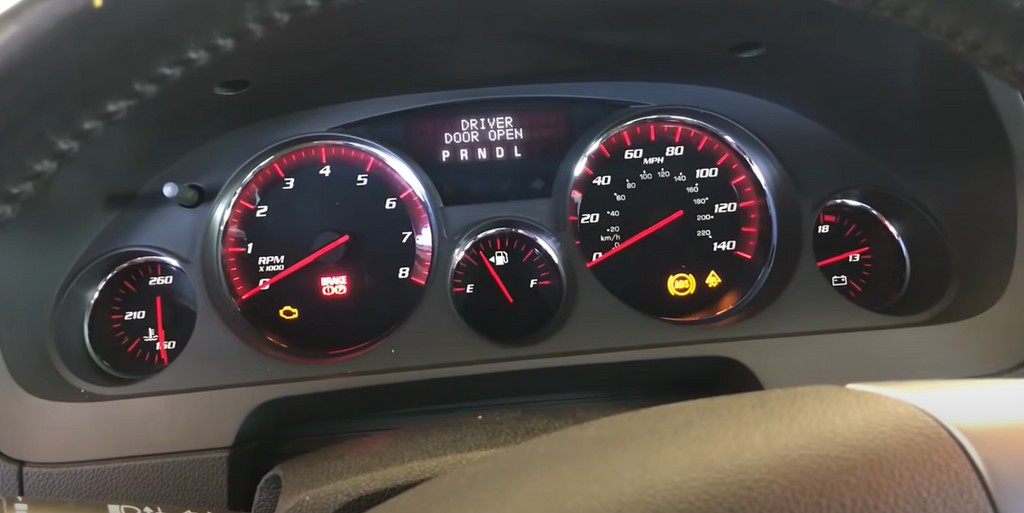
- Programming completed
- The programming is complete.
- The programming is complete.
5.4 Post-Reprogramming Steps
After the reprogramming process is complete, follow these steps:
- Verify Reprogramming:
- Use the OEM software to verify that the reprogramming was successful.
- Check for any error codes or other issues.
- Clear DTCs:
- Clear any diagnostic trouble codes (DTCs) that may have been set during the reprogramming process.
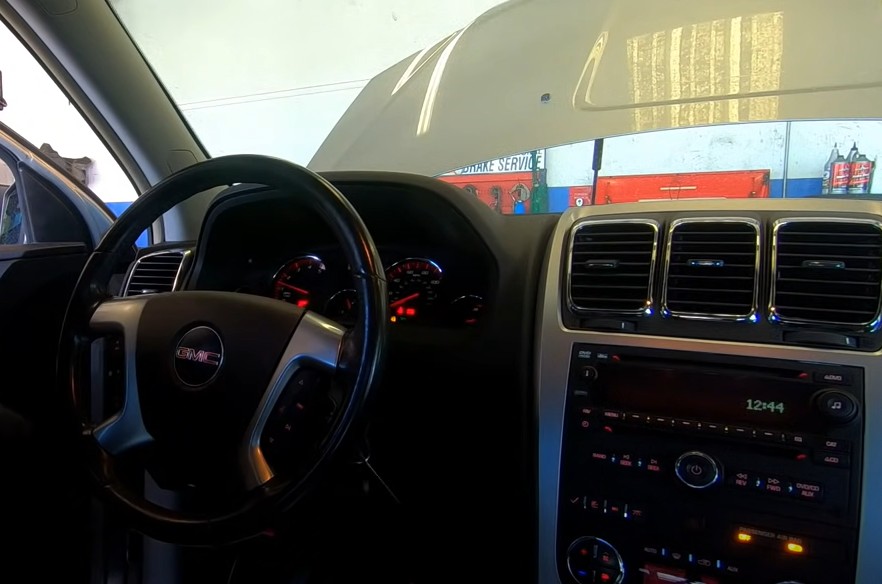
- Test Drive the Vehicle:
- Test drive the vehicle to ensure that it is running correctly.
- Monitor vehicle performance and look for any issues.
5.5 Potential Risks and Mitigation Strategies
While ECU reprogramming can offer significant benefits, it also carries potential risks. Here are some common risks and mitigation strategies:
| Risk | Mitigation Strategy |
|---|---|
| Voltage Fluctuations | Use a battery maintainer to ensure a stable voltage supply during the reprogramming process. |
| Interrupted Programming | Avoid using your computer for other tasks during the reprogramming process. Ensure a stable internet connection. |
| Incorrect Software | Double-check that you are using the correct software version for the vehicle and ECU. |
| Communication Errors | Ensure that the Autel device is properly connected to both the computer and the vehicle. |
| ECU Damage | Follow the OEM’s reprogramming procedures carefully. If you are unsure about any step, seek assistance from a qualified technician or Autel support. |
| Incompatible Firmware Versions | Cross-reference the existing firmware and the new firmware to make sure the ECU is compatible. Reach out to Autel Support or visit CARDIAGTECH.NET for assistance determining compatibility. |


5.6 Premier Resources at CARDIAGTECH.NET
At CARDIAGTECH.NET, we don’t just sell tools; we provide solutions.
We offer top-of-the-line Autel products and comprehensive support to ensure your success in automotive diagnostics and reprogramming. Contact us via Whatsapp at +1 (641) 206-8880.
6. Optimizing Your Autel J2534 for Peak Performance
To ensure your Autel J2534 device operates at its best, it’s essential to follow some best practices. Regular maintenance, proper usage, and staying updated with the latest software can significantly enhance its performance and longevity.
6.1 Regular Maintenance Tips
- Keep the Device Clean: Regularly clean the Autel J2534 device and its cables to remove dust and debris. Use a soft, dry cloth to wipe down the surfaces. Avoid using harsh chemicals or solvents, as they can damage the device.
- Inspect Cables and Connectors: Check the cables and connectors for any signs of damage, such as frayed wires or bent pins. Replace damaged cables immediately to prevent communication issues.
- Store the Device Properly: When not in use, store the Autel J2534 device in a clean, dry place away from extreme temperatures and humidity. Use a protective case or bag to prevent damage.
6.2 Best Practices for Usage
- Use a Stable Power Supply: Always use a stable power supply when performing ECU reprogramming or other critical operations. Voltage fluctuations can cause communication errors and potentially damage the ECU.
- Ensure a Secure Connection: Double-check that the Autel J2534 device is securely connected to both the vehicle’s OBDII port and your computer. A loose connection can interrupt data transfer and cause errors.
- Follow OEM Procedures: Always follow the OEM’s recommended procedures for ECU reprogramming and diagnostics. These procedures are designed to minimize the risk of errors and ensure a successful outcome.
- Avoid Interruptions: Avoid using your computer for other tasks during ECU reprogramming or other critical operations. Interruptions can cause data corruption and potentially damage the ECU.
6.3 Keeping Software and Firmware Up-to-Date
- Check for Updates Regularly: Regularly check for software and firmware updates for your Autel J2534 device. These updates often include bug fixes, performance improvements, and support for the latest vehicle models.
- Install Updates Promptly: Install updates as soon as they become available. Delays can lead to compatibility issues and reduced performance.
- Back Up Your Data: Before installing any updates, back up your important data, such as vehicle diagnostic reports and ECU reprogramming files. This will protect you from data loss in case something goes wrong during the update process.
6.4 Advanced Troubleshooting Techniques
- Check Device Manager: If you’re experiencing communication issues, check Device Manager to see if the Autel J2534 device is listed with an error icon. If so, try reinstalling the driver or updating it manually.
- Test with a Different Vehicle: If you’re having trouble connecting to a specific vehicle, try testing the Autel J2534 device with a different vehicle. This can help you determine whether the problem is with the device or the vehicle.
- Contact Autel Support: If you’ve tried all of the above troubleshooting steps and are still experiencing problems, contact Autel support for assistance. They can provide expert guidance and help you resolve any issues.
6.5 Optimizing Your Toolkit with CARDIAGTECH.NET
At CARDIAGTECH.NET, we are dedicated to helping you maximize the performance and longevity of your diagnostic tools.
We offer a wide range of Autel products and expert support to meet all your automotive diagnostic needs. Contact us via Whatsapp at +1 (641) 206-8880.
7. Frequently Asked Questions (FAQs) About Connecting Autel J2534 to Computer
Here are some frequently asked questions to help you better understand how to connect your Autel J2534 device to your computer and troubleshoot common issues.
Q1: What is the Autel J2534 device used for?
A1: The Autel J2534 device is a diagnostic and reprogramming tool used to communicate with a vehicle’s electronic control units (ECUs). It allows technicians to perform tasks such as reading and clearing diagnostic trouble codes (DTCs), reprogramming ECUs, and data logging.
Q2: What are the minimum system requirements for connecting the Autel J2534 to a computer?
A2: The minimum system requirements typically include a Windows-based computer (Windows 10 or 11 recommended), a USB port, a stable internet connection, and the Autel PC Suite software.
Q3: How do I install the J2534 device driver on my computer?
A3: Insert the driver installation CD into your computer and run the setup program. Follow the on-screen instructions to install the driver. If you don’t have the CD, you can download the software from the Autel website.
Q4: How do I update the software for my Autel J2534 device?
A4: Connect the Autel device to your computer and launch the MaxiFlash Elite program. The program will automatically check for updates. Follow the on-screen instructions to install any available updates.
Q5: What should I do if the driver installation fails?
A5: Ensure that you have administrator privileges on your computer. Temporarily disable any antivirus software, as it may interfere with the installation. Try reinstalling the driver from the CD or downloaded file.
**Q6: What should I do if my computer does not recognize the Autel J2534 device?