Ready to unlock the full potential of your Golf MK7? The Golf MK7 lane assist LED VCDS system offers a range of customization options, and CARDIAGTECH.NET is here to guide you through it all. Learn how to enhance your driving experience, improve safety, and personalize your vehicle using VCDS tweaks. This guide will help you maximize your car’s functionality.
1. Understanding Golf MK7 Lane Assist LED VCDS
The Golf MK7 Lane Assist system is a driver assistance technology designed to keep your vehicle within its lane. When combined with LED lighting and VCDS (VAG-COM Diagnostic System), it offers enhanced safety and customization options. VCDS allows you to adjust various parameters of your car’s systems, including the lane assist and LED settings, to tailor them to your preferences. Let’s explore the basics of lane assist, LED lighting, and VCDS, and how they interact in your Golf MK7.
1.1. What is Lane Assist?
Lane Assist is a safety feature that uses a camera to monitor the vehicle’s position within lane markings. If the car starts to drift out of its lane without the driver signaling, the system can provide corrective steering or a warning to help prevent accidents. According to the National Highway Traffic Safety Administration (NHTSA), lane departure warning systems can reduce single-vehicle crashes by 11%.
1.2. The Role of LED Lighting
LED lighting enhances visibility and aesthetics in modern vehicles. In the context of lane assist, LEDs can be used for indicators, daytime running lights (DRLs), and other lighting functions that complement the safety system. For example, some Golf MK7 models use LED indicators that can be programmed to function differently using VCDS.
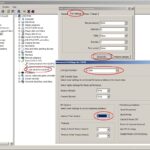
1.3. Introduction to VCDS
VCDS (VAG-COM Diagnostic System) is a software and hardware tool used to diagnose and customize Volkswagen Audi Group (VAG) vehicles, including the Golf MK7. It allows you to access and modify various control modules within the car, enabling tweaks and adjustments that are not available through the standard infotainment system. According to Ross-Tech, the developers of VCDS, the system can perform functions ranging from basic diagnostics to advanced coding.
2. Key Benefits of Customizing Your Golf MK7 with VCDS
Customizing your Golf MK7 with VCDS offers numerous benefits. From enhancing safety and convenience to personalizing your driving experience, VCDS tweaks can significantly improve your vehicle. Here are some of the key advantages:
2.1. Enhanced Safety Features
VCDS allows you to fine-tune safety systems like lane assist, improving their responsiveness and effectiveness. For example, you can adjust the point at which the steering wheel vibrates to warn you of lane departure, making the system more sensitive to your driving style. The Insurance Institute for Highway Safety (IIHS) notes that lane departure warning systems can help prevent crashes, especially when combined with other safety technologies.
2.2. Improved Convenience
VCDS tweaks can add convenience features to your Golf MK7. Enabling heated seat memory, automatic window closing in rain, and customizing lighting functions can make your driving experience more comfortable and enjoyable. These small changes can have a significant impact on your daily commute.
2.3. Personalization Options
VCDS provides a wide range of personalization options, allowing you to tailor your car to your preferences. From displaying oil temperature in the cluster to adjusting the intensity of interior LED lights, VCDS enables you to create a unique driving environment.
2.4. Diagnostic Capabilities
In addition to customization, VCDS offers comprehensive diagnostic capabilities. You can use it to read and clear fault codes, monitor sensor data, and perform various tests to ensure your car is running smoothly. This can help you identify and address potential issues before they become major problems.
2.5. Cost Savings
By enabling certain features through VCDS, you can avoid the cost of aftermarket modifications or dealer programming. Many tweaks can be performed at home with the right tools and knowledge, saving you time and money.
3. Essential Tools and Software for VCDS Tweaks
Before you start customizing your Golf MK7 with VCDS, you need to ensure you have the necessary tools and software. Here’s a detailed list of what you’ll need:
3.1. VCDS Interface Cable
The VCDS interface cable is the most critical tool. It connects your car to your computer, allowing you to access and modify the control modules. Ross-Tech offers several versions of the cable, so choose one that is compatible with your Golf MK7 model year.
3.2. VCDS Software
The VCDS software is the program you will use on your computer to communicate with your car. You can download the latest version from the Ross-Tech website. Make sure your computer meets the minimum system requirements for the software.
3.3. Windows Laptop
A Windows laptop is required to run the VCDS software. The software is not compatible with macOS or Linux operating systems. Ensure your laptop has a USB port for connecting the VCDS interface cable.
3.4. Battery Charger or Maintainer
When performing VCDS tweaks, it’s important to maintain a stable voltage supply to prevent errors or damage to your car’s electronic systems. A battery charger or maintainer can help ensure your battery doesn’t drain during the process. CTEK offers a range of battery chargers suitable for this purpose.
3.5. OBD-II Extension Cable (Optional)
An OBD-II extension cable can provide more flexibility when connecting the VCDS interface cable to your car’s OBD-II port. This can be especially useful if the port is in an awkward location.
3.6. Reliable Internet Connection
A reliable internet connection is needed to download the VCDS software, access online resources, and seek help from forums or communities if you encounter any issues.
4. Step-by-Step Guide to Enabling Lane Assist with VCDS
Enabling lane assist on your Golf MK7 involves several steps using VCDS. Here’s a detailed guide to help you through the process:
4.1. Preparation
- Gather Your Tools: Ensure you have the VCDS interface cable, VCDS software installed on your Windows laptop, and a battery charger or maintainer.
- Connect to Your Car: Plug the VCDS interface cable into your car’s OBD-II port and connect it to your laptop.
- Turn On the Ignition: Turn on your car’s ignition, but do not start the engine.
- Launch VCDS Software: Open the VCDS software on your laptop.
4.2. Accessing Control Modules
- Select Control Module 17 (Dashboard): In VCDS, select “Select Control Module” and then choose “17-Instruments.”
- Long Coding: Click on “Coding – 07” to access the long coding interface.
- Byte 4 Bit 6 Activate: Activate Bit 6 in Byte 4 to enable lane assist.
- Bye 11 Bit 1 Activate: Activate Bit 1 in Bye 11.
- Select Control unit A5 (front / advance camera): In VCDS, select “Select Control Module” and then choose “A5-Front Sensors Driver Assistance System.”
- Long Coding: Click on “Coding – 07” to access the long coding interface.
- Bye 0 Bit 0 Activate: Activate Bit 0 in Byte 0.
- Security Access: Click on “Security Access – 16” and enter the code “20103”.
- Adaptation: Click on “Adaptation – 10”.
- Channel – Selection HCA_On_State: Put emphasis on menu.
- Channel – Selection HCA_Warning_intensity: Put emphasis on menu.
- Channel – Selection BAP_Personalisierung: Put emphasis on not activated.
- Select the time of engagement: Set adjustment via menu – emphasis on late.
- Select Personalization spurt holding an assistant to a terminal 15 – channel: Set value to last setting.
- Select Control unit 44 (power steering): In VCDS, select “Select Control Module” and then choose “44-Steering Assist.”
- Long Coding: Click on “Coding – 07” to access the long coding interface.
- Bye 0 Bit 0 Activate: Activate Bit 0 in Byte 0.
- Select Control unit 5F (Informationselektronik): In VCDS, select “Select Control Module” and then choose “5F – Information Electr.”
- Adaptation: Click on “Adaptation – 10”.
- (49) function -Vehicle list BAP LDW_HCA_0x19 Activate: Activate.
- (21) vehicle menu operation-menu_display_Lane_Departure_Warning Activate: Activate.
- (23) vehicle menu Bedienung_menu_display_Lane_Departure_Warning_over_threshold_high – channel Activate: Activate.
4.3. Saving the Changes
- Do It!: After making the changes, click the “Do It!” button to save the new settings.
- Test: Test to confirm that the setting is functioning.
4.4. Verification
- Check the Headunit: Go to the car menu on the headunit and verify that the lane assist option is now available.
- Test Drive: Take your car for a test drive to ensure the lane assist system is working correctly.
5. Customizing LED Settings with VCDS
VCDS allows you to customize various LED settings on your Golf MK7, enhancing both the appearance and functionality of your vehicle. Here’s how to adjust some common LED settings:
5.1. Increasing Intensity of Rear Lights
- Select Control Module 09 (Central Electrics): In VCDS, select “Select Control Module” and then choose “09-Central Electrics.”
- Security Access: Click on “Security Access – 16” and enter the code “31347”.
- Adaptation: Click on “Adaptation – 10”.
- (6)-Leuchte28RFL LC11-dimmwert AB28 Value=100: Set value to 100.
- (6)-Leuchte29RFL RA64-dimmwert AB29 Value=100: Set value to 100.
- Save the Changes: Click the “Do It!” button to save the new settings.
5.2. Disabling LED Dimming When Indicating
- Select Control Module 09 (Central Electrics): In VCDS, select “Select Control Module” and then choose “09-Central Electrics.”
- Security Access: Click on “Security Access – 16” and enter the code “31347”.
- Adaptation: Click on “Adaptation – 10”.
- (12)-Leuchte2SL VLB10-Lichtfunction E2 Select: not active: Select “not active”.
- (12)-Leuchte3SL VRB21-Lichtfunction E3 Select: not active: Select “not active”.
- Save the Changes: Click the “Do It!” button to save the new settings.
5.3. Enabling Cornering Fog Lights
- Select Control Module 09 (Central Electrics): In VCDS, select “Select Control Module” and then choose “09-Central Electrics.”
- Security Access: Click on “Security Access – 16” and enter the code “31347”.
- Adaptation: Click on “Adaptation – 10”.
- (5) Leuchte12NL LB45-Lichtfunktion B12 auswählen Select: Abbiegelicht links: Select “Abbiegelicht links”.
- (5) Leuchte13NL RB5-Lichtfunktion B13 auswählen Select: Abbiegelicht rechts: Select “Abbiegelicht rechts”.
- Save the Changes: Click the “Do It!” button to save the new settings.
5.4. Adjusting Door LED Light Intensity
- Select Control Module 09 (Central Electrics): In VCDS, select “Select Control Module” and then choose “09-Central Electrics.”
- Security Access: Click on “Security Access – 16” and enter the code “31347”.
- Adaptation: Click on “Adaptation – 10”.
- (6)-Leuchte16BLK SLB35BLK SL KC9-Dimmwert AB 16 Select: max 127: Select “max 127”.
- (6)-Leuchte17TFLR SRB3TFL R SR KC3-Dimmwert AB 17 Select: max 127: Select “max 127”.
- Save the Changes: Click the “Do It!” button to save the new settings.
5.5. LED Number Plate Error Deletion
- Select Control Module 09 (Central Electrics): In VCDS, select “Select Control Module” and then choose “09-Central Electrics.”
- Security Access: Click on “Security Access – 16” and enter the code “31347”.
- Adaptation: Click on “Adaptation – 10”.
- Select – Leuchte25KZL HA59 – Lasttyp 25 Change value to Allgemeine LED: Change value to “Allgemeine LED”.
- Select Leuchte25KZL HA59 – Dimmwert AB 25 Change value to 127: Change value to 127.
- Save the Changes: Click the “Do It!” button to save the new settings.
6. Other Useful VCDS Tweaks for Your Golf MK7
Besides lane assist and LED settings, VCDS offers a variety of other useful tweaks to enhance your Golf MK7. Here are some popular options:
6.1. Disabling Soundaktor
The Soundaktor unit creates a fake engine sound when driving. Disabling it can provide a more natural driving experience.
- Select Control Module 47 (Sound System): In VCDS, select “Select Control Module” and then choose “47-Sound System.”
- Adaptation: Click on “Adaptation – 10”.
- Select ‘Channel of Structure Bore Sound’: Select ‘Channel of Structure Bore Sound’.
- Change Value: Change the value from 100% to 0% or any desired value.
- Save the Changes: Click the “Do It!” button to save the new settings.
6.2. Enabling Traffic Information (TMC) on Headunit
This enables the ‘Traffic’ button on the headunit to display nearby traffic information using radio frequency data.
- Select Control Module 5F (Information Electrical): In VCDS, select “Select Control Module” and then choose “5F-Information Electr.”
- Adaptation: Click on “Adaptation – 10”.
- Change Fee Based Traffic Information (TMC) value to ‘1024’: Change the value to ‘1024’.
- Enable Traffic Programme (TP) and RDS: In the normal radio settings, enable ‘Traffic Programme (TP)’ and RDS.
6.3. Enabling Off Road Display
This enables an ‘Off Road Display’ on the headunit, showing compass and other off-road related information.
- Select Control Module 5F (Information Electrical): In VCDS, select “Select Control Module” and then choose “5F-Information Electr.”
- Security Access: Click on “Security Access – 16” and enter the code “31347” or “20103”.
- Adaptation: Click on “Adaptation – 10”.
- Change – (81) Car_Function_Adaptations_Gen2-menu_display_compass to Active: Change to Active.
- Change – (83) Car_Function_Adaptations_Gen2-menu_display_compass_over_threshold_high to Active: Change to Active.
- Change – (41) Car_Function_List_BAP_Gen2-compass_0x15Â to Active: Change to Active.
- Restart the MIB Headunit: Hold the Power button for >10 Seconds to restart the MIB Headunit.
6.4. Heated Seat Memory
Heated seats will resume the last setting upon re-entering the vehicle.
- Select Control Module 08 – HVAC: In VCDS, select “Select Control Module” and then choose “08-HVAC.”
- Adaptation: Click on “Adaptation – 10”.
- Change “Retention of the seat heater level driver” to active: Change to active.
- Change “Retention of the seat heater level passenger” to active: Change to active.
- Save the Changes: Click the “Do It!” button to save the new settings.
6.5. Starting Vibration Reduction
In wheel slip scenarios, this tweak will stop the intervention of the braking system, allowing you to continue spinning the wheels.
- Select Control Module 03 – Brake: In VCDS, select “Select Control Module” and then choose “03-ABS Brakes.”
- Adaptation: Click on “Adaptation – 10”.
- Starting Vibration Reduction: Set to Starting Vibration Reduction and Torque Limitation to ‘Deactivated’.
- Save the Changes: Click the “Do It!” button to save the new settings.
6.6. Haldex All-Wheel-Drive Adjust Traction
Changing this setting to ‘Increased Traction’ improves handling and makes the car feel like a permanent AWD system.
- Select AWD Control Unit: In VCDS, select the AWD Control Unit.
- Adaptation: Click on “Adaptation – 10”.
- Logic: Choose from ‘Standard, Increased Traction, Less Noise’.
- Save the Changes: Click the “Do It!” button to save the new settings.
6.7. Drive Profile Display in Cluster
This tweak will show the driver profile name in the cluster when switching modes.
- Select Control Unit 19: In VCDS, select “Select Control Module” and then choose “19-CAN Gateway.”
- Control Unit Long Coding: Click on “Coding – 07”.
- Byte 08 Bit 4 Activate: Activate Bit 4.
- Save the Changes: Click the “Do It!” button to save the new settings.
6.8. ESP Option in Car Settings
Show the Electronic Stability Program setting within the car menu on the headunit.
- Select Control Unit 03: In VCDS, select “Select Control Module” and then choose “03-ABS Brakes.”
- Control Unit Long Coding: Click on “Coding – 07”.
- Byte 29 New Value 09: Set the new value to 09.
- Save the Changes: Click the “Do It!” button to save the new settings.
6.9. Oil Temperature Display in Cluster
Displays the engine oil temperature in the cluster.
- Select Control Unit 17: In VCDS, select “Select Control Module” and then choose “17-Instruments.”
- Control Unit Long Coding: Click on “Coding – 07”.
- Byte 10 Bit 01 Activate: Activate Bit 01.
- Save the Changes: Click the “Do It!” button to save the new settings.
6.10. Fog Lights On with Indicator
Fog lights will turn on when indicating. Fog lights must be fitted.
- Select Control Unit 09 (Central Electrics): In VCDS, select “Select Control Module” and then choose “09-Central Electrics.”
- Security Access: Click on “Security Access – 16” and enter the code “31347”.
- Adaptation: Click on “Adaptation – 10”.
- (2)-Static AFS Light Vorschrift Value = FMVSS 517 108: Set the value to FMVSS 517 108.
- Save the Changes: Click the “Do It!” button to save the new settings.
6.11. Disable Start / Stop (Voltage Method)
Disable engine Start / Stop functionality.
- Select Control unit 19: In VCDS, select “Select Control Module” and then choose “19-CAN Gateway.”
- Adaptation: Click on “Adaptation – 10”.
- Start Stop Limit voltage Value=12: Set the value to 12.
- Save the Changes: Click the “Do It!” button to save the new settings.
6.12. XDS Differential Lock Adjustment
XDS is an electronic differential lock that improves traction when cornering fast. This tweak will vary the aggressiveness of XDS.
- Select Control unit 03 (ABS): In VCDS, select “Select Control Module” and then choose “03-ABS Brakes.”
- Adaptation: Click on “Adaptation – 10”.
- Select: Expanded Electronic Differential Lock Options: Choose from ‘Weak – Normal – Hard’.
- Save the Changes: Click the “Do It!” button to save the new settings.
6.13. Brake Drying System
This function increases safety in heavy rain by applying the brake pads to the brake discs at prescribed intervals.
- Select Control unit 03 (ABS): In VCDS, select “Select Control Module” and then choose “03-ABS Brakes.”
- Adaptation: Click on “Adaptation – 10”.
- Select: Disc Drying Options: Choose from ‘Weak-Normal-Hard’.
- Save the Changes: Click the “Do It!” button to save the new settings.
6.14. Auto Close Windows When Raining
When rain is detected on the rain sensor, the windows will automatically close.
- Select Control unit 09 (Central Electrics): In VCDS, select “Select Control Module” and then choose “09-Central Electrics.”
- Security Access: Click on “Security Access – 16” and enter the code “31347”.
- Adaptation: Click on “Adaptation – 10”.
- (15) Access Control 2-Regenschliessen_ein_aus Value: Permanent: Set Value to Permanent.
- (16) Access Control 2-Regenschliessen_art Value: Permanent: Set Value to Permanent.
- (28) Zugriffskontrolle 2-Menuesteuerung Regenschliessen Value:Aktif: Set Value to Aktif.
- Select Control unit 09 (Central Electrics) Control unit Long Coding Subsystem: Rain / Light Sensor (RLS):
- Byte 0 Bit 1-Bit 2 DeActivate: DeActivate.
- Save the Changes: Click the “Do It!” button to save the new settings.
6.15. Activation of Optical Parking Sensor (OPS)
Enable a visual graphic on the headunit when parking the vehicle. Uses parking sensors to display obstacles.
- Select Control unit 10 (Assistance Situation): In VCDS, select “Select Control Module” and then choose “10-Park/Steer Assist.”
- Security Access: Click on “Security Access – 16” and enter the code “71679”.
- Control unit Long Coding: Click on “Coding – 07”.
- Byte 2 Bit 0 Activate: Activate Bit 0.
- Save the Changes: Click the “Do It!” button to save the new settings.
6.16. Alternating Indicator Lights (Pace Car Lights)
For vehicles with LED tail lights, the inner and outer rear indicators will alternate when indicating or with hazard lights.
- Select Control unit 09 (Central Electrics): In VCDS, select “Select Control Module” and then choose “09-Central Electrics.”
- Security Access: Click on “Security Access – 16” and enter the code “31347”.
- Adaptation: Click on “Adaptation – 10”.
- (16)-Leuchte2SL VLB10-Lichtfunktion G 2 Select: Blinken Links Dunkelphase: Select Blinken Links Dunkelphase.
- (18)-Leuchte2SL VLB10-Dimmwert GH 2 Select: yeni deÄŸer 0: Select yeni deÄŸer 0.
- (19)-Leuchte2SL VLB10-Dimming Direction GH 2 Select: yeni deÄŸer minimize: Select yeni deÄŸer minimize.
- (16)-Leuchte3SL VRB21-Lichtfunktion G 3 Select: Blinken Links Dunkelphase: Select Blinken Links Dunkelphase.
- (18)-Leuchte3SL VRB21-Dimmwert GH 3 Select: yeni deÄŸer 0: Select yeni deÄŸer 0.
- (19)-Leuchte3SL VRB21-Dimming Direction GH 3 Select: yeni deÄŸer minimize: Select yeni deÄŸer minimize.
- Save the Changes: Click the “Do It!” button to save the new settings.
6.17. Fan Speed Display on Auto Mode
Show the A/C fan speed when operating in auto mode.
- Select Control unit 08 (Air condition A/C): In VCDS, select “Select Control Module” and then choose “08-HVAC.”
- Control unit Long Coding: Click on “Coding – 07”.
- Byte 11 Bit 6 Activate: Activate Bit 6.
- Save the Changes: Click the “Do It!” button to save the new settings.
6.18. Avoid Dimming LED Lights when Indicating
LED running lights typically dim when indicating. This tweak will remove this behavior.
- Select Control unit 09 (Central Electrics): In VCDS, select “Select Control Module” and then choose “09-Central Electrics.”
- Security Access: Click on “Security Access – 16” and enter the code “31347”.
- Adaptation: Click on “Adaptation – 10”.
- (12)-Leuchte2SL VLB10-Lichtfunction E2 Select: not active: Select not active.
- (12)-Leuchte3SL VRB21-Lichtfunction E3 Select: not active: Select not active.
- Save the Changes: Click the “Do It!” button to save the new settings.
6.19. Adjusting Cornering Fog Light Sensitivity (Speed Threshold)
With the above tweak enabled, this will adjust the speed in which cornering fog lights will turn on. Fog lights must be fitted.
- Select Control unit 09 (Central Electrics): In VCDS, select “Select Control Module” and then choose “09-Central Electrics.”
- Security Access: Click on “Security Access – 16” and enter the code “31347”.
- Adaptation: Click on “Adaptation – 10”.
- (3) Static cornering light lower speed threshold New Value = 0: Set the new value to 0.
- (4) Static cornering light upper speed threshold New Value = 50: Set the new value to 50.
- Save the Changes: Click the “Do It!” button to save the new settings.
6.20. Mirror Down in Reverse
The passenger mirror will dip when in reverse gear.
- Select Control unit 52 (Türelektr. Beifahr.): In VCDS, select “Select Control Module” and then choose “52-Door Elect, Pass.”
- Control unit Long Coding: Click on “Coding – 07”.
- Byte 04 Bit 2-Activate Bit 3-Activate: Activate Bit 2 and Bit 3.
- Select Control unit 09 (Central Electrics): In VCDS, select “Select Control Module” and then choose “09-Central Electrics.”
- Security Access: Click on “Security Access – 16” and enter the code “31347”.
- Adaptation: Click on “Adaptation – 10”.
- (15) Access Control 2-Spiegelabsenkung bei Rueckwaertsfahrt Value=Active: Set Value to Active.
- (20) Access Control 2-Menuesteuerung Spiegelabsenkung Value=Active: Set Value to Active.
- Save the Changes: Click the “Do It!” button to save the new settings.
6.21. Hill Hold Assist Duration
Adjust how long the brakes ‘hold’ the vehicle when taking off on a steep hill.
- Select Control unit 03 (Brakes): In VCDS, select “Select Control Module” and then choose “03-ABS Brakes.”
- Adaptation: Click on “Adaptation – 10”.
- Select Berganfahrassistent: Adjust as you wish. (default: Normal).
- Save the Changes: Click the “Do It!” button to save the new settings.
6.22. Refuel Amount in Cluster
After refuelling, the amount in liters will be displayed in the cluster.
- Select Control unit 17 (Dashboard): In VCDS, select “Select Control Module” and then choose “17-Instruments.”
- Control unit long coding: Click on “Coding – 07”.
- Byte 10 Bit 4 Activate: Activate Bit 4.
- Save the Changes: Click the “Do It!” button to save the new settings.
6.23. Coming Home Lighting Duration
After stopping the engine, your headlights will remain on for the specified duration.
- Select Control unit 09 (Central Electrics): In VCDS, select “Select Control Module” and then choose “09-Central Electrics.”
- Security Access: Click on “Security Access – 16” and enter the code “31347”.
- Adaptation: Click on “Adaptation – 10”.
- (3) Comfort illumination-Menueeinstellung Cominghome Value (Default: 15 seconds – maximum: 60 seconds): Set the value as desired.
- Save the Changes: Click the “Do It!” button to save the new settings.
6.24. Coming Home / Leaving Home with Fog Lights
Adds fog lights to coming home / leaving home functions.
- Select Control unit 09 (Central Electrics): In VCDS, select “Select Control Module” and then choose “09-Central Electrics.”
- Security Access: Click on “Security Access – 16” and enter the code “31347”.
- Adaptation: Click on “Adaptation – 10”.
- (4) Comfort lighting Coming Home Lights Value :Nebellicht(Low Beam): Set Value to Nebellicht(Low Beam).
- Save the Changes: Click the “Do It!” button to save the new settings.
6.25. Lock Acknowledge with Horn
The horn will beep when locking the vehicle.
- Select Control unit 09 (Central Electrics): In VCDS, select “Select Control Module” and then choose “09-Central Electrics.”
- Security Access: Click on “Security Access – 16” and enter the code “31347”.
- Adaptation: Click on “Adaptation – 10”.
- (1) feedback signals-Acoustic feedback Value=Yes: Set Value to Yes.
- (2) Lock feedback signals-Acoustic feedback Value=Yes: Set Value to Yes.
- (8) feedback signals-Acoustic feedback global Value=Aktive: Set Value to Aktive.
- (7) feedback signals-Acoustic feedback Value=Active: Set Value to Active.
- (8) feedback signals-Acoustic feedback duration Value=Short(kurz): Set Value to Short(kurz).
- Save the Changes: Click the “Do It!” button to save the new settings.
6.26. Deactivate Warning Tone for Parking System
Disables the sounder for the parking sensors.
- Select Control unit 03 (Brakes): In VCDS, select “Select Control Module” and then choose “03-ABS Brakes.”
- Adaptation: Click on “Adaptation – 10”.
- Park Assist Activation Tone Value = OFF: Set Value to OFF.
- Save the Changes: Click the “Do It!” button to save the new settings.
6.27. Parking Warning Speed Change
Sets the speed where the parking sensors will be disabled.
- Select Control unit 03 (Brakes): In VCDS, select “Select Control Module” and then choose “03-ABS Brakes.”
- Adaptation: Click on “Adaptation – 10”.
- Shutdown parking aid Value = 20km/h: Set Value to 20km/h.
- Save the Changes: Click the “Do It!” button to save the new settings.
6.28. Hide Optical Parking System Warning Line
Disables the ‘Please check surroundings’ message that appears on the headunit when parking.
- Select Control unit 03 (Brakes): In VCDS, select “Select Control Module” and then choose “03-ABS Brakes.”
- Security Access: Click on “Security Access – 16” and enter the code “71679”.
- Control unit Coding: Click on “Coding – 07”.
- Byte 1 Bit 5 DeActivate: DeActivate.
- Save the Changes: Click the “Do It!” button to save the new settings.
6.29. Closing Windows When Ignition Off
Allows you to operate all windows after the ignition has been switched off and doors opened.
- Select Control unit 09 (Central Electrics): In VCDS, select “Select Control Module” and then choose “09-Central Electrics.”
- Security Access: Click on “Security Access – 16” and enter the code “31347”.
- Adaptation: Click on “