
Encountering the dreaded check engine light on your dashboard can be unsettling, especially when accompanied by a cryptic error code. One such code that car owners might face is P2422, an OBDII/EOBD code pointing towards a problem within the Evaporative Emission Control System (EVAP). Specifically, P2422 indicates a “Evaporative Emission System Vent Valve Stuck Closed”. This article delves into a practical, DIY approach to resolving the P2422 code, focusing on a common culprit: moisture accumulation in the vapor canister.
Understanding the P2422 Code and Your Vehicle’s EVAP System
Before diving into the repair process, it’s crucial to understand what the P2422 code signifies and the role of the EVAP system in your vehicle. The EVAP system is designed to prevent fuel vapor from escaping into the atmosphere. It captures these vapors and stores them in a charcoal canister until the engine is ready to burn them. The system uses various valves and sensors to control this process, including a vent valve that allows fresh air into the system and a purge valve that releases the stored vapors to the engine.
The P2422 code indicates that the EVAP vent valve is stuck closed. This can prevent the system from venting properly, leading to pressure imbalances and triggering the check engine light. While a faulty vent valve or its wiring can be the cause, another often overlooked issue is moisture buildup within the charcoal canister itself.
Diagnosing the Issue: Beyond the Vent Valve
When faced with a P2422 code, many guides immediately point to replacing the vapor canister vent valve. While this might be the solution in some cases, it’s essential to conduct a more thorough diagnosis before jumping to conclusions. In my experience, after confirming the functionality of both the fuel tank pressure sensor and the vapor canister purge valve, and inspecting all vent lines for blockages and damage, I still encountered the persistent P2422 code.
This led me to suspect an issue within the vapor canister itself. Upon removing the vapor canister purge valve, I discovered a significant amount of moisture present. This moisture, likely condensed water vapor, can accumulate over time within the sealed canister, especially in environments with temperature fluctuations. This moisture can interfere with the proper operation of the vent valve, potentially causing it to stick or malfunction, thus triggering the P2422 code.
The DIY Solution: Removing Moisture from the Vapor Canister
Based on this discovery, I decided to address the moisture issue directly. Here’s a step-by-step guide on how to safely and effectively remove moisture from your vehicle’s vapor canister, potentially resolving the P2422 code without replacing parts:
Step 1: Accessing the Vapor Canister
Locate the vapor canister in your vehicle. Its location varies depending on the make and model but is often found near the fuel tank or under the vehicle. Consult your vehicle’s repair manual for the precise location and removal instructions.
Step 2: Removing the Vapor Canister Purge Valve
Carefully disconnect and remove the vapor canister purge valve from the canister. This valve is typically attached to the canister with a clip or screws. Observe the valve housing and the canister port for any signs of moisture, as I did.
Step 3: Moisture Extraction – The Compressed Air Method (with Caution)
This is the core of the DIY fix. With the vapor canister purge valve removed, you can use compressed air to gently expel any accumulated moisture. Crucially, before applying compressed air, ensure you have removed the fuel tank pressure sensor from the canister. Forgetting this step can severely damage the delicate sensor due to overpressure.
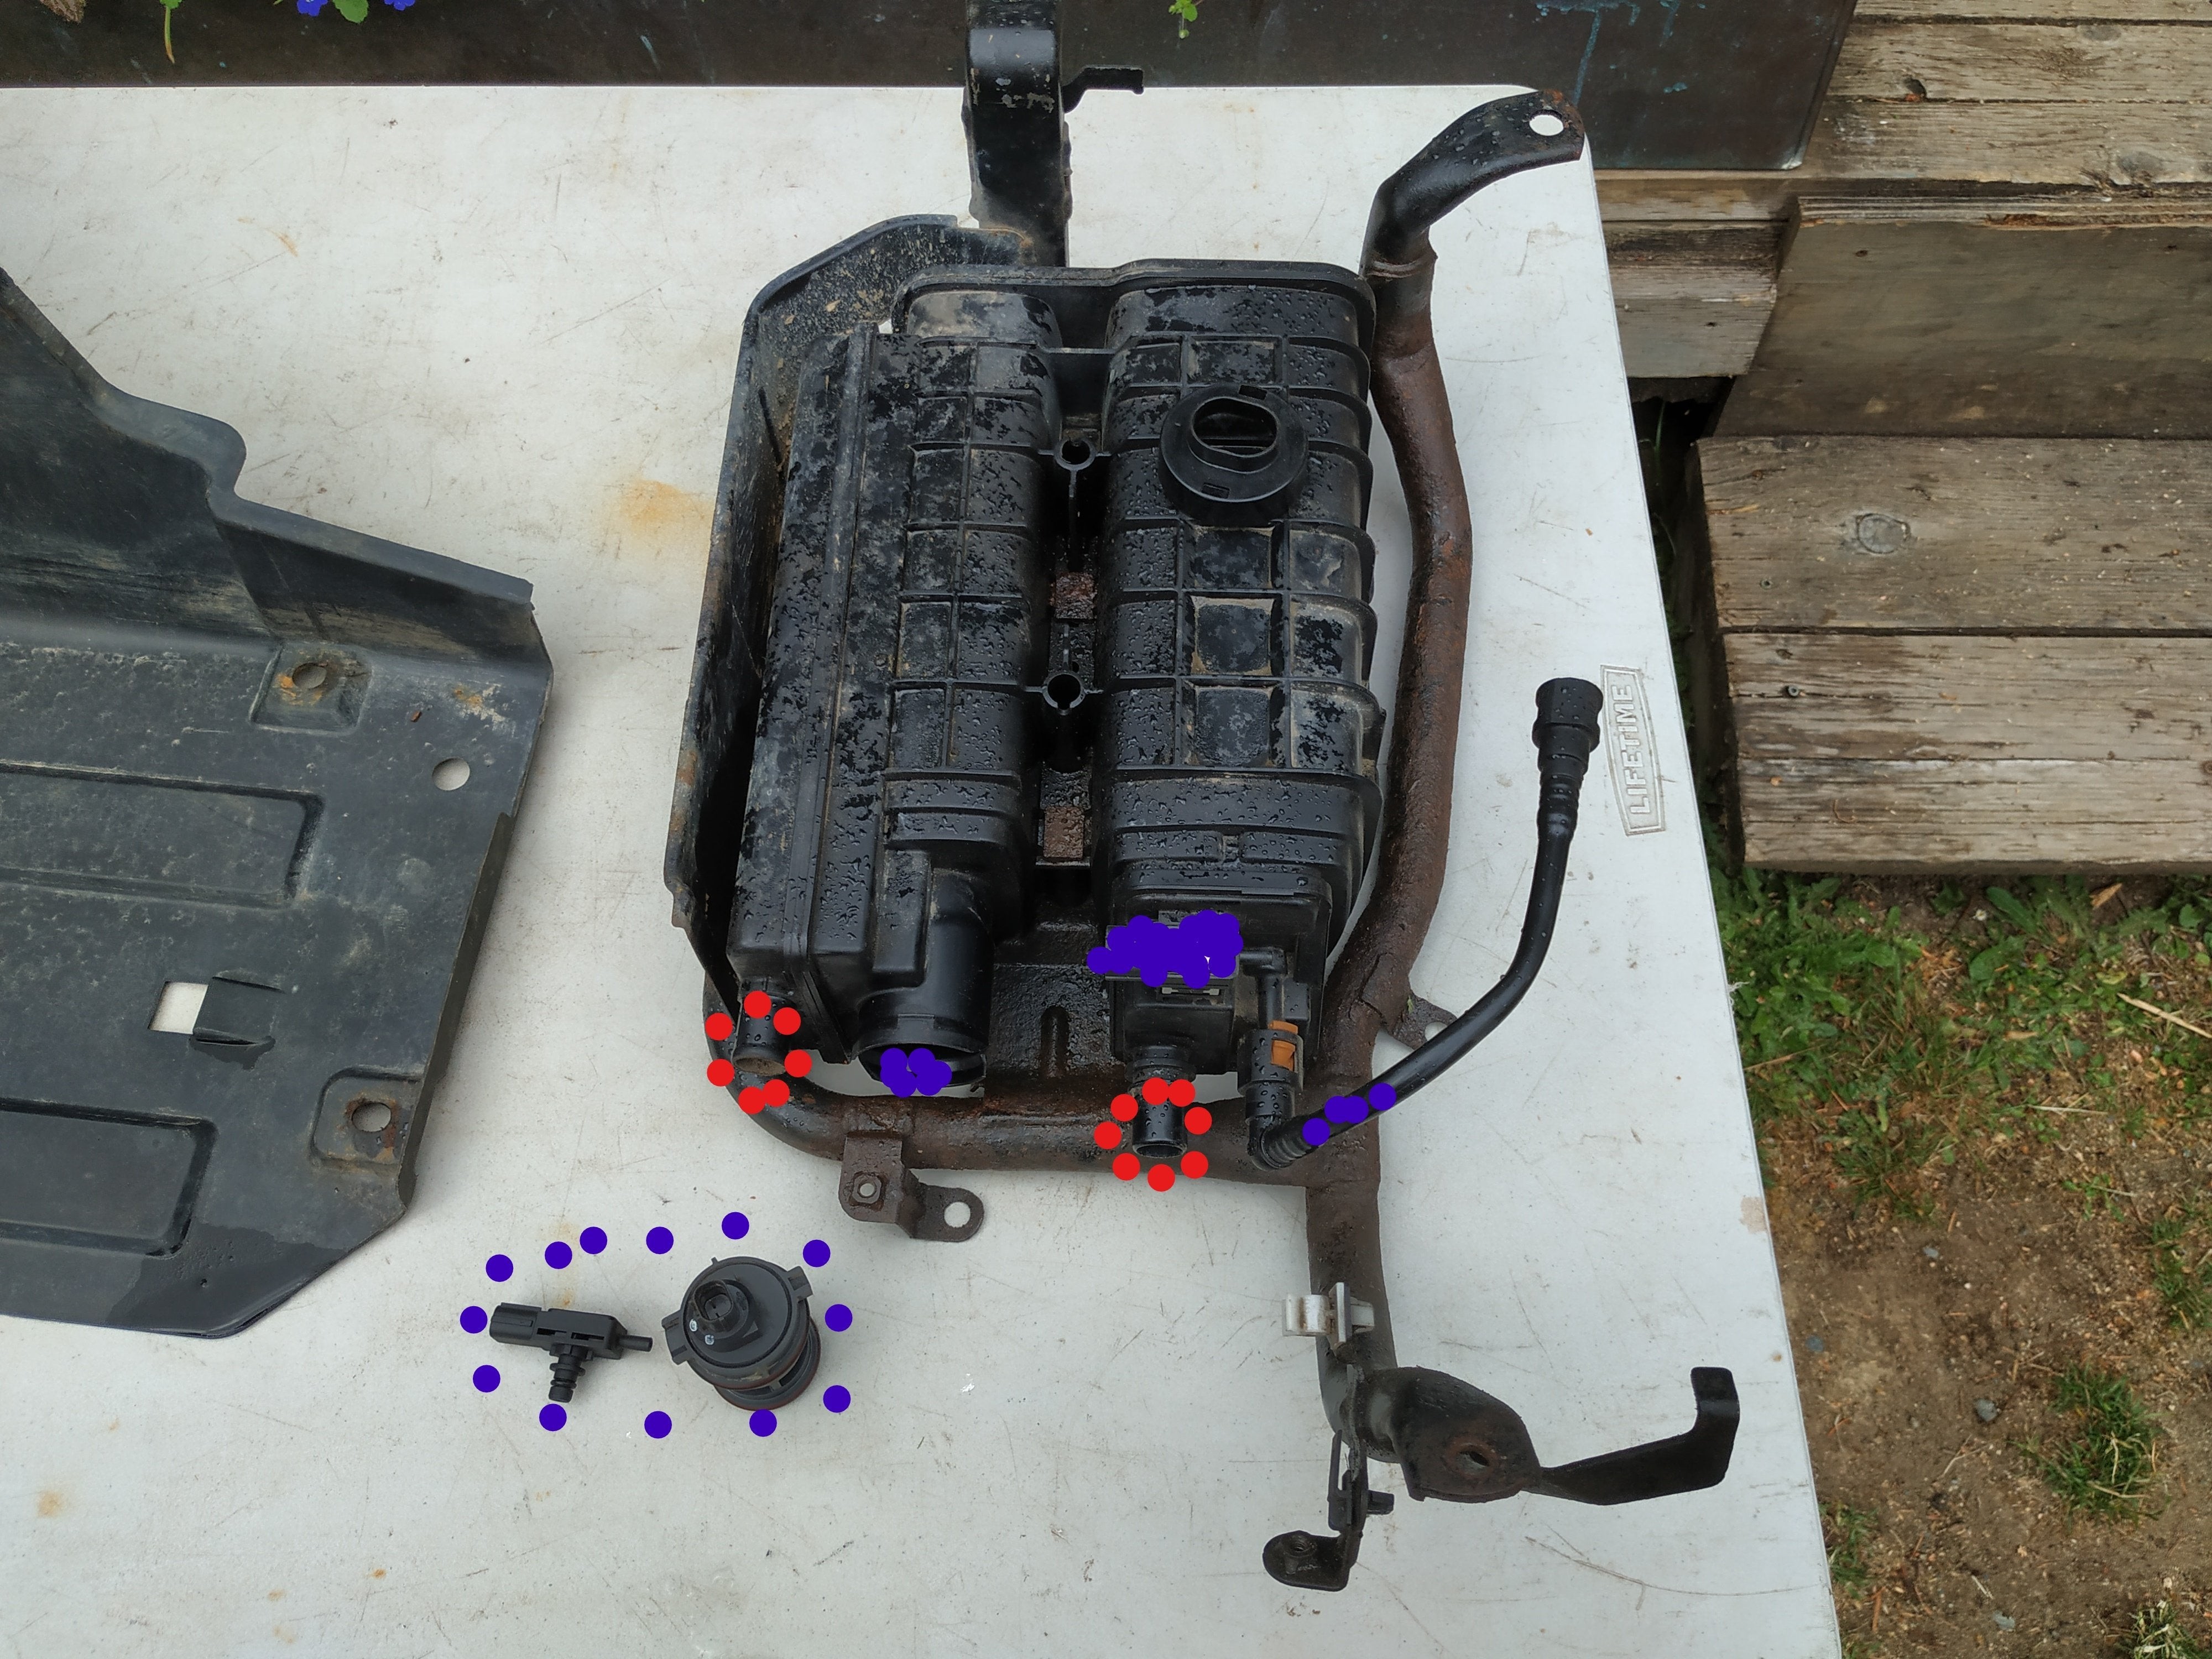 Vapor Canister with Air Input and Sensor Location Highlighted
Image Alt Text: Diagram of a vapor canister showing the red circle indicating where compressed air was gently introduced and the blue circle highlighting the location where the fuel tank pressure sensor must be removed prior to applying air pressure to prevent damage during moisture removal for P2422 code troubleshooting.
Begin by applying low-pressure compressed air to the ports of the canister. You will likely observe water droplets exiting the canister. Gradually increase the air pressure, being mindful not to over-pressurize the system. Continue this process for approximately 10 minutes, or until you primarily smell strong fuel vapor and no longer see water droplets being expelled. The compressed air helps to force out the trapped moisture and dry the canister.
Step 4: Reassembly and Testing
Once you are confident that the moisture has been removed, reassemble all components. Ensure the fuel tank pressure sensor is securely reinstalled (if removed), and reconnect the vapor canister purge valve. Remount the canister back in its original location.
After reassembly, clear the P2422 code using an OBDII scanner. Start your vehicle and monitor for the check engine light to reappear. In my case, after this procedure, the P2422 code did not return, even after multiple drives and fuel refills, suggesting that moisture removal was the effective solution.
Important Considerations and Disclaimer:
- Safety First: Work in a well-ventilated area when dealing with fuel vapor. Avoid open flames or sparks.
- Sensor Removal is Mandatory: Always remove the fuel tank pressure sensor before applying compressed air to the vapor canister to prevent damage.
- Gentle Air Pressure: Do not use excessive air pressure, as this could damage the canister or other EVAP system components.
- Not a Guaranteed Fix: While moisture removal can resolve P2422 in many cases, other underlying issues like a faulty vent valve, wiring problems, or leaks in the EVAP system might require further diagnosis and repair.
- Professional Assistance: If you are not comfortable performing these steps yourself, or if the P2422 code persists after moisture removal, consult a qualified automotive technician for professional diagnosis and repair.
Conclusion: A Practical Approach to P2422
The P2422 code can be a frustrating issue, but understanding the potential causes and employing a systematic approach to diagnosis can lead to effective solutions. By considering moisture buildup in the vapor canister as a possible culprit and utilizing the DIY moisture removal technique described, you may be able to resolve the P2422 code and restore your vehicle’s EVAP system to proper working order, saving time and money on unnecessary parts replacements. Always prioritize safety and consult professional help when needed to ensure proper and safe vehicle maintenance.