Encountering a check engine light can be unsettling, and deciphering the error codes is the first step towards resolving the issue. Among the common OBD-II fault codes, P0031 indicates a problem within the oxygen sensor heater circuit. This article will delve into the specifics of the P0031 code, helping you understand its causes, symptoms, and effective solutions to get your vehicle running smoothly again.
What is the OBD-II P0031 Code?
The P0031 diagnostic trouble code (DTC) is categorized as an OBD-II powertrain code, specifically related to the oxygen (O2) sensor circuit. It signals “HO2S Heater Circuit Low (Bank 1, Sensor 1).” In simpler terms, this means the engine control module (ECM) or powertrain control module (PCM) has detected a low voltage or low resistance in the heater circuit of the upstream oxygen sensor (Sensor 1) located in Bank 1 of your engine.
Bank 1 refers to the side of the engine containing cylinder number one. Sensor 1 is the sensor positioned before the catalytic converter, playing a crucial role in measuring the air-fuel ratio in the exhaust gases. Oxygen sensors need to reach a certain operating temperature to function accurately. The integrated heater element helps the sensor reach this temperature quickly, especially during cold starts, ensuring optimal engine performance and reduced emissions. The P0031 code arises when the ECM/PCM detects that the heater circuit’s resistance is lower than expected, typically below 0.8 amps, indicating a potential short or other electrical fault.
Symptoms of a P0031 Error Code
While the P0031 code primarily relates to the oxygen sensor heater circuit, it can manifest in several symptoms, often subtle but important to recognize:
- Check Engine Light Illumination: This is the most immediate and common symptom. The malfunction indicator lamp (MIL), or check engine light, will illuminate on your dashboard to alert you to a detected issue.
- Reduced Fuel Efficiency: An improperly functioning oxygen sensor heater can affect the accuracy of air-fuel ratio readings. This can lead to the engine running richer (more fuel) or leaner (less fuel) than optimal, potentially decreasing fuel economy.
- Poor Engine Performance: In some cases, you might experience slight hesitations, rough idling, or decreased engine power. This is less common with a P0031 code compared to other engine issues but can occur if the sensor malfunction affects overall engine management.
- Failed Emissions Test: Because the oxygen sensor plays a critical role in emissions control, a P0031 code can cause your vehicle to fail an emissions test.
It’s important to note that these symptoms can be associated with various other engine problems. Therefore, using an OBD-II scanner is crucial to confirm that the P0031 code is indeed the culprit.
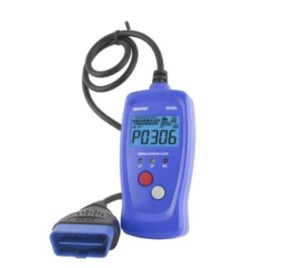 OBD-II Scanner diagnosing car
Potential Causes of the P0031 Code
Several factors can trigger the P0031 code. Understanding these potential causes is essential for effective diagnosis and repair:
- Faulty Oxygen Sensor Heater: The heater element within the oxygen sensor itself can fail due to age, wear and tear, or electrical damage. This is the most common cause of P0031.
- Wiring Issues: Problems in the wiring harness connected to the oxygen sensor are frequently responsible. This can include:
- Short circuit: Wires may be damaged, frayed, or melted, causing a short to ground and low resistance in the heater circuit.
- Open circuit: A broken or disconnected wire can interrupt the circuit, although this typically results in a “high” circuit code (like P0032) rather than a “low” circuit code. However, damage can sometimes present in unexpected ways.
- Corrosion: Corrosion within connectors can increase resistance and potentially lead to inaccurate readings or circuit malfunctions.
- Connector Problems: Loose, corroded, or damaged electrical connectors at the oxygen sensor or ECM/PCM can disrupt the heater circuit.
- Relay or Fuse Issues: Although less common, a blown fuse or a faulty relay in the oxygen sensor heater circuit can also cause a P0031 code.
- ECM/PCM Failure: In rare instances, a fault within the ECM or PCM itself can cause incorrect diagnosis of the oxygen sensor heater circuit, leading to a P0031 code. This is usually considered after ruling out other possibilities.
Diagnosing the P0031 Code: A Step-by-Step Approach
Diagnosing a P0031 code requires a systematic approach to pinpoint the root cause. Here’s a step-by-step guide for DIY mechanics:
-
OBD-II Scan and Code Verification: Use an OBD-II scanner to confirm the presence of the P0031 code and check for any other related fault codes. Record all codes present. Clear the codes and test drive the vehicle to see if the P0031 code returns.
-
Visual Inspection:
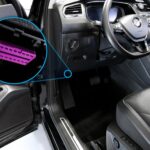
- Oxygen Sensor: Locate the Bank 1 Sensor 1 oxygen sensor. Visually inspect the sensor and its wiring for any obvious damage, such as cracks, breaks, or melted plastic.
- Wiring Harness: Carefully examine the wiring harness leading to the sensor for any signs of fraying, cuts, or damage. Pay close attention to areas where wiring might rub against engine components.
- Connectors: Inspect the electrical connectors at the sensor and the ECM/PCM for corrosion, loose pins, or damage.
-
Fuse and Relay Check: Consult your vehicle’s repair manual or wiring diagram to locate the fuse and relay associated with the Bank 1 Sensor 1 oxygen sensor heater circuit. Check the fuse for continuity and test the relay for proper function.
-
Voltage Test:
- Power Supply: Using a multimeter, check for voltage at the oxygen sensor heater connector. Typically, there should be approximately 12 volts when the ignition is on. Refer to your vehicle’s service manual for the exact specifications. Lack of voltage indicates a problem upstream, possibly in the wiring, fuse, relay, or ECM/PCM.
- Ground Circuit: Verify the ground circuit is intact. Use a multimeter to check for continuity between the ground pin at the sensor connector and a known good ground point on the vehicle.
-
Resistance Test:
- Heater Circuit Resistance: Disconnect the oxygen sensor and measure the resistance across the heater terminals on the sensor itself using a multimeter. Compare the reading to the specifications in your vehicle’s service manual. A very low resistance (close to zero ohms) or an open circuit (infinite resistance) indicates a faulty heater element. The original article mentioned resistance below 0.8A, but resistance is measured in Ohms, and amperage in Amps. This likely refers to a current draw during operation, but for static testing, resistance in Ohms is the key measurement.
-
Wiring Continuity and Short to Ground Test: If wiring damage is suspected, use a multimeter to perform continuity tests on each wire in the heater circuit to identify breaks or shorts to ground.
-
ECM/PCM Diagnosis (Last Resort): If all other components and wiring are ruled out, and the P0031 code persists, a faulty ECM/PCM could be the issue. However, ECM/PCM problems are rare, and this should be considered only after thorough investigation of other possibilities. Consulting a professional technician is recommended for ECM/PCM diagnosis and replacement.
How to Fix the OBD-II P0031 Code
The repair procedure for a P0031 code depends on the identified cause. Here are common solutions:
-
Oxygen Sensor Replacement: If the resistance test indicates a faulty heater element, replacing the Bank 1 Sensor 1 oxygen sensor is usually the most effective solution. Ensure you use a high-quality replacement sensor compatible with your vehicle.
-
Wiring Repair: If wiring issues are found, repair or replace the damaged wiring sections. This may involve splicing wires, replacing connectors, or repairing frayed insulation. Ensure all connections are secure and properly insulated.
-
Connector Cleaning or Replacement: Clean corroded connectors with electrical contact cleaner. If connectors are damaged beyond cleaning, replace them.
-
Fuse or Relay Replacement: If a blown fuse or faulty relay is identified, replace the component with a new one of the correct rating.
-
ECM/PCM Repair or Replacement (Professional Help): If an ECM/PCM fault is suspected, professional diagnosis and repair are necessary. ECM/PCM replacement often requires programming to match your vehicle’s specific configuration.
After performing any repairs, clear the OBD-II codes using a scanner and test drive the vehicle to confirm that the P0031 code does not return and that the check engine light is off. Re-scan for codes to ensure no new issues have arisen.
Addressing a P0031 code promptly is important for maintaining optimal engine performance, fuel efficiency, and emissions compliance. While some diagnostic and repair steps can be performed by DIY mechanics, more complex issues or ECM/PCM related problems may require the expertise of a qualified automotive technician. Using professional-grade diagnostic tools, like those offered by Autel, can greatly simplify and expedite the troubleshooting and repair process for OBD-II fault codes like P0031.