Autel Pc Link V1.10 is an essential software component for maximizing the capabilities of your Autel diagnostic tools, as it enhances automotive diagnostics. At CARDIAGTECH.NET, we ensure you harness the full potential of this software. Streamline your workflow with efficient vehicle communication and advanced data analysis. Explore vehicle diagnostics, data analysis, and tool compatibility with Autel PC Suite.
1. Understanding Autel PC Link V1.10
Autel PC Link V1.10 serves as a crucial bridge between your Autel diagnostic tools and your computer, enabling seamless data transfer, software updates, and advanced functionalities. This connectivity software enhances the capabilities of your Autel devices, making complex diagnostic tasks more manageable and efficient. By facilitating a stable and reliable connection, Autel PC Link V1.10 ensures that you can leverage the full potential of your diagnostic equipment.
1.1 What is Autel PC Link V1.10?
Autel PC Link V1.10 is a software application designed to connect Autel diagnostic tools to a personal computer. This connection allows users to perform various functions, including:
- Software Updates: Downloading and installing the latest software updates for your Autel tools.
- Data Logging: Transferring diagnostic data from the tool to the computer for detailed analysis.
- Report Printing: Generating and printing diagnostic reports.
- Firmware Updates: Updating the firmware of the Autel tool to ensure optimal performance.
- Data Backup: Backing up important data from the Autel tool to the computer.
This software is essential for keeping your Autel diagnostic tools up-to-date and functional, ensuring accurate and efficient vehicle diagnostics.
1.2 Why is Autel PC Link V1.10 Important?
Autel PC Link V1.10 is vital for several reasons:
- Keeping Tools Updated: Regular software updates ensure your Autel tool has the latest vehicle coverage, bug fixes, and feature enhancements.
- Enhancing Data Analysis: Transferring data to a computer allows for more detailed analysis using larger screens and more powerful processing capabilities.
- Improving Workflow: Streamlining the process of generating and printing diagnostic reports saves time and improves overall workflow efficiency.
- Ensuring Optimal Performance: Firmware updates optimize the tool’s performance, ensuring accurate and reliable diagnostic results.
- Data Security: Backing up data protects against data loss, preserving critical diagnostic information.
Without Autel PC Link V1.10, managing and maintaining your Autel diagnostic tools would be significantly more challenging and time-consuming.
1.3 Key Features of Autel PC Link V1.10
Autel PC Link V1.10 comes with a range of features designed to enhance your diagnostic workflow:
- User-Friendly Interface: The software features an intuitive interface that is easy to navigate, even for users with limited technical experience.
- Fast Data Transfer: High-speed data transfer ensures quick and efficient transfer of diagnostic information.
- Automatic Updates: The software can be configured to automatically check for and download updates, ensuring you always have the latest version.
- Comprehensive Reporting: Generate detailed diagnostic reports with customizable options for data presentation.
- Secure Data Backup: Easily back up and restore your Autel tool’s data to prevent loss of critical information.
These features collectively make Autel PC Link V1.10 an indispensable tool for automotive technicians and shop owners.
2. System Requirements for Autel PC Link V1.10
Before installing Autel PC Link V1.10, it is essential to ensure that your computer meets the minimum system requirements. Meeting these requirements ensures smooth operation and prevents potential compatibility issues.
2.1 Minimum Hardware Requirements
To run Autel PC Link V1.10 effectively, your computer should meet the following minimum hardware specifications:
- Processor: Intel Pentium 4 or higher
- Memory (RAM): 1 GB
- Hard Disk Space: 500 MB of free space
- Display Resolution: 1024×768 or higher
- USB Port: USB 2.0 or higher
These hardware specifications are necessary to ensure that the software runs without performance issues, allowing for efficient data transfer and analysis.
2.2 Operating System Compatibility
Autel PC Link V1.10 is compatible with several Windows operating systems, providing flexibility for users with different computer setups. The compatible operating systems include:
- Windows 7 (32-bit and 64-bit)
- Windows 8/8.1 (32-bit and 64-bit)
- Windows 10 (32-bit and 64-bit)
- Windows 11
Ensure that your computer is running one of these operating systems to avoid compatibility issues and ensure proper software functionality.
2.3 Internet Connection Requirements
An active internet connection is required for several functions within Autel PC Link V1.10:
- Software Updates: Downloading the latest software versions.
- Firmware Updates: Downloading firmware updates for your Autel tool.
- Online Activation: Activating the software and your Autel tool.
- Cloud Services: Accessing cloud-based features and data storage.
A stable and reliable internet connection ensures that you can keep your tools updated and access all available features without interruption.
3. Downloading Autel PC Link V1.10
The first step in using Autel PC Link V1.10 is downloading the software from a trusted source. This ensures that you get a clean, virus-free installation file.
3.1 Official Autel Website
The safest and most reliable way to download Autel PC Link V1.10 is from the official Autel website. Here’s how to do it:
- Go to the Autel official website.
- Navigate to the “Support” or “Downloads” section.
- Find the “PC Suite” or “PC Link” software.
- Download the latest version of Autel PC Link V1.10.
Downloading from the official website ensures that you receive a legitimate copy of the software, free from malware and other security threats.
3.2 Alternative Download Sources
While the official Autel website is the recommended source, there are alternative websites where you might find the software. However, exercise caution when using these sources:
- Authorized Distributors: Download from authorized Autel distributors.
- Tech Forums: Some tech forums may host the software, but verify the source’s credibility.
- Third-Party Download Sites: Use with extreme caution, as these sites may bundle malware with the software.
Always scan any downloaded files with a reputable antivirus program before installation to protect your computer from potential threats.
3.3 Verifying the Downloaded File
After downloading Autel PC Link V1.10, it’s crucial to verify the integrity of the file to ensure it hasn’t been corrupted or tampered with. Here’s how:
- Check the File Size: Compare the file size with the information provided on the download page.
- Use a Checksum Utility: Use a checksum utility to verify the file’s MD5 or SHA-256 hash against the official value provided by Autel.
- Scan with Antivirus Software: Scan the downloaded file with a reputable antivirus program to detect any potential malware.
By taking these precautions, you can ensure that the software you install is safe and reliable.
4. Installing Autel PC Link V1.10
Once you have downloaded the software, the next step is to install it on your computer. Follow these steps for a smooth and successful installation.
4.1 Step-by-Step Installation Guide
- Locate the Downloaded File: Find the Autel PC Link V1.10 installation file on your computer.
- Run the Installer: Double-click the installation file to start the installation process.
- Follow the On-Screen Instructions:
- Accept the license agreement.
- Choose the installation directory (the default location is usually recommended).
- Create a desktop shortcut (optional).
- Complete the Installation: Click “Install” to begin the installation process.
- Launch the Software: Once the installation is complete, click “Finish” to launch Autel PC Link V1.10.
Following these steps ensures that the software is installed correctly and ready for use.
4.2 Troubleshooting Common Installation Issues
Sometimes, you may encounter issues during the installation process. Here are some common problems and their solutions:
- Issue: Installation fails to start.
- Solution: Ensure that the downloaded file is not corrupted. Re-download the file from the official website.
- Issue: Compatibility errors.
- Solution: Verify that your operating system is compatible with Autel PC Link V1.10.
- Issue: Insufficient permissions.
- Solution: Run the installer as an administrator. Right-click the installation file and select “Run as administrator”.
- Issue: Antivirus software blocking the installation.
- Solution: Temporarily disable your antivirus software during the installation. Remember to re-enable it afterward.
Addressing these common issues can help you overcome installation obstacles and get the software up and running.
4.3 Configuring Autel PC Link V1.10 After Installation
After successful installation, configure the software for optimal performance:
- Launch Autel PC Link V1.10: Open the software from the desktop shortcut or the Start menu.
- Update the Software: Check for updates and install any available updates to ensure you have the latest version.
- Configure Device Settings: Connect your Autel diagnostic tool to your computer and configure the device settings within the software.
- Set Communication Ports: Ensure that the correct communication port is selected for data transfer.
- Test the Connection: Perform a test connection to verify that the software can communicate with your Autel tool.
These configuration steps ensure that Autel PC Link V1.10 is properly set up and ready to use with your diagnostic tools.
5. Using Autel PC Link V1.10
Once Autel PC Link V1.10 is installed and configured, you can start using it to enhance your diagnostic capabilities. This section covers the main functions and how to use them effectively.
5.1 Updating Autel Diagnostic Tools
Keeping your Autel diagnostic tools up-to-date is crucial for accessing the latest vehicle coverage, bug fixes, and feature enhancements. Here’s how to update your tools using Autel PC Link V1.10:
- Connect Your Autel Tool: Connect your Autel diagnostic tool to your computer using a USB cable.
- Launch Autel PC Link V1.10: Open the software on your computer.
- Select “Update”: Navigate to the “Update” or “Software Update” section of the software.
- Check for Updates: The software will automatically check for available updates for your connected tool.
- Install Updates: Select the updates you want to install and click “Install” or “Update Now”.
- Follow the On-Screen Instructions: Follow any on-screen prompts to complete the update process.
Regularly updating your Autel tools ensures that you have the most accurate and reliable diagnostic information.
5.2 Data Logging and Transfer
Data logging and transfer are essential for detailed analysis of diagnostic information. Autel PC Link V1.10 makes it easy to transfer data from your Autel tool to your computer:
- Connect Your Autel Tool: Connect your Autel diagnostic tool to your computer using a USB cable.
- Launch Autel PC Link V1.10: Open the software on your computer.
- Select “Data Manager”: Navigate to the “Data Manager” or “Data Logging” section of the software.
- Select Data to Transfer: Choose the diagnostic data you want to transfer from the tool to your computer.
- Start Transfer: Click “Transfer” or “Import” to begin the data transfer process.
- View Data on Computer: Once the transfer is complete, you can view the data on your computer using the software’s data analysis tools or export it for use in other applications.
This feature allows for in-depth analysis of vehicle diagnostics, helping you identify and resolve complex issues more effectively.
5.3 Printing Diagnostic Reports
Generating and printing diagnostic reports is a key function for providing customers with detailed information about their vehicle’s condition. Autel PC Link V1.10 simplifies this process:
- Connect Your Autel Tool: Connect your Autel diagnostic tool to your computer using a USB cable.
- Launch Autel PC Link V1.10: Open the software on your computer.
- Select “Report”: Navigate to the “Report” or “Print” section of the software.
- Select Report to Print: Choose the diagnostic report you want to print.
- Customize Report (Optional): Customize the report with additional information or branding.
- Print Report: Click “Print” to send the report to your connected printer.
This feature streamlines the process of creating professional diagnostic reports, enhancing customer satisfaction and trust.
6. Troubleshooting Autel PC Link V1.10 Issues
Even with careful installation and configuration, you may encounter issues while using Autel PC Link V1.10. This section provides solutions to common problems.
6.1 Common Error Messages and Solutions
- Error Message: “Device Not Detected.”
- Solution:
- Ensure the USB cable is properly connected.
- Restart both the computer and the Autel tool.
- Update the USB drivers on your computer.
- Try a different USB port.
- Solution:
- Error Message: “Communication Error.”
- Solution:
- Verify that the correct communication port is selected in the software settings.
- Check for interference from other devices connected to the computer.
- Reinstall the software.
- Solution:
- Error Message: “Software Update Failed.”
- Solution:
- Ensure a stable internet connection.
- Temporarily disable your antivirus software.
- Download the update file manually from the Autel website and install it.
- Solution:
6.2 Contacting Autel Support
If you are unable to resolve an issue on your own, contacting Autel support is the next step. Here’s how:
- Visit the Autel Website: Go to the official Autel website.
- Navigate to the “Support” Section: Find the “Support” or “Contact Us” section.
- Submit a Support Ticket: Fill out the support ticket form with detailed information about your issue.
- Call Autel Support: Find the phone number for your region and call Autel support directly.
- Check the FAQ Section: Review the FAQ section for answers to common questions.
6.3 Community Forums and Resources
In addition to official support, you can find help from community forums and online resources:
- Autel Forums: Participate in Autel-specific forums to ask questions and share solutions with other users.
- Automotive Tech Forums: General automotive tech forums often have sections dedicated to diagnostic tools.
- YouTube Tutorials: Search for video tutorials demonstrating how to troubleshoot common issues with Autel PC Link V1.10.
- CARDIAGTECH.NET: Contact us for expert support and guidance.
7. Advanced Features and Tips
To maximize the benefits of Autel PC Link V1.10, explore its advanced features and follow these tips.
7.1 Customizing Software Settings
Autel PC Link V1.10 allows you to customize various settings to optimize your workflow:
- Language Settings: Change the software’s language to your preferred language.
- Data Storage Settings: Configure where diagnostic data is stored on your computer.
- Report Settings: Customize the layout and content of diagnostic reports.
- Update Settings: Set the software to automatically check for updates.
Customizing these settings can make the software more convenient and efficient to use.
7.2 Using Keyboard Shortcuts
Using keyboard shortcuts can significantly speed up your workflow:
- Ctrl + P: Print the current report.
- Ctrl + S: Save the current data.
- Ctrl + U: Check for updates.
- Ctrl + O: Open a saved file.
Learning and using these shortcuts can save you time and effort.
7.3 Integrating with Other Software
Autel PC Link V1.10 can be integrated with other software to enhance your diagnostic capabilities:
- Diagnostic Databases: Integrate with online diagnostic databases for access to repair information and troubleshooting guides.
- Vehicle Information Systems: Connect to vehicle information systems for access to wiring diagrams, technical specifications, and repair procedures.
- Accounting Software: Integrate with accounting software for streamlined billing and invoicing.
Integrating Autel PC Link V1.10 with other tools can create a more comprehensive and efficient diagnostic workflow.
8. Maintaining Autel PC Link V1.10
Proper maintenance is essential for ensuring the long-term performance and reliability of Autel PC Link V1.10.
8.1 Regular Software Updates
Make sure to regularly update the software to the latest version. Updates often include bug fixes, performance improvements, and new features. Configure the software to automatically check for updates, or manually check for updates on a regular basis.
8.2 Performing Data Backups
Regularly back up your diagnostic data to prevent data loss. Use the software’s data backup feature to create backups of your important files. Store backups in a safe location, such as an external hard drive or a cloud storage service.
8.3 Optimizing Computer Performance
Ensure that your computer is running efficiently to optimize the performance of Autel PC Link V1.10:
- Run Disk Cleanup: Regularly run disk cleanup to remove temporary files and free up disk space.
- Defragment Hard Drive: Defragment your hard drive to improve file access times.
- Update Drivers: Keep your computer’s drivers up-to-date to ensure compatibility and performance.
- Scan for Malware: Regularly scan your computer for malware to prevent performance issues and security threats.
Optimizing your computer’s performance can help ensure that Autel PC Link V1.10 runs smoothly and efficiently.
9. The Future of Autel PC Link and Automotive Diagnostics
As automotive technology continues to evolve, so too will Autel PC Link and other diagnostic tools. Here are some trends to watch:
9.1 Emerging Trends in Automotive Diagnostics
- Artificial Intelligence (AI): AI-powered diagnostic tools can analyze data more quickly and accurately, helping technicians identify and resolve complex issues.
- Cloud-Based Diagnostics: Cloud-based diagnostic systems allow for remote access to diagnostic data and collaboration among technicians.
- Wireless Connectivity: Wireless connectivity options, such as Bluetooth and Wi-Fi, make it easier to connect diagnostic tools to vehicles and computers.
- Augmented Reality (AR): AR technology can overlay diagnostic information onto the technician’s view of the vehicle, providing real-time guidance and assistance.
9.2 How Autel PC Link is Adapting
Autel is committed to staying at the forefront of automotive diagnostics by incorporating these emerging trends into Autel PC Link and its other products. This includes:
- AI-Powered Features: Integrating AI-powered features for enhanced data analysis and troubleshooting.
- Cloud Connectivity: Expanding cloud connectivity options for remote access and collaboration.
- Improved Wireless Support: Enhancing support for wireless connectivity options.
- AR Integration: Exploring the integration of augmented reality technology for real-time diagnostic assistance.
9.3 Predictions for Future Versions of Autel PC Link
Future versions of Autel PC Link are likely to include:
- Enhanced User Interface: A more intuitive and user-friendly interface.
- Improved Data Analysis Tools: More powerful data analysis tools for in-depth diagnostic information.
- Expanded Vehicle Coverage: Support for the latest vehicle models and technologies.
- Seamless Integration: Seamless integration with other diagnostic tools and software.
By staying informed about these trends and developments, you can ensure that you are well-prepared for the future of automotive diagnostics.
10. Frequently Asked Questions (FAQs)
Here are some frequently asked questions about Autel PC Link V1.10:
10.1 Is Autel PC Link V1.10 Free?
Autel PC Link V1.10 is typically provided free of charge with the purchase of an Autel diagnostic tool. However, some advanced features or cloud-based services may require a subscription or additional purchase.
10.2 What Autel Tools are Compatible with PC Link V1.10?
Autel PC Link V1.10 is compatible with a wide range of Autel diagnostic tools, including:
- MaxiSys Series (e.g., MS906, MS908, MS909)
- MaxiCOM Series
- Autel MaxiScope MP408
- MaxiCheck Series
Refer to the Autel website or the tool’s user manual for a complete list of compatible tools.
10.3 How Do I Update My Autel Tool Using PC Link?
To update your Autel tool using PC Link:
- Connect your Autel tool to your computer using a USB cable.
- Launch Autel PC Link V1.10.
- Navigate to the “Update” or “Software Update” section.
- Check for updates and install any available updates.
10.4 Can I Use Autel PC Link on a Mac?
Autel PC Link V1.10 is primarily designed for Windows operating systems. While there may be workarounds for using it on a Mac (such as using a virtual machine or compatibility software), it is not officially supported.
10.5 What Should I Do If PC Link is Not Detecting My Tool?
If PC Link is not detecting your tool:
- Ensure the USB cable is properly connected.
- Restart both the computer and the Autel tool.
- Update the USB drivers on your computer.
- Try a different USB port.
- Verify that the tool is compatible with PC Link V1.10.
10.6 How Do I Transfer Data from My Autel Tool to My Computer?
To transfer data from your Autel tool to your computer:
- Connect your Autel tool to your computer using a USB cable.
- Launch Autel PC Link V1.10.
- Navigate to the “Data Manager” or “Data Logging” section.
- Select the data you want to transfer and click “Transfer” or “Import.”
10.7 Can I Print Diagnostic Reports Directly from PC Link?
Yes, you can print diagnostic reports directly from PC Link:
- Connect your Autel tool to your computer using a USB cable.
- Launch Autel PC Link V1.10.
- Navigate to the “Report” or “Print” section.
- Select the report you want to print and click “Print.”
10.8 How Often Should I Update Autel PC Link and My Diagnostic Tool?
It is recommended to check for updates for Autel PC Link and your diagnostic tool on a regular basis, ideally every month or when prompted by the software. Regular updates ensure that you have the latest vehicle coverage, bug fixes, and feature enhancements.
10.9 What Are the Minimum System Requirements for Autel PC Link V1.10?
The minimum system requirements for Autel PC Link V1.10 are:
- Processor: Intel Pentium 4 or higher
- Memory (RAM): 1 GB
- Hard Disk Space: 500 MB of free space
- Display Resolution: 1024×768 or higher
- USB Port: USB 2.0 or higher
- Operating System: Windows 7, 8/8.1, 10, or 11 (32-bit or 64-bit)
10.10 Where Can I Find the Latest Version of Autel PC Link V1.10?
The latest version of Autel PC Link V1.10 can be found on the official Autel website in the “Support” or “Downloads” section.
Conclusion
Autel PC Link V1.10 is an indispensable tool for automotive technicians and shop owners, enhancing the capabilities of Autel diagnostic tools and streamlining the diagnostic workflow. By understanding its features, system requirements, and troubleshooting tips, you can maximize its benefits and ensure accurate and efficient vehicle diagnostics. At CARDIAGTECH.NET, we are dedicated to providing you with the tools and information you need to succeed in the automotive industry.
Are you facing challenges with your current diagnostic tools? Do you want to improve the efficiency and accuracy of your automotive repairs? Contact CARDIAGTECH.NET today at Whatsapp: +1 (641) 206-8880 or visit our website at CARDIAGTECH.NET. Our team of experts is ready to help you choose the right Autel diagnostic tools and provide comprehensive support to meet your needs. Located at 276 Reock St, City of Orange, NJ 07050, United States, we are your trusted partner for automotive diagnostic solutions. Let us help you take your business to the next level with Autel and CARDIAGTECH.NET.
5 Search Intent của người dùng
- Download Autel PC Link V1.10: Users searching for a direct download link to install the software on their computer.
- Autel PC Link V1.10 Compatibility: Users checking if their Autel diagnostic tool is compatible with this specific version of the PC Link software.
- How to Use Autel PC Link V1.10: Users looking for a guide on how to install, configure, and use the software for updating tools, transferring data, and printing reports.
- Troubleshooting Autel PC Link V1.10: Users seeking solutions to common problems and error messages encountered while using the software.
- Autel PC Link V1.10 Features: Users wanting to understand the capabilities and functionalities of the software, such as data logging, reporting, and updating tools.
Alt text: Autel MaxiScope MP408 automotive oscilloscope connected to a laptop, displaying detailed waveform data for vehicle diagnostics.
1. Unveiling Autel’s MaxiScope MP408: A Deep Dive into Automotive Oscilloscopes
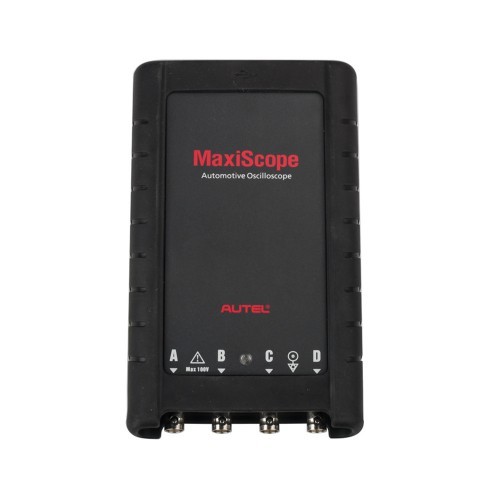
The Autel MaxiScope MP408 stands out as a pivotal tool for automotive diagnostics, offering a four-channel oscilloscope that seamlessly integrates with PCs or MaxiSys tablets. This synergy transforms your existing devices into robust diagnostic powerhouses, providing unparalleled insights into a vehicle’s electronic circuits.
1.1 What is the Autel MaxiScope MP408?
The Autel MaxiScope MP408 is a PC-based, four-channel automotive oscilloscope designed to work in tandem with your computer or MaxiSys tablet (such as MS905, MS906BT, MS908, and MS908P). This transforms your device into a high-powered diagnostic instrument, enabling you to scrutinize the inner workings of a vehicle’s electronic circuits with precision. Think of it as a window into the electrical activity of a car, allowing you to “see” the signals and patterns that dictate its performance. It’s important to note that it is not compatible with Maxisys MS906.
1.2 The Core Benefits of Owning an Autel MaxiScope MP408
Investing in an Autel MaxiScope MP408 brings several advantages to your automotive diagnostic toolkit:
- Enhanced Diagnostic Capabilities: By visualizing electrical signals, you gain a deeper understanding of circuit behavior, pinpointing issues that traditional methods might miss.
- Efficiency and Accuracy: The MP408’s precision reduces diagnostic time and minimizes errors, leading to quicker and more reliable repairs.
- Versatile Compatibility: Works seamlessly with your existing PC or MaxiSys tablet, maximizing your investment in Autel technology.
- User-Friendly Design: An intuitive interface ensures that both novice and experienced technicians can effectively utilize the oscilloscope’s features.
- Cost-Effectiveness: Avoid the expense of dedicated oscilloscope devices by leveraging your existing computing power.
1.3 Highlighting Key Features and Functions
The Autel MaxiScope MP408 is packed with features to streamline your diagnostic process:
- Four-Channel Capability: Simultaneously analyze multiple signals, allowing for comparative diagnostics and complex circuit analysis.
- One-Click Auto Setup: Quickly configure voltage scale and time base settings for optimal signal viewing.
- Broad Vehicle Compatibility: Compatible with virtually all makes and models of modern vehicles.
- Data Bus Standards: Supports LIN, CAN, and FlexRay data bus standards, ensuring compatibility with modern vehicle communication systems.
- High-Resolution Waveforms: Displays electrical signals in high-resolution waveforms for detailed analysis.
- Measurement Parameter Editing: Manually adjust measurement parameters for precise signal analysis.
- Waveform Recording and Playback: Records and plays back waveform data for later analysis and comparison.
- Color-Coded Control Panel: A color-coded four-channel control panel simplifies signal identification and management.
- Intuitive UI Design: Features easy trigger point adjustment and real-time scale information display for user-friendly operation.
- USB Power Supply: Powered directly through a USB connection, eliminating the need for external power sources.
- Free Online Software Updates: Keeps your device current with the latest features and vehicle coverage.
- Portable Design: Compact and rugged design with a protective rubber boot for durability and portability.
Alt text: Autel MaxiScope MP408 displaying complex automotive signal waveforms, showcasing its ability to analyze vehicle electronics.
2. Mastering Installation: Autel MaxiScope MP408 on PC and Android
The journey to unlocking the full potential of your Autel MaxiScope MP408 begins with proper installation on both your PC and compatible Android devices. This section provides a step-by-step guide to ensure a smooth setup process.
2.1 PC Software Installation: A Step-by-Step Guide
- Download the MaxiScope PC Suite: Visit www.autel.com, navigate to Products -> MaxiScope MP408 -> Downloads to acquire the latest PC Suite.
- Extract the Downloaded File: Unzip the downloaded file and locate the ‘setup.exe’ file.
- Initiate the Installation: Double-click ‘setup.exe’ to begin the installation process.
- Follow the Prompts:
- Click ‘Next’ to proceed through the initial setup screens.
- Choose an installation directory by clicking ‘Browse’ or accept the default location.
- Click ‘Next’ to continue without altering the default installation folder.
- Complete the Installation: Click ‘Install’ to finalize the installation of the software onto your computer.
2.2 Android App Installation: A Streamlined Approach
- Locate the MaxiScope App: Copy the MaxiScope app (e.g., ScopeV1.15.apk) to the external SD card of your compatible Autel tool.
- Open ES File Explorer: Launch the ES File Explorer on your Autel device.
- Find the App File: Locate the app file (e.g., ScopeV1.15.apk) on the SD card.
- Install the App: Click the app file to initiate the installation.
- Follow On-Screen Prompts: Complete the installation process by following the prompts displayed on your screen.
2.3 Crucial Post-Installation Checks and Configurations
After installing the software and app, perform these critical checks:
- Verify Software Launch: Ensure that the MaxiScope software launches successfully on your PC.
- Confirm App Installation: Check that the MaxiScope app appears on your Autel device.
- Establish Connection: Connect the MaxiScope MP408 module to your PC or Autel device via USB.
- Test Functionality: Run a basic test to ensure the oscilloscope is properly communicating with the software or app.
3. Firmware Updates: Keeping Your Autel MaxiScope MP408 at Peak Performance
Regularly updating the firmware of your Autel MaxiScope MP408 is crucial for maintaining optimal performance, compatibility, and access to the latest features. This section provides a comprehensive guide on how to update your device’s firmware.
3.1 Preparing for a Seamless Firmware Update
Before initiating the firmware update, ensure the following prerequisites are met:
- Install PC Software: Verify that you have installed the MaxiScope software ‘Setup.exe’ program on your PC.
- Establish USB Connection: Connect the MaxiScope MP408 to your computer using the USB cable provided in the tool kit.
- Stable Power: Ensure your computer has a stable power supply to prevent interruptions during the update.
3.2 A Step-by-Step Guide to Updating Your Firmware
- Launch Firmware Updater: Locate and double-click the ‘MaxiScope Update’ icon on your desktop. This will open the Firmware Update window.
- Select Firmware File: Click on ‘Select File’ to locate the newly downloaded firmware update package on your computer.
- Choose Language: Click the dropdown menu icon next to the ‘Set Language’ option to select your preferred language.
- Initiate Update: Click on ‘Update’ to commence the firmware update process.
- Monitor Progress: Observe the progress bar and on-screen instructions carefully.
- Completion: Once the update is complete, a confirmation message will appear.
3.3 Troubleshooting Common Firmware Update Errors
- Issue: Update process freezes or fails.
- Solution: Ensure a stable USB connection, restart the computer and MaxiScope, and try again.
- Issue: Incorrect firmware file selected.
- Solution: Verify that you have selected the correct firmware update package for your device.
- Issue: Power interruption during the update.
- Solution: Avoid any power interruptions during the update. If interrupted, restart the process from the beginning.
Alt text: Autel MaxiScope MP408 firmware update screen showing progress bar and language selection, illustrating the updating process.
4. Resolving Communication Issues: A Comprehensive Guide
Establishing a stable communication link between your MaxiScope MP408 module and your computer is crucial for seamless operation. This section provides a detailed troubleshooting guide to address common communication issues.
4.1 Essential Check-Ups for Establishing a Connection
Before diving into advanced troubleshooting, perform these basic checks:
- USB Connection Integrity: Ensure the USB cable is securely connected to both the MaxiScope module and your PC.
- LED Indicator Status: Observe the LED indicator light on the Scope Module. A steady light indicates a proper connection. A shimmering light suggests a communication error.
- Module Reconnection: If the LED light is shimmering, unplug the Scope Module and reconnect it to the computer.
4.2 Delving Deeper: Advanced Troubleshooting Techniques
If the basic checks don’t resolve the issue, explore these advanced solutions:
- Firewall Interference: Check if any firewall software is interfering with the connection port. Temporarily disable the firewall to see if it resolves the issue. Configure