This guide provides a detailed walkthrough for replacing the TP/LCD screen on your Autel MaxiSys MS906, MS906BT, or MS906TS tablet. We’ll cover the necessary tools, the replacement process, and troubleshooting steps if the screen doesn’t work after installation. This guide also includes the latest TP screen part numbers for the MS906 and MS906BT.
Required Tools and Parts:
- 2.5mm Allen Key
- 3.0mm Allen Key
- Iron Soldering Tool
- Autel MS906 TP+LCD Screen and Front Shell Kit (Part numbers below)
Latest TP Screen Part Numbers:
- Autel MS906: 501003930
- Autel MS906BT: 501003932
Important Note: Update your Autel scanner’s operating system to the latest version before replacing the screen.
- MaxiSys MS906: V03.46.00 or later
- MaxiSys MS906BT: V03.31.00 or later
Autel MS906 Screen Replacement Steps:
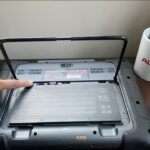
Step 1: Disassemble the Back Shell
Using the Allen keys, remove the 10 bolts securing the back shell of the MS906.
Step 2: Disconnect Internal Components
Carefully release the secure-clips connecting the main board to the light sensor and the touch panel to the LCD screen. Once disconnected, separate the front shell from the back shell.
Step 3: Connect the New Screen Assembly
Connect the new front shell assembly, which includes the new touch panel and LCD screen, to the main board. Ensure the secure-clips are properly fastened for each connection. Pay close attention to the alignment of the connectors.
Connector Alignment:
Ensure the white line on the connector is as close as possible to the connection point before closing the secure-clip. This ensures a proper connection.
Troubleshooting: Screen Not Working After Replacement
If the touch screen isn’t responsive after reassembly, carefully disassemble the unit again and check the following:
- Connector Seating: Ensure all connectors are firmly seated and the secure-clips are fully closed. A loose connection can prevent the screen from functioning.
- Cable Damage: Inspect the connectors and cables for any signs of damage, such as bent pins or frayed wires.
- Alignment: Double-check the alignment of the screen assembly and ensure it sits flush within the housing. Misalignment can put pressure on components and cause malfunctions.
- De-resistance and Flashing: In some cases, you may need to perform a de-resistance procedure and then flash the device with the latest firmware. Consult Autel’s official documentation for detailed instructions on these advanced troubleshooting steps. This may require specialized tools and software.
This guide provides a general overview of the Autel Ms906 Screen Replacement process. For more detailed instructions or if you encounter difficulties, refer to Autel’s official documentation or contact their technical support. A successful screen replacement will restore your Autel scanner to full functionality.