Autel J2534 Gm is a powerful tool for automotive technicians, offering advanced ECU programming capabilities. This guide, brought to you by CARDIAGTECH.NET, will explore the ins and outs of using the Autel J2534 device with GM vehicles, providing you with the knowledge and confidence to tackle complex reprogramming tasks. Unlock superior vehicle diagnostics and reprogramming with Autel J2534, your gateway to enhanced automotive solutions, offering vehicle communication interface and module programming.
1. Understanding the Autel J2534 GM and Its Applications
The Autel J2534 device is a versatile tool that allows automotive technicians to reprogram Electronic Control Units (ECUs) on GM vehicles. ECU programming is essential for updating software, fixing bugs, and improving vehicle performance. It’s like giving your car a brain upgrade. With the Autel J2534 GM, technicians can perform tasks such as:
- ECU Reflashing: Updating the software on the ECU to the latest version.
- Module Programming: Installing new software on a replacement ECU.
- Parameter Configuration: Adjusting vehicle settings to optimize performance.
This tool is invaluable for dealerships, independent repair shops, and even advanced DIY enthusiasts who want to stay ahead in the rapidly evolving automotive technology landscape.
1.1. The Role of J2534 in Modern Automotive Repair
The J2534 standard is a critical component of modern automotive diagnostics and repair, mandated by the EPA to ensure independent repair shops have access to the same reprogramming capabilities as dealerships. This standard enables the use of a single interface for reprogramming ECUs across various vehicle makes and models, streamlining the process and reducing the need for multiple specialized tools. The Autel J2534 GM tool adheres to this standard, allowing technicians to perform essential software updates and module replacements, ensuring vehicles operate with the latest, most efficient software versions.
1.2. Benefits of Using Autel J2534 with GM Vehicles
Utilizing the Autel J2534 GM tool provides numerous advantages for automotive professionals working on GM vehicles.
| Benefit | Description |
|---|---|
| Comprehensive Compatibility | Works seamlessly with a wide range of GM vehicles, ensuring broad coverage and applicability. |
| Enhanced Reprogramming Speed | Offers rapid data transfer rates, significantly reducing reprogramming times. |
| User-Friendly Interface | Features an intuitive design that simplifies complex procedures, making it accessible for technicians with varying levels of expertise. |
| Cost-Effectiveness | Eliminates the need for multiple OEM-specific tools, reducing overall equipment costs and increasing return on investment. |
| Reliable Performance | Built with high-quality components to ensure stable and consistent performance, minimizing the risk of errors during critical programming operations. |
| Access to OEM Software | Provides access to GM’s OEM software, enabling technicians to perform accurate and up-to-date reprogramming, adhering to manufacturer specifications. |
| Improved Vehicle Performance | Allows for the installation of updated software that can improve fuel efficiency, engine performance, and overall vehicle reliability. |
| Compliance with Regulations | Ensures compliance with EPA mandates for J2534 reprogramming, keeping repair shops aligned with legal requirements. |
| Versatile Functionality | Supports a variety of diagnostic functions beyond reprogramming, making it a valuable all-in-one tool for comprehensive vehicle maintenance. |
| Remote Diagnostics Support | Enables remote diagnostics and programming capabilities, allowing experts to assist with complex repairs from anywhere in the world, enhancing service efficiency and customer satisfaction. |


2. Essential Equipment for Autel J2534 GM Programming
Before you begin, make sure you have all the necessary equipment. This includes:
- Laptop: A Windows-based laptop is required to run the Autel software and connect to the vehicle.
- Autel MaxiFlash Elite: This is the J2534 pass-thru device that connects your laptop to the vehicle’s OBDII port.
- AC/DC Adapter (12V): Provides power to the MaxiFlash Elite.
- Main Cable: Connects the MaxiFlash Elite to the vehicle’s OBDII port.
- USB Cable: Connects the MaxiFlash Elite to your laptop.
- Internet Connection: Required for downloading software updates and accessing online resources.
- GM Vehicle: The GM vehicle you intend to reprogram.
- GM Subscription: You need an active subscription to GM’s Technical Delivery System (TDS) to download the necessary software and calibrations.
2.1. Choosing the Right Laptop for Automotive Diagnostics
Selecting the appropriate laptop is crucial for effective automotive diagnostics and reprogramming. Here are the key specifications to consider:
- Operating System: Windows 10 or 11 (64-bit) is preferred for compatibility with most diagnostic software.
- Processor: An Intel Core i5 or higher ensures smooth operation and quick processing of diagnostic data.
- RAM: At least 8GB of RAM is recommended to handle multiple applications and large data sets.
- Storage: A 256GB SSD (Solid State Drive) provides fast boot times and quick access to software and data.
- Display: A screen resolution of 1920×1080 (Full HD) ensures clear and detailed visuals of diagnostic information.
- Connectivity: Multiple USB ports (including USB 2.0 and 3.0) are essential for connecting diagnostic tools and other peripherals.
- Durability: A ruggedized laptop designed to withstand harsh shop environments can prolong the device’s lifespan and prevent damage.
- Battery Life: A long battery life is beneficial for extended diagnostic sessions without needing to be tethered to a power outlet.
2.2. Understanding the Importance of a Stable Power Supply
A stable power supply is critical when reprogramming vehicle ECUs. Voltage fluctuations or power interruptions can lead to incomplete programming, resulting in ECU damage or functional issues.
- Consistent Voltage: Ensure the power supply provides a consistent voltage output, typically around 12-14 volts for automotive applications.
- Sufficient Amperage: The power supply should offer enough amperage to handle the peak demands of the programming process, typically 20-30 amps.
- Overload Protection: Look for power supplies with overload protection to prevent damage to the ECU and the power supply itself.
- Surge Protection: Surge protection safeguards against voltage spikes that can occur during electrical storms or power grid fluctuations.
- Battery Support: A power supply with battery support can maintain a stable voltage even during brief power outages, ensuring uninterrupted programming.
- Quality Certification: Choose power supplies that meet industry standards and certifications (e.g., UL, CE) to ensure safety and reliability.
According to a study by the Equipment and Tool Institute (ETI), power-related issues account for approximately 15% of all ECU programming failures. Investing in a high-quality, stable power supply is a cost-effective measure to prevent costly repairs and ensure successful programming outcomes.
3. Installing the Autel J2534 Driver
The first step is to install the Autel J2534 device driver on your laptop. Follow these steps:
- Insert the Driver CD: Insert the CD that came with your Autel MaxiFlash Elite into your laptop’s CD drive.
- Open the CD Folder: Navigate to the CD drive and open the folder.
- Run the Setup File: Double-click on the “Autel Run.exe” file.
- Select MaxiFlash Elite: On the MaxiSys PC Suite screen, click the MaxiFlash Elite icon.
- Choose Installation Language: Select your preferred language from the drop-down menu.
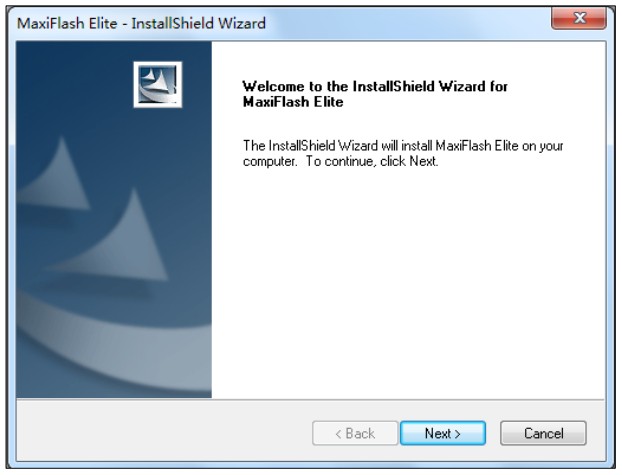
- Follow the Wizard: The installation wizard will guide you through the process. Click “Next” to continue.
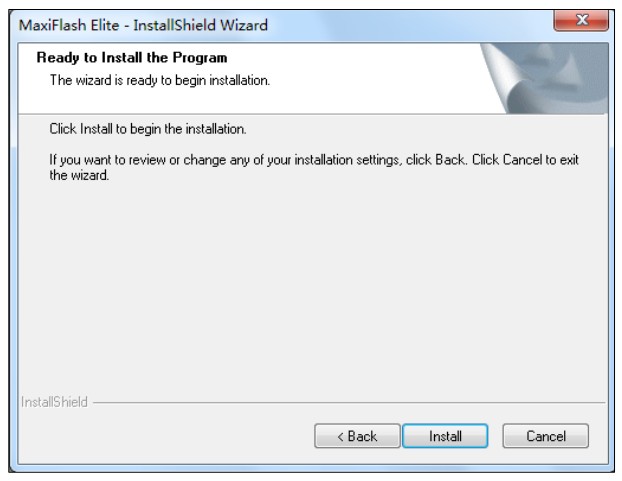
- Install the Driver: Click “Install” to begin the driver installation.
- Complete the Installation: Once the driver is successfully installed, a confirmation window will appear. Click “Finish” to complete the process.
3.1. Troubleshooting Common Driver Installation Issues
During the driver installation process, you might encounter some common issues. Here are some troubleshooting tips:
| Issue | Solution |
|---|---|
| Driver Installation Fails | Ensure your laptop meets the minimum system requirements. Disable any antivirus software temporarily, as it may interfere with the installation. Run the installation file as an administrator by right-clicking and selecting “Run as administrator.” Check for any corrupted files on the installation CD or download the driver from Autel’s official website. |
| Device Not Recognized | Verify that the USB cable is securely connected to both the laptop and the Autel MaxiFlash Elite. Try a different USB port on your laptop. Restart your laptop and try the installation process again. Check Device Manager for any unrecognized devices or driver conflicts. |
| Compatibility Issues | Ensure that the driver version is compatible with your operating system. Update your operating system to the latest version. * Check Autel’s website for any compatibility patches or updates. |
| Error Messages During Installation | Note the exact error message and search online for solutions specific to that error. Consult Autel’s technical support for assistance. * Check the installation logs for any detailed error information. |
| Conflicting Software | Uninstall any other diagnostic software that may be conflicting with the Autel drivers. Perform a clean boot of your system to minimize software conflicts during installation. |
3.2. Verifying Successful Driver Installation
After the driver installation, it’s essential to verify that the device is correctly recognized by your computer.
- Open Device Manager:
- Press
Win + Xand select “Device Manager” from the menu.
- Press
- Locate the Autel Device:
- Expand the “Ports (COM & LPT)” section.
- Look for “Autel USB Serial Port” or a similar entry.
- Check Device Status:
- If the device is listed without any warning symbols (e.g., yellow exclamation mark), the driver is installed correctly.
- Update Driver (If Necessary):
- If there’s a warning symbol, right-click on the device and select “Update driver.”
- Choose “Search automatically for drivers” to let Windows find and install the latest driver.
4. Updating the Autel J2534 Software
Keeping your Autel J2534 software up-to-date is crucial for optimal performance and access to the latest features. Here’s how to update the software:
- Power Up the Device: Connect the MaxiFlash Elite to an external power supply using the AC/DC adapter. Verify that the green Power LED on the front panel is lit.
- Connect to PC: Connect the MaxiFlash Elite to your PC using the supplied USB cable. Verify that the green Connection LED on the front panel is lit.
- Launch the Software: From the Windows Start Menu, find and double-click the “MaxiFlash Elite” icon.
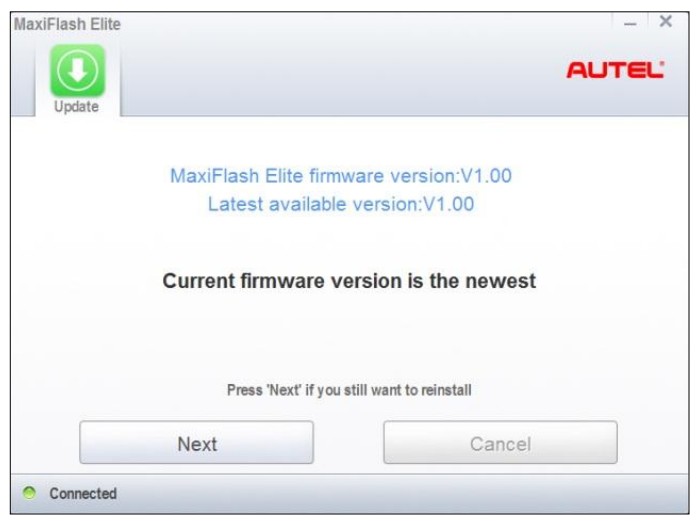
- Check for Updates: The software will automatically check for available updates online.
- Install Updates: If an update is available, click the “Next” button to install the newest firmware.
- Cancel Update: If you prefer to skip the update, click the “Cancel” button to exit.
4.1. Best Practices for Software Updates
To ensure a smooth and successful software update process, follow these best practices:
| Practice | Description |
|---|---|
| Stable Internet Connection | Use a reliable, high-speed internet connection to download updates quickly and prevent interruptions. Avoid using public Wi-Fi networks, which may be unstable and pose security risks. |
| Consistent Power Supply | Ensure the Autel MaxiFlash Elite is connected to a stable power source throughout the update process. Use the provided AC/DC adapter to maintain a consistent voltage and prevent power fluctuations. |
| Close Other Applications | Close all unnecessary applications on your computer to free up system resources and prevent software conflicts. Disable any background processes that may consume bandwidth or processing power. |
| Follow On-Screen Instructions | Carefully read and follow all on-screen instructions provided by the update software. Do not interrupt the update process or attempt to restart your computer while the update is in progress. |
| Back Up Existing Data | Before performing a software update, back up any critical data or settings on your Autel MaxiFlash Elite. This will allow you to restore your device to its previous state if any issues arise during the update process. |
| Check Release Notes | Before installing an update, review the release notes to understand the new features, bug fixes, and improvements included in the update. This will help you determine whether the update is relevant to your needs and whether there are any known issues to be aware of. |
| Schedule Updates | Schedule software updates during off-peak hours to minimize disruption to your workflow. Avoid performing updates when you need the Autel MaxiFlash Elite for critical diagnostic or programming tasks. |
| Monitor Progress | Keep an eye on the update progress bar and any status messages displayed by the update software. If you encounter any errors or unexpected behavior, consult Autel’s technical support for assistance. |
| Verify Installation | After the update is complete, verify that the new software version has been installed correctly. Check the device’s settings or “About” menu to confirm the updated version number. |
| Restart Device | After the update is complete, restart the Autel MaxiFlash Elite to ensure that all changes take effect. This will help to clear any temporary files or processes that may be interfering with the new software. |
4.2. Resolving Update Errors
If you encounter any errors during the software update process, here are some steps you can take to resolve them:
| Error | Solution |
|---|---|
| Download Errors | Check your internet connection and ensure it is stable. Try downloading the update again later. Clear your browser cache and cookies. Disable any firewalls or proxy servers that may be interfering with the download. |
| Installation Errors | Ensure that you have sufficient disk space on your computer. Close any other applications that may be running in the background. Restart your computer and try the installation again. Run the installation file as an administrator. |
| Compatibility Errors | Check that the update is compatible with your operating system and hardware configuration. Update your operating system and drivers to the latest versions. * Consult Autel’s website or technical support for compatibility information. |
| Device Not Recognized | Ensure that the Autel MaxiFlash Elite is properly connected to your computer. Check that the USB cable is securely plugged into both the device and the computer. Try a different USB port. Restart your computer and the Autel MaxiFlash Elite. * Reinstall the device drivers. |
| Corrupted Update File | Delete the downloaded update file and download it again. Ensure that you are downloading the update file from a trusted source, such as Autel’s official website. * Check the file’s checksum to verify its integrity. |
| Insufficient Permissions | Run the update software as an administrator. Check the permissions settings on the update file and ensure that you have the necessary permissions to execute it. * Disable User Account Control (UAC) temporarily. |
| Conflicting Software | Uninstall any other diagnostic software or applications that may be conflicting with the Autel update software. Perform a clean boot of your system to minimize software conflicts. |
| Interrupted Update Process | Do not interrupt the update process once it has started. Ensure that your computer and the Autel MaxiFlash Elite remain powered on and connected throughout the update. * If the update is interrupted, try restarting the process from the beginning. |
| Unresponsive Device | Try performing a hard reset of the Autel MaxiFlash Elite by disconnecting it from the power source and holding down the power button for 10-15 seconds. Reconnect the device to your computer and try the update process again. * Contact Autel’s technical support for further assistance. |
| Outdated Update Software Version | Ensure that you are using the latest version of the Autel Update software. Download and install the latest version from Autel’s website. * Older versions of the update software may not be compatible with the latest firmware updates. |
5. Reprogramming GM Vehicles with Autel J2534
Now that you have the necessary equipment and software installed, you can start reprogramming GM vehicles. Here’s a step-by-step guide:
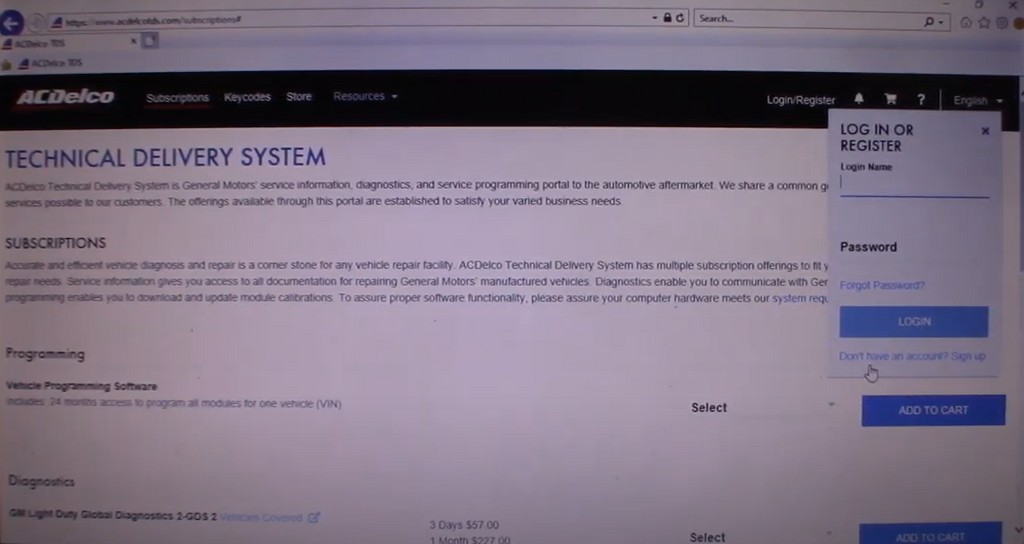
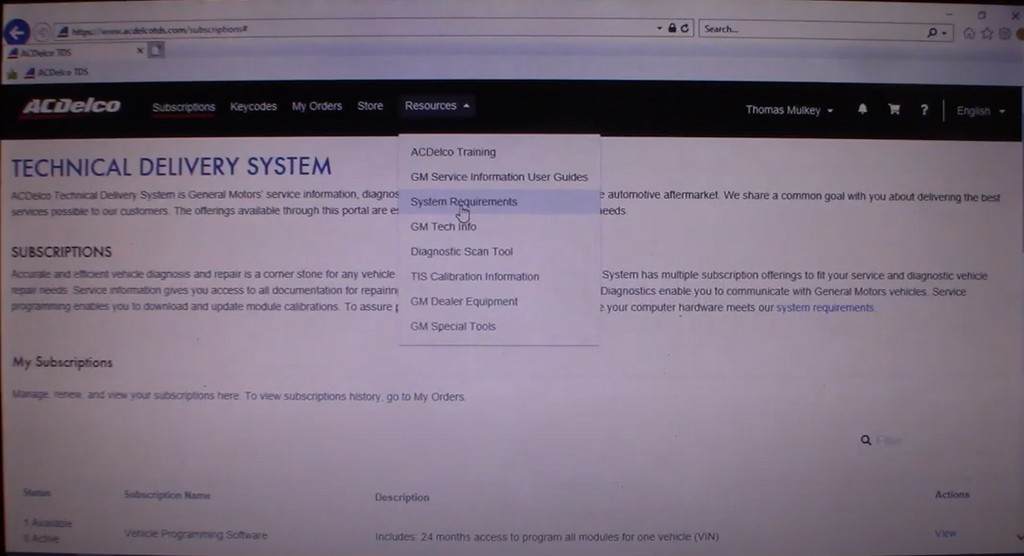
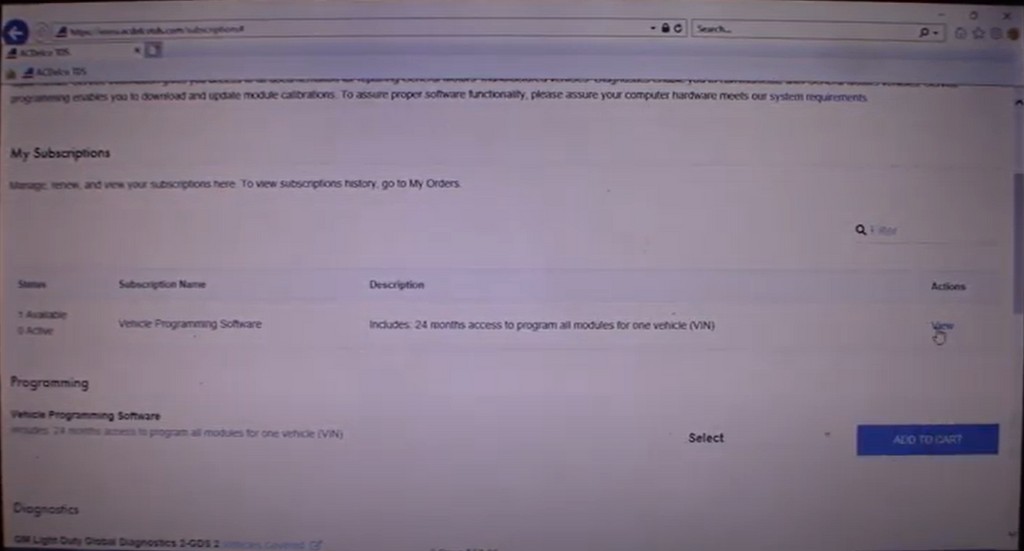
- Subscribe to GM TDS: Visit the https://www.acdelcotds.com/ website and purchase a subscription to GM’s Technical Delivery System (TDS). This will give you access to the necessary software and calibrations for your vehicle.
- Log In to GM TDS: Log in to the GM TDS website with your credentials.
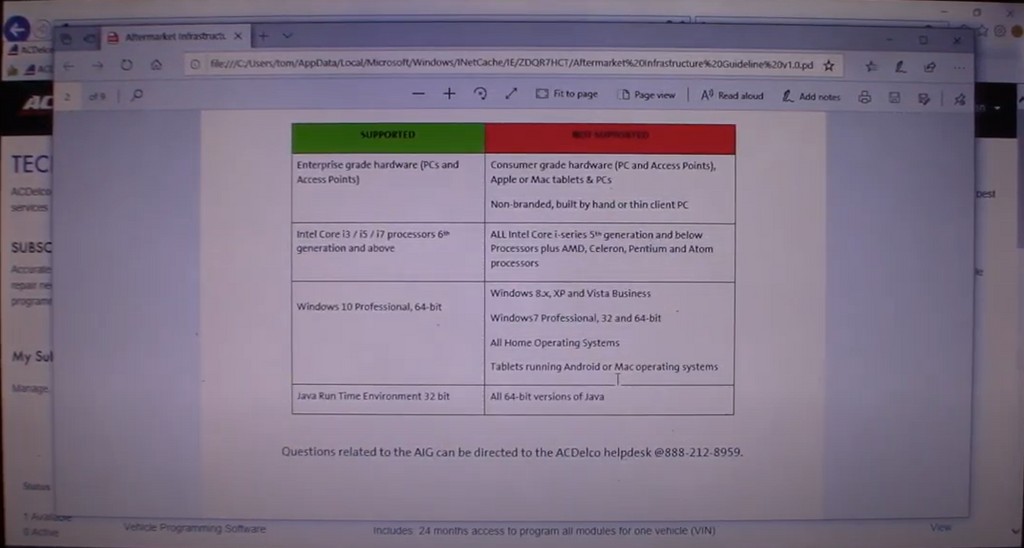
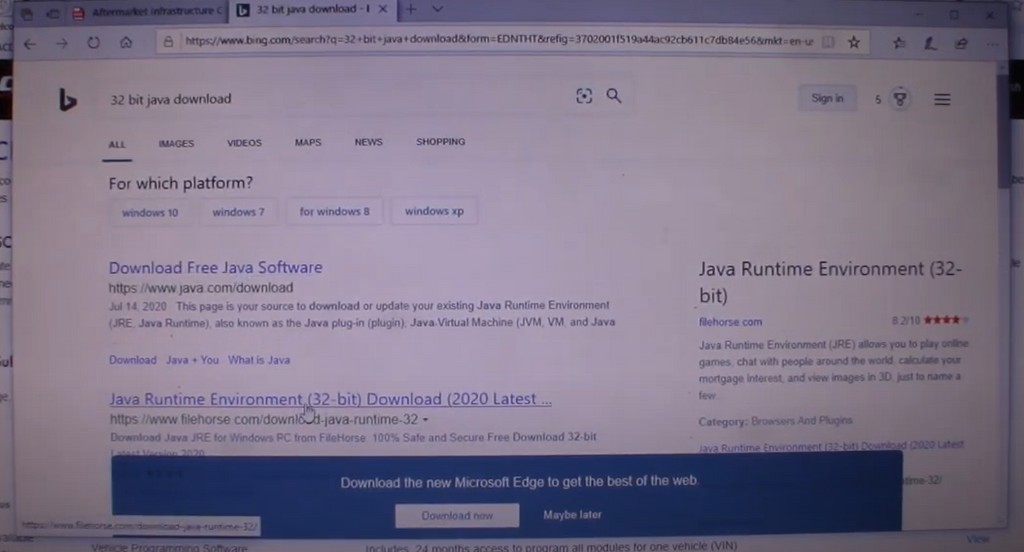
- Download System Requirements: Download and install any necessary system requirements, such as Java.
- Check Requirements: Ensure your system meets all the requirements for reprogramming.
- Download and Install Java: If required, download and install the latest version of Java.
- Add VIN: Enter the Vehicle Identification Number (VIN) of the vehicle you want to reprogram.
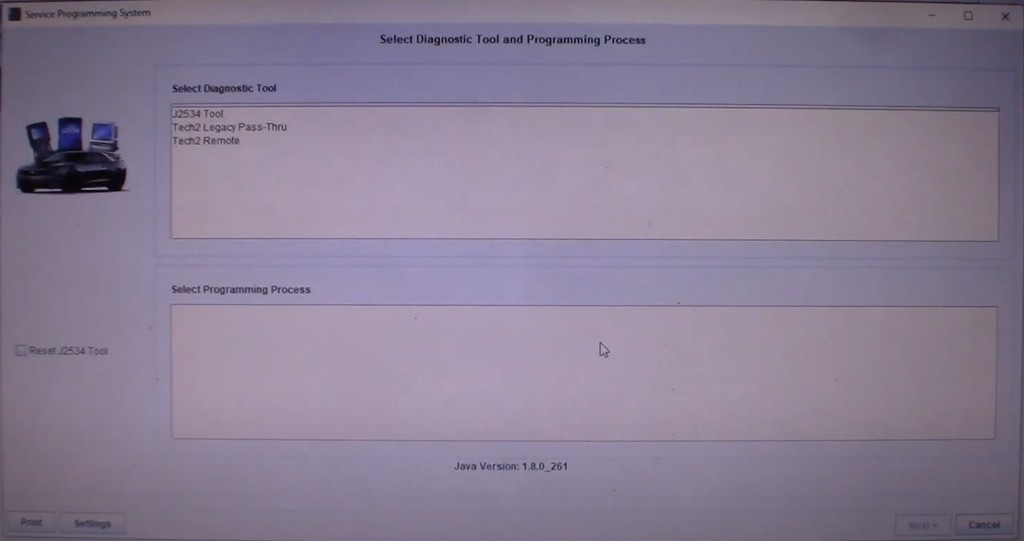
- Select Diagnostic Tool and Programming Process: Choose the Autel MaxiFlash Elite as your diagnostic tool and select the appropriate programming process.
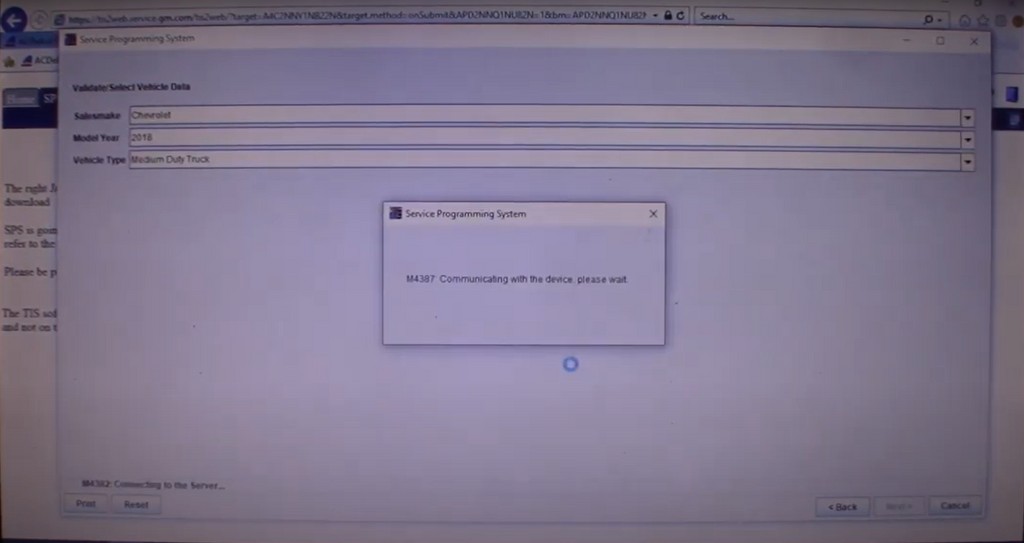
- Select Vehicle Data: Select the correct vehicle data for your GM vehicle.
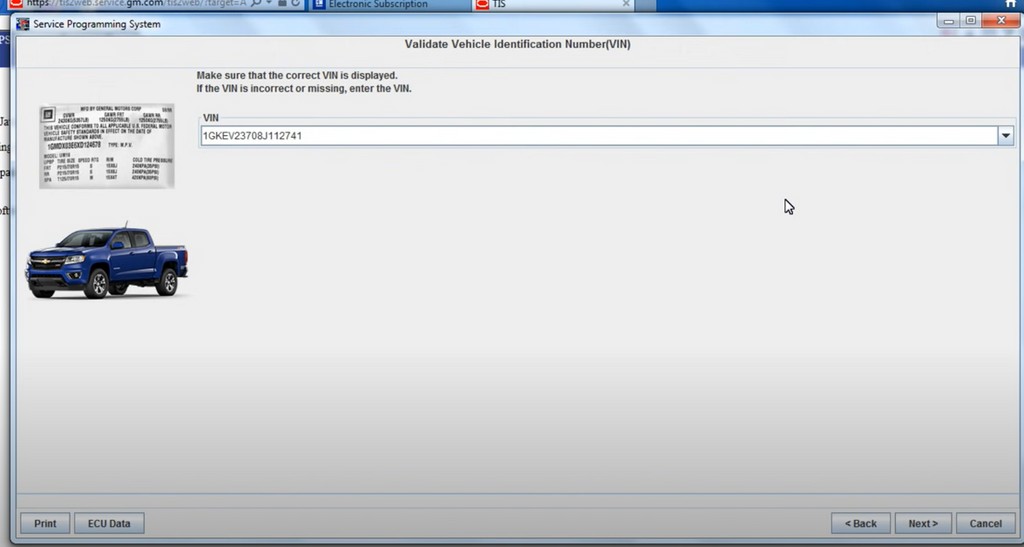
- Validate VIN: Validate the VIN to ensure it matches the vehicle you are working on.
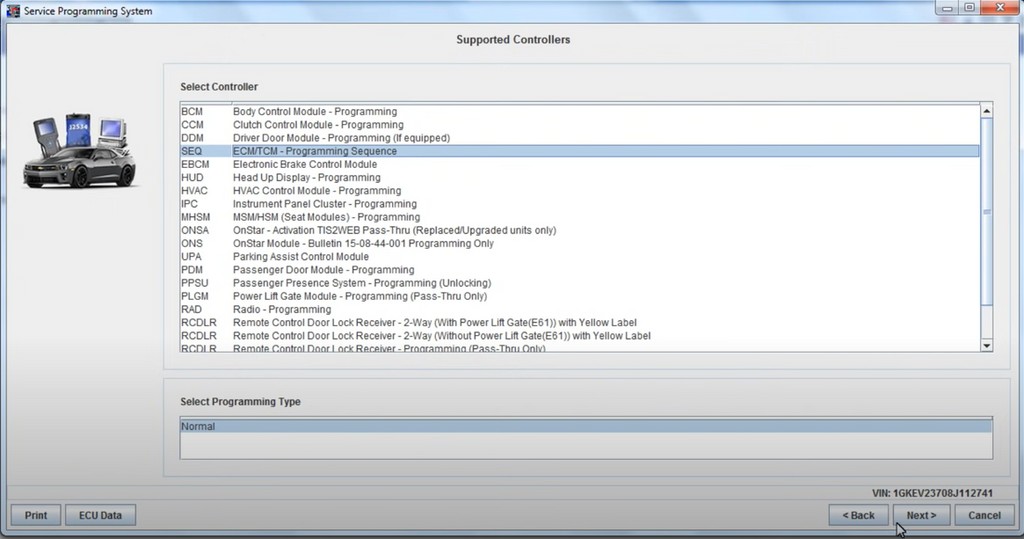
- Select Controller: Select the controller you want to reprogram.
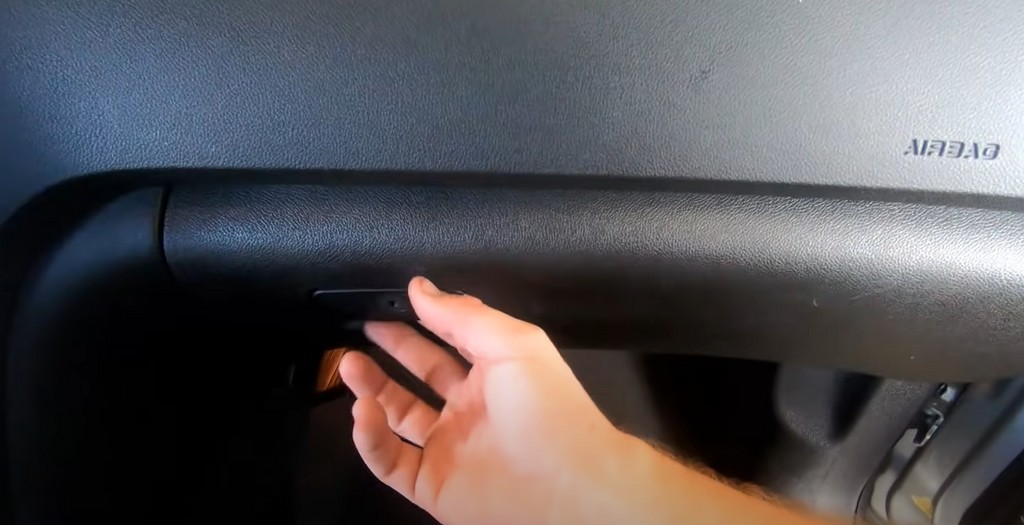
- Find Your VIN: Locate the VIN on your vehicle.
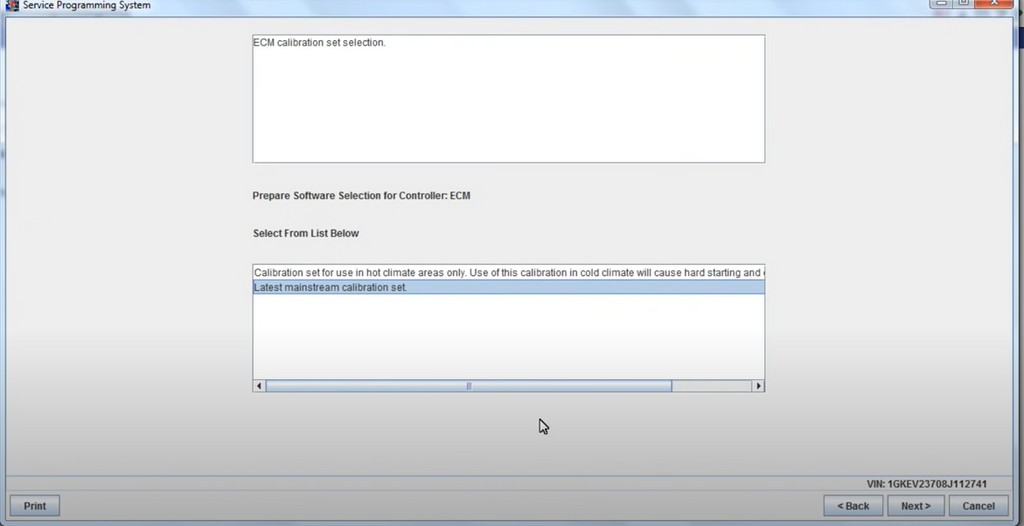
- Software Selection for Controller: Choose the appropriate software for the controller.
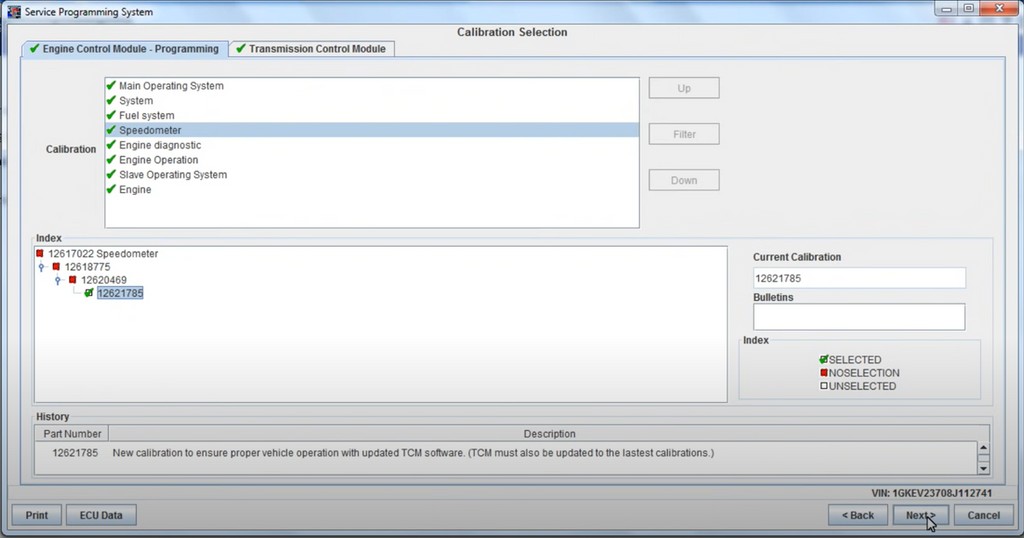
- Calibration Selection: Select the correct calibration for your vehicle.
- Summary: Review the summary of your selections.
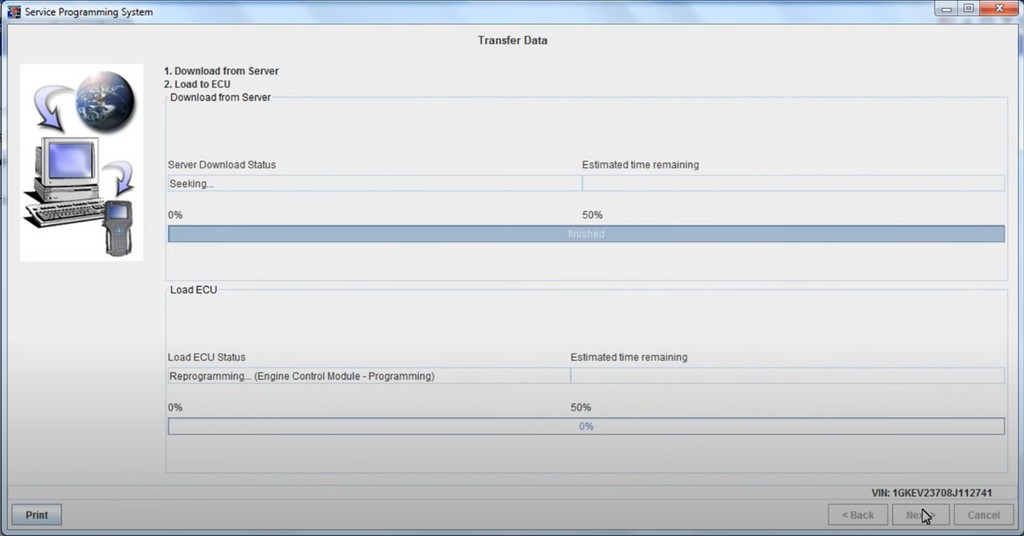
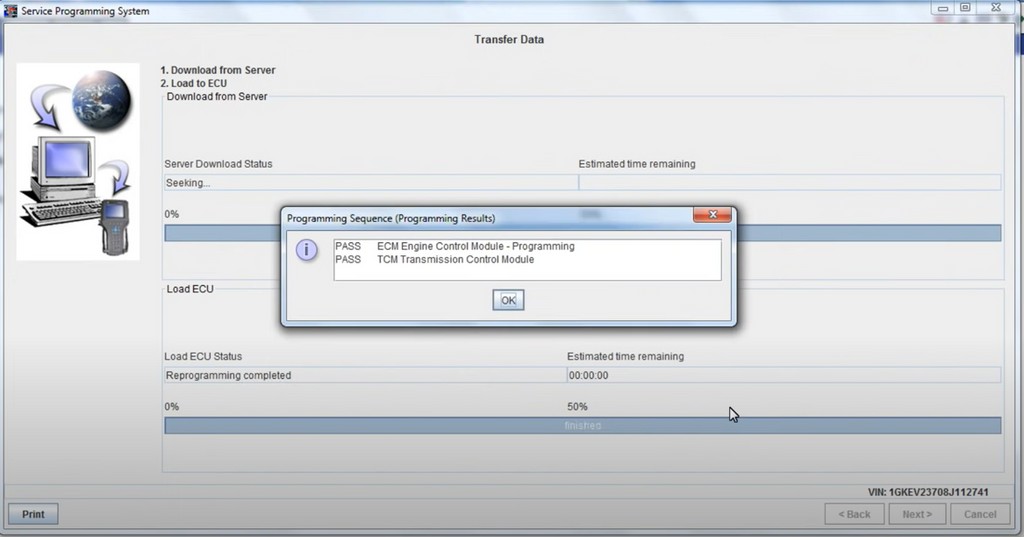
- Transfer Data: Transfer the data to the vehicle.
- Programming: Begin the programming process.
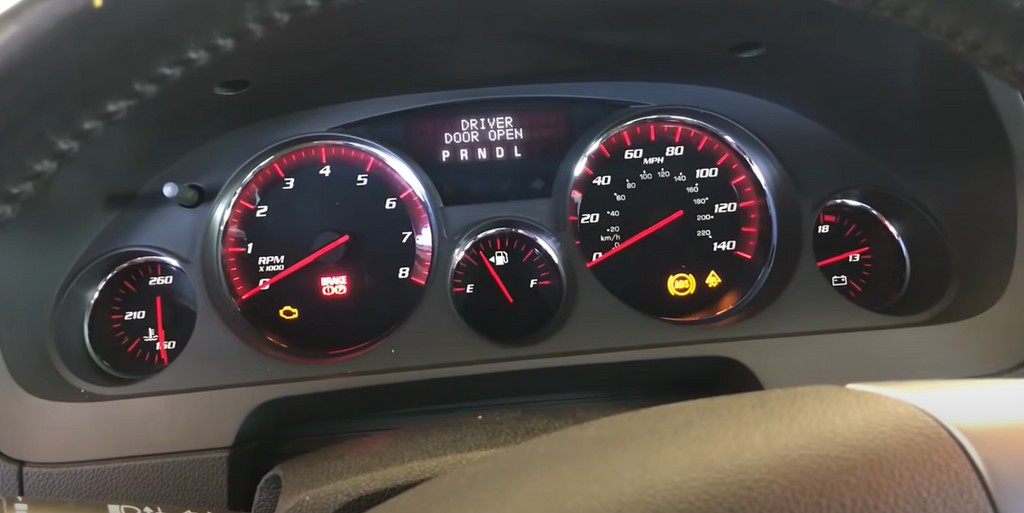
- Programming Completed: Once the programming is complete, verify the successful completion.
5.1. Common Reprogramming Challenges and Solutions
Reprogramming ECUs can present various challenges. Here are some common issues and their solutions:
| Challenge | Solution |
|---|---|
| Incorrect VIN Entry | Double-check the VIN on the vehicle and ensure it matches the VIN entered into the GM TDS system. Use a VIN scanner to avoid manual entry errors. |
| Communication Errors | Ensure the Autel MaxiFlash Elite is securely connected to both the vehicle’s OBDII port and your laptop. Check the USB cable for damage and replace if necessary. Verify that the Autel J2534 driver is properly installed and up-to-date. Restart your laptop and the Autel MaxiFlash Elite. |
| Software Incompatibility | Ensure that you are using the correct version of the GM TDS software for the vehicle you are working on. Check for any compatibility patches or updates on Autel’s website. |
| Power Interruptions | Use a stable power supply to prevent voltage fluctuations or power outages during the programming process. Consider using a battery maintainer to keep the vehicle’s battery fully charged. |
| Incorrect Calibration Selection | Carefully review the available calibrations and select the one that is specifically designed for the vehicle’s VIN and ECU. Consult GM’s service information for guidance on selecting the correct calibration. |
| Security Access Issues | Ensure that you have the necessary security access to reprogram the ECU. Follow GM’s security procedures to obtain the required authorization. |
| ECU Not Responding | Check the ECU’s power supply and ground connections. Verify that the ECU is not damaged or faulty. * Consult GM’s service information for troubleshooting steps. |
| Programming Process Freezes | Do not interrupt the programming process once it has started. Monitor the progress and wait for the process to complete. * If the process freezes for an extended period, consult GM’s service information or Autel’s technical support for assistance. |
| Post-Programming Issues | Perform a thorough system scan to check for any diagnostic trouble codes (DTCs). Verify that the vehicle is functioning properly after the reprogramming. * Consult GM’s service information for post-programming procedures and checks. |
| Licensing and Subscription Problems | Ensure that your GM TDS subscription is active and valid. Verify that you have the necessary licenses to access the software and calibrations. * Contact GM’s customer support for assistance with licensing and subscription issues. |
5.2. Verifying Successful Reprogramming
After completing the reprogramming process, it’s crucial to verify that it was successful. Here’s how:
- Check for DTCs:
- Use a diagnostic scan tool (like an Autel MaxiSys) to scan the vehicle for any Diagnostic Trouble Codes (DTCs).
- Address any new DTCs that appear after the reprogramming process.
- Verify Functionality:
- Test the systems that were affected by the reprogramming to ensure they are functioning correctly.
- For example, if you reprogrammed the engine control module (ECM), check the engine performance, fuel economy, and emissions.
- Review Service Information:
- Consult GM’s service information for any post-reprogramming procedures or checks that need to be performed.
- Follow the recommended steps to ensure the vehicle is operating within specifications.
- Confirm Calibration Version:
- Use a diagnostic tool to verify the calibration version of the reprogrammed module.
- Compare the installed calibration version to the latest version available from GM to confirm that the update was successful.
- Road Test:
- Perform a road test to evaluate the vehicle’s overall performance and identify any potential issues.
- Pay attention to any unusual symptoms or behaviors that may indicate a problem with the reprogramming.
- Customer Feedback:
- If you are performing the reprogramming for a customer, ask for their feedback on the vehicle’s performance after the update.
- Address any concerns or issues that the customer may have.
- Documentation:
- Document the reprogramming process, including the date, VIN, module reprogrammed, calibration version, and any DTCs found before and after the process.
- Keep this documentation for your records and provide a copy to the customer if applicable.
According to a study by the National Institute for Automotive Service Excellence (ASE), proper verification of reprogramming is essential to ensure vehicle reliability and customer satisfaction. Taking the time to verify the success of the reprogramming can help prevent future issues and ensure that the vehicle is operating at its best.
6. Maximizing the Value of Your Autel J2534 GM Tool
The Autel J2534 GM tool is more than just a reprogramming device. Here’s how to maximize its value:
- Use as a Pass-Thru Diagnostic Tool: The Autel J2534 can also function as a pass-thru diagnostic tool, allowing you to read and clear Diagnostic Trouble Codes (DTCs), data log PIDs, collect sensor data, and log generic OBDII data.
- Stay Updated: Regularly update the software to ensure you have the latest features and vehicle coverage.
- Join Online Communities: Participate in online forums and communities to share knowledge, ask questions, and learn from other technicians.
6.1. Leveraging OEM Software for Advanced Diagnostics
OEM (Original Equipment Manufacturer) software plays a crucial role in advanced diagnostics and reprogramming. Here’s how to leverage it effectively:
| Strategy | Description |
|---|---|
| Access OEM Service Information | Subscribe to OEM service information websites to access detailed repair procedures, wiring diagrams, technical service bulletins (TSBs), and diagnostic flowcharts. This information is essential for accurately diagnosing and repairing complex vehicle issues. |
| Utilize OEM Diagnostic Software | Use OEM diagnostic software to perform advanced diagnostic functions, such as module programming, parameter resets, and system calibrations. OEM software often provides more comprehensive diagnostic capabilities than aftermarket tools. |
| Follow OEM Reprogramming Procedures | Adhere to OEM reprogramming procedures when updating or replacing ECUs. Incorrect programming can lead to vehicle malfunctions or damage. * Use the Autel J2534 tool in conjunction with OEM software to ensure proper programming. |
| Stay Updated with OEM Software Updates | Regularly update OEM software to access the latest diagnostic and reprogramming capabilities. OEMs often release software updates to address bugs, improve performance, and support new vehicle models. |
| Attend OEM Training Programs | Participate in OEM training programs to learn about the latest diagnostic techniques and repair procedures. OEM training can provide valuable insights into the inner workings of specific vehicle systems. |
| Use OEM Special Tools | Utilize OEM special tools when required for specific diagnostic or repair procedures. Some tasks may require specialized tools that are only available from the OEM. |
| Collaborate with OEM Technical Support | Contact OEM technical support for assistance with complex diagnostic or repair issues. OEM technical support can provide expert guidance and troubleshooting assistance. |
| Document OEM Procedures | Document all OEM diagnostic and repair procedures that you perform. This documentation can be valuable for future reference and can help you to improve your diagnostic skills. |
| Adhere to OEM Safety Guidelines | Always follow OEM safety guidelines when working on vehicles. OEM safety guidelines are designed to protect technicians from injury and to prevent damage to vehicles. |
| Participate in OEM Forums | Engage in OEM forums or online communities to share your experiences and learn from other technicians. OEM forums can be a valuable source of information and support. |
6.2. Expanding Your Service Offerings with J2534
The Autel J2534 GM tool can significantly expand your service offerings, allowing you to cater to a broader range of customer needs.
| Service Offering | Description |
|---|---|
| ECU Reprogramming Services | Offer ECU reprogramming services to update vehicle software, fix bugs, and improve performance. This service can be particularly valuable for vehicles with known software issues or for customers seeking to enhance their vehicle’s performance. |
| Module Replacement Services | Provide module replacement services, including programming and configuration of new modules. This service is essential for vehicles with faulty or damaged modules that need to be replaced. |
| Parameter Configuration Services | Offer parameter configuration services to adjust vehicle settings and optimize performance. This service can be used to customize vehicle settings to meet specific customer needs or to improve fuel economy or engine performance. |
| Diagnostic Services | Utilize the Autel J2534 tool as a pass-thru diagnostic tool to read and clear DTCs, data log PIDs, and collect sensor data. This service can be used to diagnose a wide range of vehicle issues and to provide customers with accurate and reliable diagnostic information. |
| Pre-Purchase Inspections | Offer pre-purchase inspections to assess the condition of a vehicle before it is purchased. This service can help customers to make informed decisions about purchasing a vehicle and to avoid potential problems down the road. |
| Performance Tuning | Provide performance tuning services to optimize vehicle performance for racing or other high-performance applications. This service can involve |