Autel EVO built-in screen offers unparalleled convenience for drone pilots, providing real-time flight data and camera views directly on the remote controller. At CARDIAGTECH.NET, we understand the importance of having reliable equipment for automotive repairs and diagnostics, which is why we’ve put together this comprehensive guide. Discover how to optimize your drone experience with the Autel EVO’s integrated display, ensuring seamless operation and enhanced performance.
1. Understanding the Autel EVO Built-In Screen
The Autel EVO series, renowned for its advanced drone technology, incorporates a built-in screen on its remote controller. This integrated display eliminates the need for a separate mobile device, streamlining the flying experience. Let’s delve into the specifics of what makes this feature so valuable for both novice and experienced drone operators.
1.1 What is the Autel EVO Built-In Screen?
The Autel EVO built-in screen is a high-resolution display integrated directly into the remote controller of Autel EVO series drones. It provides real-time flight information, camera settings, and live video feed, enhancing control and situational awareness.
1.2 Key Features and Benefits
- Real-Time Flight Data: Monitor altitude, speed, distance, and battery life instantly.
- Camera Control: Adjust camera settings such as ISO, shutter speed, and aperture on the fly.
- Live Video Feed: View a crisp, clear video feed from the drone’s camera without relying on an external device.
- Enhanced Portability: No need to carry or connect a separate smartphone or tablet.
- Improved Reliability: Direct connection ensures stable data transmission and reduces the risk of connection issues.
- Ease of Use: Simplifies setup and operation, making it easier to focus on flying and capturing content.
1.3 Models Featuring the Built-In Screen
Several Autel EVO models come equipped with this convenient feature. Here’s a look at some of the popular ones:
- Autel EVO II Pro: Known for its 1-inch CMOS sensor capable of capturing 6K video, the EVO II Pro’s built-in screen enhances its professional capabilities.
- Autel EVO II: Offers excellent video and photo quality with a built-in screen for easy monitoring.
- Autel EVO Nano Series: Compact and lightweight, the Nano series includes models with integrated screens, perfect for on-the-go use.
- Autel EVO Lite Series: Balances performance and portability, featuring a built-in screen for streamlined operation.
2. Setting Up Your Autel EVO with the Built-In Screen
Getting your Autel EVO drone ready for flight involves a few essential steps. Here’s a detailed guide to ensure you’re properly set up and ready to take to the skies.
2.1 Initial Setup Process
-
Unboxing and Inspection:
- Carefully unpack all components, including the drone, remote controller, batteries, and accessories.
- Inspect each item for any signs of damage during shipping.
-
Charging Batteries:
- Fully charge the drone and remote controller batteries using the provided charger.
- Charging times vary, so refer to the user manual for specific details.
-
Installing Batteries:
- Insert the charged battery into the drone until it clicks securely into place.
- Ensure the battery is properly locked to prevent accidental ejection during flight.
-
Powering On:
- Press the power button on the drone and remote controller to turn them on.
- Wait for the devices to initialize and establish a connection.
2.2 Connecting the Remote Controller
-
Binding:
- In most cases, the remote controller is pre-bound to the drone at the factory.
- If binding is required, follow the instructions in the user manual to synchronize the devices.
-
Firmware Updates:
- Check for firmware updates using the Autel Explorer app (if applicable) or via the built-in screen.
- Update the firmware on both the drone and remote controller to ensure optimal performance and compatibility.
-
Calibrating the Remote Controller:
- Calibrate the joysticks and other controls on the remote controller for precise handling.
- Follow the on-screen prompts or refer to the user manual for calibration instructions.
2.3 Understanding the Screen Interface
The built-in screen on your Autel EVO remote controller displays critical information and settings. Here’s a breakdown of the key elements:
- Flight Mode: Indicates the current flight mode (e.g., GPS, ATTI).
- GPS Signal Strength: Shows the number of GPS satellites connected, affecting stability and positioning accuracy.
- Battery Level: Displays the remaining battery life for both the drone and remote controller.
- Altitude and Distance: Shows the drone’s current altitude and distance from the home point.
- Camera Settings: Allows adjustment of camera parameters such as ISO, shutter speed, and white balance.
- Video Recording Status: Indicates whether the camera is recording video and the remaining storage space.
- Warning Messages: Displays alerts for low battery, signal loss, or other potential issues.
Understanding these elements ensures you can quickly assess the drone’s status and make necessary adjustments during flight.
3. Navigating the Autel Explorer App
While the built-in screen offers a direct interface, the Autel Explorer app (if applicable to your model) provides additional features and settings. Here’s how to navigate and use it effectively.
3.1 Downloading and Installing the App
-
App Availability:
- Check if your Autel EVO model requires the Autel Explorer app for advanced features.
- The app is typically available for both iOS (Apple App Store) and Android (Google Play Store).
-
Download:
- Search for “Autel Explorer” in your device’s app store.
- Download and install the app on your smartphone or tablet.
-
Permissions:
- Grant the app necessary permissions, such as access to location, storage, and camera.
- These permissions are required for full functionality.
3.2 Connecting to the Drone
-
Wi-Fi or USB Connection:
- Depending on your Autel EVO model, connect your mobile device to the remote controller via Wi-Fi or USB.
- Follow the on-screen instructions in the Autel Explorer app to establish a connection.
-
Device Pairing:
- If required, pair your mobile device with the remote controller.
- This step ensures secure communication between the app and the drone.
-
Real-Time Data:
- Once connected, the Autel Explorer app displays real-time flight data, camera settings, and a live video feed, mirroring the built-in screen.
3.3 Key Features in the App
-
Advanced Camera Settings:
- Adjust detailed camera settings such as ISO, shutter speed, aperture, white balance, and color profiles.
- Optimize image and video quality for various shooting conditions.
-
Intelligent Flight Modes:
- Access intelligent flight modes like ActiveTrack, Orbit, Waypoint, and more.
- These modes automate complex flight maneuvers and enable creative shots.
-
Firmware Updates:
- Check for and install firmware updates for the drone and remote controller.
- Keep your devices up-to-date to ensure optimal performance and compatibility.
-
Flight Logs:
- Review flight logs to analyze flight data, track performance, and identify potential issues.
- Use flight logs to improve your flying skills and maintain your drone.
-
Customizable Settings:
- Personalize app settings such as units of measurement, control schemes, and display preferences.
- Tailor the app to your specific needs and preferences.
By mastering the Autel Explorer app, you can unlock the full potential of your Autel EVO drone and enhance your flying experience.
4. Firmware Updates: Keeping Your System Up-to-Date
Regular firmware updates are essential for maintaining the performance, stability, and security of your Autel EVO drone. Here’s how to perform these updates using both OTA (Over-the-Air) and microSD card methods.
4.1 Why Firmware Updates Are Important
- Performance Improvements: Updates often include optimizations that enhance flight stability, camera performance, and overall system efficiency.
- New Features: Firmware updates can introduce new flight modes, camera features, and other functionalities that expand the capabilities of your drone.
- Bug Fixes: Updates address known issues and bugs that may affect the drone’s performance or stability.
- Security Enhancements: Firmware updates include security patches that protect your drone from potential vulnerabilities and cyber threats.
- Compatibility: Updates ensure compatibility with the latest accessories, software, and regulations.
4.2 Updating via Over-the-Air (OTA)
-
Preparation:
- Ensure the drone and remote controller are fully charged.
- Connect your mobile device to the remote controller.
- Ensure your mobile device has a stable Wi-Fi or cellular data connection.
-
Autel Explorer App:
- Open the Autel Explorer app on your mobile device.
- The app will automatically check for available firmware updates.
-
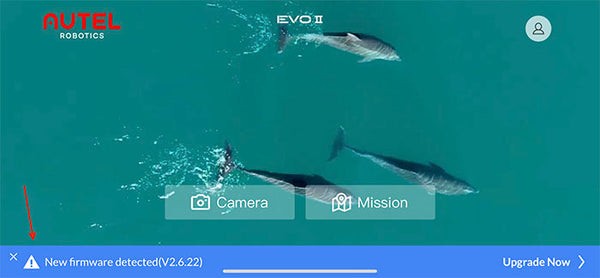
Download and Installation:
- If an update is available, you will see a notification at the bottom of the screen.
- Tap the notification to view the update details and release notes.
- Tap Download to download the firmware onto your mobile device.
-
Uploading to the Drone:
- Once the download is complete, tap Start Uploading to upload the firmware update to your Autel EVO unit.
-
Update Process:
- The app will upload the firmware to the drone and initiate the update process.
- Monitor the progress on the built-in screen of your EVO II remote controller.
- Do not power off the drone or remote controller during the update.
-
Reboot:
- Once the update is complete, reboot the drone and remote controller.
- Verify that the firmware has been successfully updated in the app settings.
4.3 Updating via microSD Card
-
Download Firmware:
- Visit the Autel Robotics website and navigate to the downloads section for your EVO II model (https://auteldrones.com/pages/evo-ii-downloads).
- Download the latest firmware update file (BIN file) to your computer.
-
Prepare microSD Card:
- Remove the microSD card from your EVO II and insert it into your computer using an adapter.
- Copy the firmware update file to the root directory of the microSD card. Ensure the file is not placed in any folder.
-
Insert microSD Card:
- Safely eject the microSD card from your computer and place it back into the EVO II aircraft.
-
Initiate Update:
- Power on your aircraft and remote controller. The drone will automatically detect the firmware update file on the microSD card.
- The update process will begin automatically. Monitor the progress on the built-in screen of the remote controller.
-
Completion:
- Once the update is complete, the drone will reboot automatically.
- Remove the microSD card and verify that the firmware has been successfully updated in the app settings.
4.4 Verifying the Firmware Version
-
Power On:
- Power on your aircraft and remote controller, then plug the remote controller into a smartphone, tablet, or other mobile device.
-
Autel Explorer App:
- Open the Autel Explorer app on your mobile device and tap the Camera option.
-
Settings Menu:
- In the top right-hand corner, tap the small gear icon. You will now be in your Settings menu.
-
Firmware Version:
- Once in the Settings menu, tap the General option at the bottom left-hand side of the screen. Depending on your app version, you may see two different sets of options. Regardless of the menu options, you will want to tap Firmware version next.
-
Review Versions:
- Review the table, which lists version numbers for each specific component in your aircraft. Compare the numbers displayed with the latest version numbers listed on our website, which can be found by visiting www.auteldrones.com/pages/evo-ii-downloads and clicking Version and Release Notes at the bottom of the page. If the numbers match, your firmware is up to date.
5. Optimizing the Built-In Screen for Enhanced Performance
To get the most out of your Autel EVO’s built-in screen, consider these optimization tips for enhanced performance and usability.
5.1 Adjusting Screen Brightness and Settings
-
Brightness Levels:
- Adjust the screen brightness to suit your flying environment. Increase brightness in bright sunlight and reduce it in low-light conditions to conserve battery.
-
Custom Settings:
- Explore the screen settings menu for options to adjust contrast, color temperature, and display modes.
- Customize these settings to your preferences for optimal viewing.
-
Automatic Adjustment:
- Some models feature automatic brightness adjustment based on ambient light. Enable this feature for convenient, hands-free operation.
5.2 Customizing Display Information
-
Prioritize Key Data:
- Customize the information displayed on the screen to prioritize the data most relevant to your flight.
- Focus on essential metrics like battery life, GPS signal, altitude, and distance.
-
Layout Options:
- Explore different layout options to arrange the display information in a way that suits your flying style.
- Some models allow you to move and resize the data elements for optimal visibility.
-
Alert Settings:
- Customize alert settings to receive notifications for critical events, such as low battery, signal loss, or geofence boundaries.
- Ensure these alerts are easily visible on the screen to prevent potential issues.
5.3 Minimizing Glare and Reflections
-
Screen Protectors:
- Apply an anti-glare screen protector to reduce reflections and improve visibility in bright sunlight.
- Choose a high-quality screen protector designed specifically for your Autel EVO model.
-
Sunshade:
- Use a sunshade or hood to block direct sunlight from hitting the screen.
- A sunshade can significantly improve visibility, especially in outdoor environments.
-
Optimal Positioning:
- Position the remote controller to minimize glare and reflections.
- Adjust your body position or find a shaded area to enhance screen visibility.
6. Troubleshooting Common Issues with the Built-In Screen
Even with careful setup and maintenance, you might encounter some issues with the built-in screen. Here’s how to troubleshoot common problems and keep your system running smoothly.
6.1 Screen Not Displaying Information
-
Power Check:
- Ensure both the drone and remote controller are powered on and have sufficient battery life.
- A low battery can sometimes cause the screen to malfunction.
-
Connection:
- Verify that the remote controller is properly connected to the drone.
- If necessary, re-bind the remote controller to the drone following the instructions in the user manual.
-
Cable Inspection:
- If you’re using a cable to connect, inspect the cable for any damage or loose connections.
- Try using a different cable to rule out a faulty connection.
6.2 Screen Freezing or Lagging
-
Firmware Update:
- Ensure that both the drone and remote controller have the latest firmware installed.
- Outdated firmware can cause performance issues and instability.
-
App Compatibility:
- If you’re using the Autel Explorer app, make sure it is compatible with your device and the drone’s firmware.
- Update or reinstall the app if necessary.
-
Background Apps:
- Close any unnecessary apps running in the background on your mobile device.
- These apps can consume resources and affect the performance of the Autel Explorer app.
6.3 Display Issues (e.g., Blurry, Distorted)
-
Screen Cleaning:
- Clean the screen with a soft, lint-free cloth to remove any dirt, dust, or smudges.
- Avoid using harsh chemicals or abrasive materials that could damage the screen.
-
Resolution Settings:
- Check the display resolution settings in the Autel Explorer app (if applicable) and adjust them as needed.
- Ensure the resolution is set to an optimal level for your device.
-
Hardware Check:
- If the display issues persist, there may be a hardware problem with the screen.
- Contact Autel Robotics support or a qualified repair technician for assistance.
6.4 Contacting Autel Robotics Support
-
Support Resources:
- Visit the Autel Robotics website for access to FAQs, user manuals, and troubleshooting guides.
- Check the support section for solutions to common issues.
-
Customer Support:
- Contact Autel Robotics customer support via email, phone, or live chat.
- Provide detailed information about the issue you’re experiencing and any troubleshooting steps you’ve already taken.
-
Warranty Information:
- Check your warranty information to determine if the issue is covered under warranty.
- Follow the warranty claim process to request a repair or replacement.
7. Advanced Features and Customization
Unlock the full potential of your Autel EVO built-in screen by exploring advanced features and customization options.
7.1 Using the Screen for Intelligent Flight Modes
-
ActiveTrack:
- Use the screen to select and track subjects in real-time, allowing the drone to follow them automatically.
- Adjust tracking parameters such as speed, distance, and angle for optimal results.
-
Orbit:
- Set up an orbit point on the screen and let the drone circle around it, capturing smooth, cinematic shots.
- Customize the orbit radius and speed for creative effects.
-
Waypoint:
- Plan and execute complex flight paths by setting waypoints on the screen.
- Adjust the drone’s altitude, speed, and camera angles at each waypoint for precise control.
7.2 Setting Up Custom Alerts and Notifications
-
Low Battery Warning:
- Configure a low battery warning to receive a notification when the drone’s battery reaches a critical level.
- Set the warning threshold based on your flight conditions and distance from the home point.
-
Signal Loss Alert:
- Enable a signal loss alert to be notified if the connection between the drone and remote controller is interrupted.
- Take immediate action to regain control of the drone or initiate the return-to-home (RTH) function.
-
Geofence Boundary:
- Set up a geofence boundary to prevent the drone from flying beyond a specified area.
- Receive a notification if the drone approaches or crosses the boundary.
7.3 Integrating with Third-Party Apps and Accessories
-
Compatibility:
- Check if your Autel EVO model is compatible with third-party apps and accessories.
- Some apps may offer advanced features, such as flight planning, data analysis, and mapping.
-
Accessories:
- Consider using accessories like external monitors, range extenders, and precision landing systems to enhance your flying experience.
- Ensure these accessories are compatible with your drone and remote controller.
-
Calibration:
- Follow the instructions provided by the app or accessory manufacturer to properly integrate and calibrate the devices.
- Test the integration thoroughly before using it in critical situations.
8. Maintaining and Caring for Your Autel EVO Screen
Proper maintenance and care are essential for prolonging the life of your Autel EVO built-in screen.
8.1 Cleaning the Screen Properly
-
Soft Cloth:
- Use a soft, lint-free microfiber cloth to clean the screen.
- Avoid using paper towels or abrasive materials that could scratch the surface.
-
Gentle Wiping:
- Gently wipe the screen in a circular motion to remove dirt, dust, and fingerprints.
- Apply minimal pressure to avoid damaging the screen.
-
Cleaning Solutions:
- If necessary, use a screen cleaning solution specifically designed for electronic devices.
- Avoid using household cleaners, alcohol, or ammonia-based products.
-
Moisture Control:
- Ensure the cloth is only slightly damp to prevent moisture from seeping into the device.
- Never spray liquid directly onto the screen.
8.2 Protecting the Screen from Damage
-
Screen Protector:
- Apply a high-quality screen protector to shield the screen from scratches, fingerprints, and impacts.
- Choose a screen protector made from tempered glass or PET film for optimal protection.
-
Storage Case:
- Store the remote controller in a protective case when not in use to prevent damage during transport and storage.
- Ensure the case is padded and provides a snug fit for the controller.
-
Avoid Extreme Temperatures:
- Avoid exposing the screen to extreme temperatures, as heat and cold can damage the display.
- Store the remote controller in a cool, dry place away from direct sunlight.
8.3 Storing the Remote Controller Correctly
-
Cool, Dry Place:
- Store the remote controller in a cool, dry place away from moisture, dust, and direct sunlight.
- Avoid storing the controller in a vehicle or other location where temperatures can fluctuate significantly.
-
Battery Care:
- Remove the batteries from the remote controller if you plan to store it for an extended period.
- Store the batteries in a separate container to prevent corrosion or leakage.
-
Cable Management:
- Properly coil and store any cables to prevent tangling and damage.
- Use cable ties or organizers to keep the cables neat and tidy.
9. Benefits of Choosing CARDIAGTECH.NET for Your Automotive Needs
While the Autel EVO built-in screen enhances your drone experience, CARDIAGTECH.NET offers solutions to elevate your automotive repair and diagnostic capabilities. Here’s why choosing us is a smart decision.
9.1 High-Quality Automotive Tools and Equipment
-
Wide Selection:
- We offer a wide range of automotive tools and equipment, including diagnostic scanners, code readers, and specialized tools for various vehicle systems.
- Find everything you need to perform accurate and efficient repairs.
-
Top Brands:
- We partner with leading brands in the automotive industry to provide you with high-quality, reliable products.
- Our tools are built to last and deliver consistent performance.
-
Latest Technology:
- We stay up-to-date with the latest advancements in automotive technology to offer you cutting-edge tools and equipment.
- Our products incorporate the latest features and capabilities to enhance your diagnostic and repair processes.
9.2 Expert Support and Training
-
Knowledgeable Staff:
- Our team of experts is knowledgeable about automotive tools and equipment and can provide you with personalized recommendations.
- We can help you choose the right tools for your specific needs and applications.
-
Training Resources:
- We offer training resources, including online tutorials, webinars, and in-person workshops, to help you master the use of our tools.
- Enhance your skills and knowledge to perform complex diagnostics and repairs.
-
Technical Support:
- We provide technical support to assist you with any questions or issues you may encounter while using our tools.
- Our support team is available to provide guidance and troubleshooting assistance.
9.3 Competitive Pricing and Value
-
Affordable Options:
- We offer competitive pricing on our products to provide you with the best value for your investment.
- Find affordable options for every budget and application.
-
Promotions and Discounts:
- Take advantage of our promotions and discounts to save even more on your purchases.
- Sign up for our newsletter to receive updates on special offers and promotions.
-
Long-Term Savings:
- Investing in high-quality tools from CARDIAGTECH.NET can lead to long-term savings by reducing repair times, improving accuracy, and minimizing errors.
- Our tools are designed to help you work more efficiently and effectively.
10. Conclusion: Elevate Your Experience with Autel EVO and CARDIAGTECH.NET
The Autel EVO built-in screen revolutionizes the drone flying experience, offering real-time data and intuitive controls at your fingertips. By understanding its features, optimizing its settings, and keeping it well-maintained, you can unlock the full potential of your drone. At CARDIAGTECH.NET, we are dedicated to providing top-quality automotive tools and equipment to enhance your repair and diagnostic capabilities. Whether you’re a drone enthusiast or an automotive professional, having reliable tools and expert support can make all the difference.
Ready to elevate your automotive repair capabilities? Contact CARDIAGTECH.NET today for expert advice and the best tools in the industry. Reach us at 276 Reock St, City of Orange, NJ 07050, United States, or give us a call/WhatsApp at +1 (641) 206-8880. Explore our full range of products and services online at CARDIAGTECH.NET. Let us help you take your work to the next level with our exceptional tools and dedicated support.
FAQ: Autel EVO Built-In Screen
-
What is the primary benefit of having a built-in screen on the Autel EVO remote controller?
Having a built-in screen eliminates the need for an external mobile device, providing real-time flight data, camera controls, and a live video feed directly on the remote controller for enhanced convenience and reliability.
-
Which Autel EVO models come with a built-in screen?
The Autel EVO II Pro, Autel EVO II, Autel EVO Nano Series, and Autel EVO Lite Series are among the models that feature a built-in screen.
-
How do I update the firmware on my Autel EVO using the built-in screen?
Firmware updates can be performed via OTA (Over-the-Air) using the Autel Explorer app or by downloading the firmware file to a microSD card and inserting it into the drone.
-
Can I adjust the brightness of the built-in screen?
Yes, the screen brightness can be adjusted to suit different lighting conditions, and some models offer automatic brightness adjustment based on ambient light.
-
What should I do if the built-in screen is not displaying any information?
Check that both the drone and remote controller are powered on with sufficient battery, ensure the remote controller is properly connected to the drone, and inspect the cable for any damage or loose connections.
-
How do I clean the built-in screen?
Use a soft, lint-free microfiber cloth to gently wipe the screen in a circular motion to remove dirt, dust, and fingerprints. Avoid using harsh chemicals or abrasive materials.
-
What can I do to protect the built-in screen from damage?
Apply a high-quality screen protector to shield the screen from scratches and impacts, and store the remote controller in a protective case when not in use.
-
How can I use the built-in screen to control intelligent flight modes?
The screen allows you to select and adjust parameters for intelligent flight modes like ActiveTrack, Orbit, and Waypoint, providing real-time control and customization.
-
Are there any third-party apps or accessories that can enhance the functionality of the built-in screen?
Yes, check the compatibility of your Autel EVO model with third-party apps and accessories like external monitors and range extenders to enhance your flying experience.
-
Where can I find high-quality automotive tools and equipment to complement my drone hobby or professional needs?
Visit CARDIAGTECH.NET at 276 Reock St, City of Orange, NJ 07050, United States, or contact us via WhatsApp at +1 (641) 206-8880 for a wide range of automotive tools, expert support, and competitive pricing.