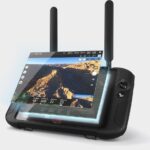
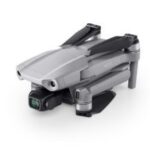
The Autel Evo 2 Pro Camera Settings are crucial for capturing stunning aerial footage, and CARDIAGTECH.NET is here to help you unlock its full potential. Whether you’re adjusting white balance for optimal color accuracy or fine-tuning exposure for perfect clarity, understanding these settings is key. Explore our collection of tools designed to enhance your drone photography and videography, ensuring you achieve professional-quality results every time. Dive into advanced color grading techniques and discover the power of RAW photography footage to elevate your aerial visuals to new heights.
1. Understanding White Balance (WB) in Autel EVO 2 Pro
White balance is a critical camera setting that adjusts the color temperature of your images and videos, ensuring that white objects appear white regardless of the lighting conditions. Getting the white balance right is essential for accurate color representation and visually appealing footage.
1.1. The Importance of White Balance
Incorrect white balance can result in color casts, making your images appear too warm (orange/yellow tint) or too cool (blue tint). This can be particularly noticeable in aerial footage where the lighting can change rapidly.
**1.2. Common White Balance Presets
The Autel EVO 2 Pro offers several white balance presets to suit various shooting conditions:
- Daylight: A standard setting for outdoor shooting under direct sunlight, typically around 5500K.
- Cloudy: Warms up the image to compensate for the cooler tones of overcast conditions, usually around 6500K.
- Sunny: Optimized for bright, sunny conditions to ensure colors remain accurate and vibrant.
- Incandescent: Reduces the yellow or orange tint often caused by incandescent lighting, balancing the color temperature for indoor shots.
- Fluorescent: Corrects the greenish tint common under fluorescent lights, providing more natural-looking colors in indoor settings.
1.3. Manual White Balance Settings
For precise control, you can set the white balance manually by adjusting the Kelvin (K) value. This allows you to fine-tune the color temperature to match the specific lighting conditions.
1.4. Why Daylight WB is Often Sufficient
In many cases, the Daylight preset (around 5500K) is a good starting point for drone footage, even at night. This is because the sun is the primary light source during daylight hours, ranging from direct sunlight (~5500K) to cloudy (~6250K). These ranges are close enough that they can be adjusted in post-processing, especially when shooting in RAW format.
1.5. Adjusting WB in Post-Processing
When shooting in RAW format, white balance is less critical because you can easily adjust it in post-processing software like Adobe Lightroom or DaVinci Resolve. Simply select a white object in your image and use the eyedropper tool to set the white balance.
2. Understanding Exposure Settings
Exposure refers to the amount of light that reaches your camera sensor, which determines the brightness of your images and videos. Proper exposure is crucial for capturing well-balanced and detailed footage.
2.1. Key Exposure Settings
- Aperture: Controls the size of the lens opening, affecting both the amount of light entering the camera and the depth of field.
- Shutter Speed: Determines how long the camera sensor is exposed to light, affecting the brightness and motion blur.
- ISO: Measures the sensitivity of the camera sensor to light; higher ISO values are useful in low-light conditions but can introduce noise.
2.2. Metering Modes Explained
Metering modes help the camera determine the optimal exposure settings based on the light in the scene. Understanding these modes is essential for achieving accurate and balanced exposures in various shooting conditions.
-
Evaluative Metering (or Matrix Metering): This is the default mode on many cameras. It analyzes the entire scene and calculates the exposure based on an average of the light levels. It’s suitable for general use and scenes with even lighting.
-
Center-Weighted Metering: This mode gives more importance to the light levels in the center of the frame. It’s useful when the subject is in the center and you want to ensure it’s properly exposed, without being overly influenced by the edges of the frame.
-
Spot Metering: This mode measures the light from a very small area in the frame, usually the center spot. It’s ideal for tricky lighting situations where the background is much brighter or darker than the subject, allowing you to pinpoint the exact area for exposure measurement.
-
Highlight-Weighted Metering: This mode prioritizes the highlights in the scene, ensuring they are not overexposed. It’s particularly useful for preventing blown-out highlights in high-contrast scenes, preserving detail in the brightest areas.
2.3. Exposure Compensation
Exposure compensation allows you to manually adjust the exposure suggested by the camera’s metering system. This is useful when the camera’s automatic settings don’t produce the desired results.
2.4. Using Histograms for Accurate Exposure
A histogram is a graph that displays the tonal range of your image, from dark to light. By analyzing the histogram, you can determine if your image is overexposed (too many pixels on the right side), underexposed (too many pixels on the left side), or properly exposed (pixels evenly distributed).
2.5. Overexposure and Underexposure
- Overexposure: Occurs when too much light reaches the sensor, resulting in blown-out highlights and loss of detail in bright areas.
- Underexposure: Occurs when too little light reaches the sensor, resulting in dark shadows and loss of detail in dark areas.
3. Optimizing Color Profiles and Settings
Color profiles and settings play a crucial role in how colors are captured and displayed in your images and videos. Understanding these settings allows you to achieve the desired look and feel for your footage.
3.1. Understanding Color Profiles
A color profile is a set of data that defines a specific color space, allowing devices to reproduce colors accurately. Common color profiles include sRGB and Adobe RGB.
- sRGB: A standard color profile used for web content and general use. It has a smaller color gamut compared to Adobe RGB.
- Adobe RGB: A wider color profile that can reproduce a larger range of colors, making it suitable for professional photography and printing.
3.2. Choosing the Right Color Profile
For most drone applications, sRGB is sufficient, especially if you’re primarily sharing your footage online. However, if you plan to print your images or work on professional projects, Adobe RGB may be a better choice.
3.3. Adjusting Saturation and Contrast
Saturation and contrast settings can significantly impact the look of your footage.
- Saturation: Controls the intensity of the colors in your image. Increasing saturation can make colors more vibrant, while decreasing it can create a more muted or desaturated look.
- Contrast: Adjusts the difference between the dark and light areas of your image. Increasing contrast can make the image appear sharper and more defined, while decreasing it can create a softer look.
3.4. Using Log Color Profiles
Log color profiles, such as D-Log on DJI drones, capture a wider dynamic range, allowing you to preserve more detail in both the highlights and shadows. This is particularly useful for post-processing, where you can adjust the colors and tones to achieve your desired look.
3.5. Custom Color Settings
The Autel EVO 2 Pro allows you to create custom color settings to suit your specific needs. This includes adjusting parameters like hue, saturation, and luminance to fine-tune the colors in your footage.
4. Mastering Resolution and Frame Rate
Resolution and frame rate are key factors in determining the quality and smoothness of your videos. Understanding these settings is essential for achieving the desired look for your footage.
4.1. Understanding Resolution
Resolution refers to the number of pixels in your image or video, which determines the level of detail. Higher resolutions result in sharper and more detailed footage.
- 4K (3840 x 2160): A popular resolution for drone videos, offering excellent detail and clarity.
- 6K (5472 x 3078): The Autel EVO 2 Pro can shoot in 6K, providing even more detail and flexibility for cropping and editing.
- 1080p (1920 x 1080): A lower resolution that is still suitable for many applications, especially when file size is a concern.
4.2. Understanding Frame Rate
Frame rate refers to the number of frames per second (fps) in your video. Higher frame rates result in smoother motion and can be used for slow-motion effects.
- 24 fps: A standard frame rate for cinematic footage, providing a film-like look.
- 30 fps: A common frame rate for general video recording, offering a good balance between smoothness and file size.
- 60 fps: A higher frame rate that can be used for slow-motion effects or to capture fast-moving subjects with greater clarity.
- 120 fps: Ideal for capturing very slow-motion footage, allowing you to slow down the action without losing detail.
4.3. Choosing the Right Resolution and Frame Rate
The best resolution and frame rate for your footage will depend on your specific needs and intended use. For cinematic videos, 4K at 24 fps or 30 fps is a good choice. For action shots or slow-motion effects, 60 fps or 120 fps may be more appropriate.
4.4. Impact on File Size
Higher resolutions and frame rates result in larger file sizes, so it’s important to consider the storage capacity of your drone and your editing computer.
5. Advanced Camera Modes and Settings
The Autel EVO 2 Pro offers a variety of advanced camera modes and settings that can help you capture stunning aerial footage in different shooting scenarios.
5.1. Intelligent Flight Modes
- ActiveTrack: Allows the drone to automatically follow a moving subject, keeping it in the frame.
- Orbit: Enables the drone to circle around a subject, capturing a dynamic and engaging shot.
- Waypoints: Allows you to plan a flight path with multiple waypoints, enabling the drone to fly autonomously along the specified route.
- Hyperlapse: Creates a time-lapse video with the drone moving through the scene, adding a dynamic element to your time-lapse footage.
5.2. HDR (High Dynamic Range)
HDR mode captures multiple images with different exposures and combines them into a single image with a wider dynamic range, preserving detail in both the highlights and shadows.
5.3. Panorama Mode
Panorama mode allows you to capture wide-angle panoramic images by automatically stitching together multiple photos.
5.4. Burst Mode
Burst mode captures a series of photos in quick succession, allowing you to capture fast-moving subjects or moments with greater precision.
5.5. Interval Shooting
Interval shooting captures photos at set intervals, allowing you to create time-lapse videos or capture slow changes over time.
6. Optimizing Focus Settings
Proper focus is essential for capturing sharp and detailed images and videos. Understanding the focus settings on your Autel EVO 2 Pro is crucial for achieving optimal results.
6.1. Autofocus Modes
- Single Autofocus (AF-S): Focuses on a single point and locks the focus. Suitable for stationary subjects.
- Continuous Autofocus (AF-C): Continuously adjusts the focus to keep moving subjects in focus.
- Manual Focus (MF): Allows you to manually adjust the focus using the focus ring on the lens.
6.2. Focus Peaking
Focus peaking highlights the areas of the image that are in focus, making it easier to achieve precise focus when using manual focus.
6.3. Hyperfocal Distance
Hyperfocal distance is the distance at which everything from half that distance to infinity is acceptably in focus. Understanding hyperfocal distance can help you maximize the depth of field in your images.
6.4. Using Focus Lock
Focus lock allows you to lock the focus on a specific point, even if the subject moves or the camera is repositioned.
7. Understanding and Using Filters
Filters are essential accessories for drone photography and videography, helping you to control the amount of light entering the camera and improve the quality of your footage.
7.1. ND (Neutral Density) Filters
ND filters reduce the amount of light entering the camera, allowing you to use slower shutter speeds or wider apertures in bright conditions. This can help you achieve motion blur in videos or reduce the depth of field in photos.
7.2. Polarizing Filters
Polarizing filters reduce glare and reflections, enhancing colors and improving contrast. They are particularly useful for shooting over water or through glass.
7.3. UV Filters
UV filters block ultraviolet light, which can cause a blue cast in your images. They also protect the lens from scratches and damage.
7.4. Graduated ND Filters
Graduated ND filters have a dark area on one side that gradually transitions to clear on the other. They are used to balance the exposure in scenes with a bright sky and a dark foreground.
7.5. Choosing the Right Filter
The best filter for your drone will depend on the specific shooting conditions and your desired results. ND filters are essential for controlling exposure in bright conditions, while polarizing filters are useful for reducing glare and enhancing colors.
8. Shooting in RAW vs. JPEG
Shooting in RAW format offers more flexibility for post-processing, while JPEG format is more convenient for quick sharing and smaller file sizes. Understanding the differences between these formats is essential for choosing the right one for your needs.
8.1. RAW Format
RAW format captures all the data from the camera sensor without any processing or compression. This allows you to make significant adjustments to the image in post-processing without losing quality.
8.2. JPEG Format
JPEG format compresses the image data, resulting in smaller file sizes. However, this compression can also result in a loss of detail and quality, especially when making significant adjustments in post-processing.
8.3. Advantages of Shooting in RAW
- Greater Dynamic Range: RAW files capture a wider dynamic range, preserving more detail in the highlights and shadows.
- More Flexibility in Post-Processing: RAW files allow you to adjust white balance, exposure, and other settings without losing quality.
- Non-Destructive Editing: RAW files are non-destructive, meaning that your original image data is preserved, and any adjustments you make are stored separately.
8.4. Advantages of Shooting in JPEG
- Smaller File Sizes: JPEG files are much smaller than RAW files, making them easier to store and share.
- Faster Processing: JPEG files require less processing power, allowing you to shoot more quickly.
- Compatibility: JPEG files are compatible with a wide range of devices and software.
8.5. When to Use RAW vs. JPEG
If you plan to make significant adjustments to your images in post-processing or want to preserve the highest possible quality, shooting in RAW format is the best choice. If you need to quickly share your images or are limited by storage space, shooting in JPEG format may be more appropriate.
9. Creative White Balance Techniques
Using white balance creatively can add unique effects and moods to your aerial footage. Experimenting with different white balance settings can help you achieve a distinctive look.
9.1. Intentionally Setting the Wrong WB
Deliberately setting the white balance to the wrong setting can create interesting color casts and moods. For example, setting the white balance to “Cloudy” on a sunny day can create a warm, golden tone.
9.2. Matching WB Across Multiple Shots
To ensure consistency in your footage, it’s important to match the white balance across multiple shots. You can use a white balance card or a white object in the scene to set the white balance accurately.
9.3. Using WB for Color Grading
White balance can be used as a color grading tool to adjust the overall look and feel of your footage. By making subtle adjustments to the white balance, you can create a variety of different moods and effects.
9.4. Setting WB Based on Light Sources
When shooting in mixed lighting conditions, try to set the white balance based on the dominant light source. This will help to minimize color casts and create a more natural-looking image.
9.5. The 3600K Trick for Fireworks
For filming fireworks at night, setting the white balance to 3600K is often the best choice. This helps to keep the original fireworks colors true and accurate.
10. Maximizing Dynamic Range
Dynamic range refers to the range of tones from the darkest shadows to the brightest highlights that a camera can capture. Maximizing dynamic range is essential for preserving detail in both the dark and light areas of your image.
10.1. Shooting in RAW Format
As mentioned earlier, shooting in RAW format captures a wider dynamic range compared to JPEG format. This allows you to recover more detail in the highlights and shadows during post-processing.
10.2. Using HDR Mode
HDR mode captures multiple images with different exposures and combines them into a single image with a wider dynamic range. This is particularly useful for scenes with a large difference between the brightest and darkest areas.
10.3. Exposing to the Right (ETTR)
Exposing to the right involves adjusting the exposure so that the highlights are as bright as possible without being overexposed. This maximizes the amount of light captured by the sensor, resulting in a cleaner image with less noise in the shadows.
10.4. Using ND Filters
ND filters can help you control the exposure in bright conditions, allowing you to use wider apertures and slower shutter speeds. This can help you maximize the dynamic range and capture more detail in the highlights.
10.5. Post-Processing Techniques
In post-processing, you can use techniques like shadow and highlight recovery to further maximize the dynamic range of your images.
FAQ: Autel EVO 2 Pro Camera Settings
-
What are the best camera settings for the Autel EVO 2 Pro for general use?
For general use, start with a Daylight white balance, 4K resolution at 30 fps, and adjust exposure settings based on the lighting conditions. Use ND filters in bright sunlight to maintain cinematic shutter speeds.
-
How do I adjust the white balance on my Autel EVO 2 Pro?
You can adjust the white balance in the camera settings menu. Choose from presets like Daylight, Cloudy, or Manual, where you can set the Kelvin value.
-
What is the best resolution and frame rate for cinematic drone footage?
For cinematic drone footage, 4K resolution at 24 fps or 30 fps is ideal.
-
Should I shoot in RAW or JPEG with my Autel EVO 2 Pro?
Shoot in RAW for maximum flexibility in post-processing and to preserve the highest quality. Use JPEG for quick sharing and smaller file sizes.
-
How do I use ND filters with my Autel EVO 2 Pro?
Attach the ND filter to the camera lens. Choose the appropriate ND filter based on the brightness of the scene to maintain a shutter speed that is double your frame rate (e.g., 1/50th of a second for 24 fps).
-
What is the hyperfocal distance, and how can it help my drone photography?
Hyperfocal distance is the distance at which everything from half that distance to infinity is acceptably in focus. Knowing this can help you maximize depth of field.
-
How do I use focus peaking on my Autel EVO 2 Pro?
Enable focus peaking in the camera settings. The areas in focus will be highlighted, making it easier to achieve precise focus when using manual focus.
-
What are the advantages of using a polarizing filter on my drone camera?
Polarizing filters reduce glare and reflections, enhance colors, and improve contrast, especially when shooting over water or through glass.
-
How do I maximize the dynamic range of my Autel EVO 2 Pro camera?
Shoot in RAW format, use HDR mode, expose to the right (ETTR), and use ND filters in bright conditions.
-
Can CARDIAGTECH.NET help me find the right tools to enhance my drone photography and videography?
Yes, CARDIAGTECH.NET offers a range of tools and equipment to help you optimize your drone footage, from filters to professional editing software. Contact us at +1 (641) 206-8880 or visit our location at 276 Reock St, City of Orange, NJ 07050, United States, or visit our website CARDIAGTECH.NET for expert advice and assistance.
Capturing stunning aerial footage with the Autel EVO 2 Pro requires a thorough understanding of its camera settings. By mastering white balance, exposure, color profiles, resolution, frame rate, and advanced camera modes, you can unlock the full potential of your drone and create professional-quality images and videos.
If you’re facing challenges optimizing your Autel EVO 2 Pro or need assistance selecting the right tools, CARDIAGTECH.NET is here to help. Our experts can guide you through the intricacies of camera settings and recommend equipment to enhance your drone photography and videography. Contact us today at +1 (641) 206-8880 or visit us at 276 Reock St, City of Orange, NJ 07050, United States, or visit our website CARDIAGTECH.NET to discover how we can elevate your aerial visuals. Let us help you capture the perfect shot every time.