Understanding your car’s inner workings can be fascinating and incredibly useful for maintenance and diagnostics. The On-Board Diagnostics II (OBD-II) system provides a wealth of data from your vehicle’s computer, and with Arduino, accessing this information becomes surprisingly accessible. This tutorial will guide you through the basics of using Arduino with an OBD-II interface, specifically focusing on utilizing the CAN bus protocol and the ELM327 chip.
OBD-II is a standardized system used in most modern vehicles to monitor engine and emissions systems. Within OBD-II, the Controller Area Network (CAN bus) is a primary communication protocol that allows different parts of your car to talk to each other. To interface your Arduino with this system, you’ll need a translator, and that’s where the ELM327 chip comes in.
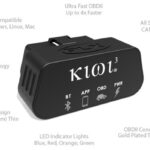
The ELM327 is essentially a microcontroller pre-programmed with firmware that understands various OBD-II protocols and translates them into a simpler serial format that Arduino can easily read. Originally developed by Elm Electronics, the ELM327 has become an industry standard, and clones are widely available at affordable prices. These clones, often from Asian manufacturers, offer different connectivity options like USB, Bluetooth, Serial, and WiFi. For Arduino projects, a serial TTL compatible ELM327 interface is ideal as it can directly connect to Arduino’s I/O pins.
To begin, you’ll need to familiarize yourself with the AT command set used to control the ELM327 chip. These commands are the foundation for communicating with your car’s ECU (Engine Control Unit). A simple terminal program can be invaluable for this initial exploration. For example, sending the command ATI (followed by a carriage return) to the ELM327 should elicit a response identifying the chip, such as “ELM327 v1.5”. While version 1.5 is a common reported version in clones, it’s important to note that ELM Electronics never officially released a 1.5 version.
Once connected to your vehicle’s OBD-II port, you can start requesting real-time data using OBD Parameter IDs (PIDs). PIDs are codes used to request specific parameters from the ECU, like engine temperature, RPM, speed, and battery voltage. For instance, the command ATRV will typically return the vehicle’s battery voltage. Comprehensive lists of standard OBD-II PIDs are readily available online, including resources like the Wikipedia page on OBD-II PIDs.
While OBD-II primarily functions as a read-only system for monitoring, it’s a powerful tool for understanding your vehicle’s health and performance. With Arduino and an ELM327 interface, you can create custom dashboards, log data, and even automate certain diagnostic tasks. Exploring the AT commands and OBD PIDs is the first step in unlocking the potential of Arduino for automotive applications and building your own Arduino CAN OBD-II projects.

