
This guide provides a step-by-step walkthrough for activating VCDS (Vag-Com Diagnostic System) version 18.2 using the VCDS Loader. This process is crucial for enabling the full functionality of your VCDS interface and ensuring proper communication with VAG (Volkswagen Audi Group) vehicles.
Installing VCDS 18.2 Software
Before activating with the VCDS Loader, you must correctly install the VCDS 18.2 software. Follow these instructions carefully:
- Disconnect the VAG-COM Cable: Ensure your VAG-COM cable is not connected to your computer during the software installation.
- Run the Installer: Execute the “VCDS-Release-18.2.0-Installer.exe” file. Crucially, if using a 64-bit Windows system, select the option “Install 32-bit EXE on 64-bit System” during installation. This ensures compatibility.
- Do Not Launch VCDS: After a successful installation, do not run the VCDS software directly.
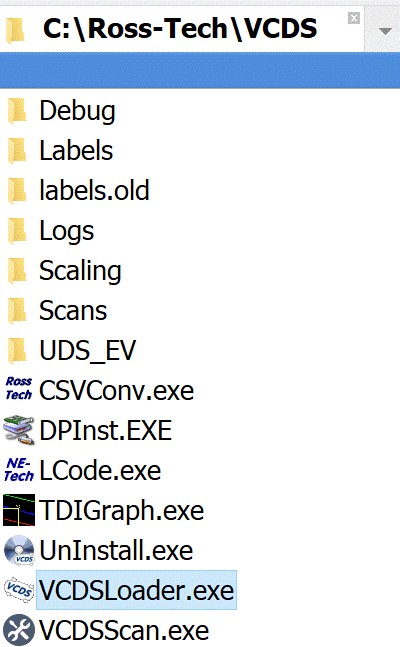
- Copy VCDSLoader.exe: Locate the “VCDSLoader.exe” file and copy it into the VCDS installation directory. This is typically found at:
C:Ross-TechVCDS.
 vcds-folder-location
Activating VCDS with VCDS Loader
With the software installed, proceed with the activation process using VCDS Loader:
- Connect the Cable: Connect your VAG-COM cable to your computer’s USB port. Allow approximately 20 seconds for Windows to automatically install the necessary drivers.
- Launch VCDSLoader: Run “VCDSLoader.exe” to launch the VCDS software. From this point forward, always use “VCDSLoader.exe” to start VCDS. This ensures the software runs in its activated state.
- Verify Installation: Click “Options” and then “Test” within the VCDS software to confirm successful installation and activation. A successful test indicates proper communication with the interface and readiness for vehicle diagnostics. You should see a “Port Status: OK” message.
VCDS 18.2 Activation for Upgraded Cables
The activation process for upgraded cables may be more involved. Here’s a detailed guide:
-
Download and Install: Download the appropriate language version of the VCDS software. Install it following the prompts, ensuring to choose the 32-bit installation option on 64-bit systems. Do not run the software after installation.
-
Install VCDS Loader: Install the VCDS Loader from the provided CD or downloaded source. This tool activates the device and protects the software.
-
Hardware Registration: Run VCDS Loader. Click “Register Hardware.” This generates a registration file. Provide this file to your supplier for activation.
-
Complete Registration: After receiving the registration file from your supplier (a
register_license_XXXX.datfile), click “Register” within VCDS Loader. Locate and select the received file. This completes the activation process. -
Run VCDS: Launch VCDS using VCDSLoader.exe. The software is now fully activated and can be used for diagnostics and coding. Activation is only required once per PC. Future updates can be performed online.
This activation process ensures the security and stability of the VCDS interface. Following these steps carefully enables the full diagnostic capabilities of your VCDS system for VAG vehicles.