Engine swaps, especially when upgrading to a powerful engine like a 6.2L, can present exciting performance gains. However, they can also introduce complex electrical challenges, often leading to a frustrating check engine light. Diagnosing electrical problems after a 6.2l engine swap, particularly those related to wiring and the OBDII system, requires a systematic approach. This guide will explore common issues and diagnostic steps, focusing on how to interpret OBDII readings and utilize wiring diagrams to resolve check engine light problems after your swap.
Understanding OBDII and CAN Bus Communication
Modern vehicles rely on a Controller Area Network (CAN) bus system for various modules to communicate. The OBDII (On-Board Diagnostics II) port is your gateway to this system, allowing you to read diagnostic trouble codes (DTCs) and monitor sensor data. When you encounter a “check engine light” after a 6.2L engine swap, your OBDII scanner is the first tool you should reach for.
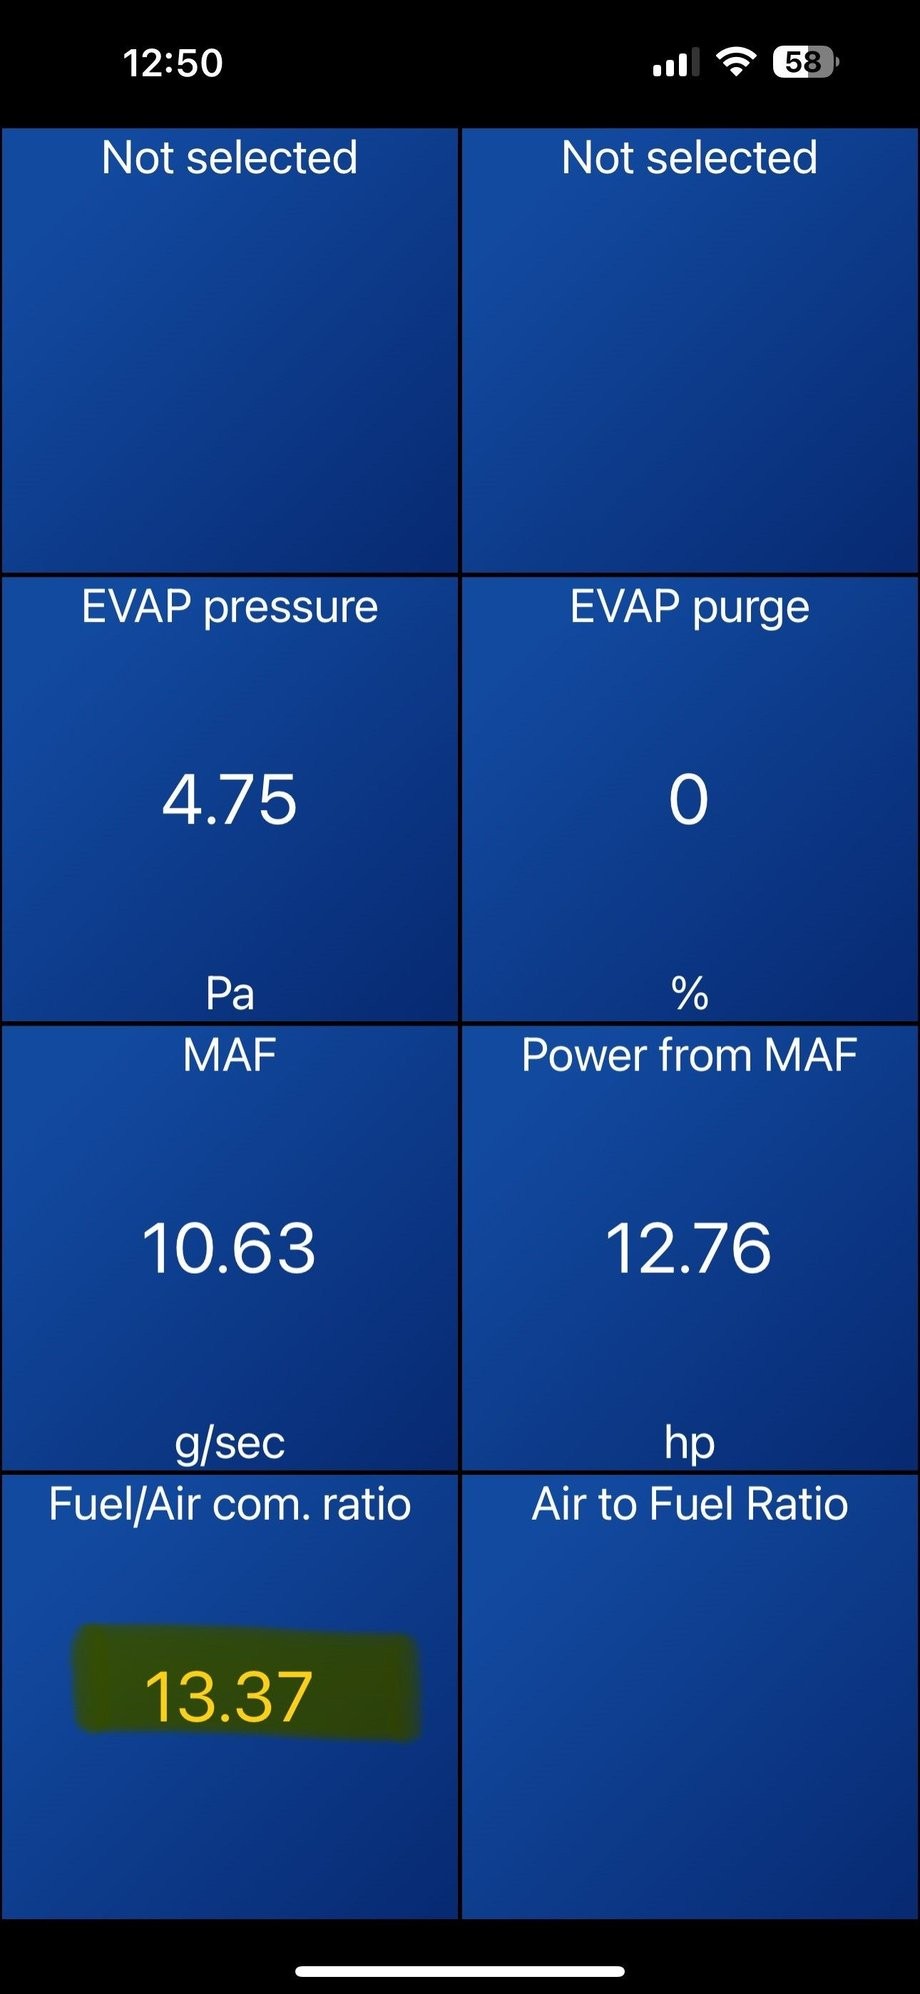
The original poster in a forum thread described a situation with several concerning symptoms after what we can infer was likely an engine swap, given the complexity of the issues. They reported a “Bus A Off” error (U0073), transmission control system malfunction (P0700), and random misfires (P0300), alongside unusual readings like a Fuel/Air Commanded Ratio of 13.37 and a blank Air to Fuel Ratio reading. These codes and readings strongly suggest potential wiring or communication problems within the CAN bus system, which are not uncommon after engine swaps.
Diagnostic Steps for Wiring and CAN Bus Issues
When tackling a “check engine light” post-engine swap, especially with codes like U0073 indicating a data bus issue, a methodical approach is crucial. Here’s a breakdown of steps, incorporating the diagnostic efforts of the original poster and expanding on best practices:
1. Initial OBDII Scan and Code Interpretation
Begin by using an OBDII scanner to retrieve all stored DTCs. Note down all codes and their descriptions. Codes like U0073 “Control Module Data Bus Off” are critical as they pinpoint a communication breakdown. P0700 and P0300, while seemingly engine-related, can also be triggered by underlying electrical or communication faults affecting the engine and transmission control modules.
2. Voltage and Resistance Checks on the CAN Bus
The original poster performed voltage and resistance checks on the CAN High and CAN Low signals with the ignition OFF, which is a good starting point. Here’s a more detailed explanation and what the readings suggest:
-
Voltage Checks (Ignition OFF):
- CAN High to Body Ground & CAN Low to Body Ground: Readings of 0.88 to 1.2 Volts (as reported by the original poster) are within a typical range for a resting CAN bus. This indicates neither signal is directly shorted to ground or battery voltage in a static state. However, this is just a preliminary check.
- Short to Battery vs. Short to Ground: The video mentioned by the original poster correctly states that a short to battery would likely show voltage close to battery voltage, and a short to ground would typically show low resistance (not an open line) to ground. The “open line” resistance reading in the original post for CAN High and Low to ground is normal in an unpowered state.
-
Voltage Checks (Ignition ON/Engine Running): This is a crucial next step the original poster planned to take.
- CAN High to Body Ground: Should typically read around 2.5V when idle and fluctuate with data transmission (observable with a scope).
- CAN Low to Body Ground: Should typically read around 2.5V when idle and fluctuate in opposition to CAN High.
- CAN High to CAN Low (Differential Voltage): This is the most important voltage to measure, ideally with an oscilloscope to visualize the CAN bus waveform. A healthy CAN bus will show a differential voltage fluctuating around 2.5V with data transmission. A multimeter can give a basic reading, but a scope is far more informative.
It’s important to note that specific voltage ranges can vary slightly depending on the vehicle and system. Consulting a wiring diagram and service manual specific to the vehicle and engine being swapped is highly recommended.
3. Utilizing Wiring Diagrams for a 6.2L Engine Swap
The keyword “6.2l Engine Swap Check Engine Light Wiring Diagram From Obdii” highlights the critical need for accurate wiring information. After an engine swap, especially when integrating a different engine family into a vehicle, wiring mismatches or errors are common culprits for CAN bus and check engine light issues.
- Source a Reliable Wiring Diagram: Obtain a wiring diagram for both the original vehicle’s electrical system and the 6.2L engine’s control system. Autel websites and professional repair databases are excellent resources for accessing accurate wiring diagrams.
- Verify Pinouts and Connections: Meticulously compare the wiring diagrams to the actual wiring in the vehicle, especially around the engine control module (ECM), transmission control module (TCM), and OBDII port. Engine swaps often require adapting wiring harnesses, and errors in pin assignments or splices can disrupt CAN bus communication.
- Focus on CAN Bus Wires: Specifically trace the CAN High and CAN Low wires throughout the system. Ensure they are correctly connected to all relevant modules and that there are no breaks, shorts, or excessive resistance in the wiring. Pay attention to termination resistors, which are crucial for CAN bus integrity.
4. Investigate Suspected Modules: Radio and TCM
The original poster suspected the radio and TCM based on their symptoms. This is a reasonable approach:
- Radio Issues: A malfunctioning radio or its wiring can sometimes interfere with the CAN bus, particularly if it shares a communication bus with other critical modules. Removing the radio fuse, as the original poster suggested, is a good isolation test to see if it resolves the U0073 code.
- TCM Issues (P0700): The P0700 code directly points to a transmission control system malfunction. Wiring issues related to the TCM or the TCM itself could be the source of the problem. Again, checking TCM fuses and wiring, referencing wiring diagrams, is essential.
5. Address Misfires (P0300) and Fuel/Air Ratio
Random misfires (P0300) and an incorrect Fuel/Air Commanded Ratio (13.37 vs. expected 14.7) can be secondary symptoms of the underlying CAN bus or wiring problems. If the ECM is not receiving accurate sensor data due to communication issues, it can miscalculate fuel delivery and ignition timing, leading to misfires and incorrect fuel ratios.
- Prioritize CAN Bus and Wiring First: Before diving deep into misfire diagnosis, resolve the U0073 and any CAN bus related issues. Often, fixing the communication problems will resolve secondary issues like misfires.
- Check Basic Misfire Causes After Wiring is Verified: Once the wiring and CAN bus are confirmed to be sound, then investigate typical misfire causes like spark plugs, ignition coils, fuel injectors, and vacuum leaks if the P0300 persists.
 OBDII Scanner Reading Fuel/Air Ratio
This image depicts an OBDII scanner displaying a Fuel/Air Commanded Ratio reading. Inconsistent or unusual fuel/air ratio readings, especially in conjunction with CAN bus communication errors, can indicate underlying electrical or sensor issues after a 6.2L engine swap.
Conclusion
Troubleshooting check engine lights and electrical issues after a 6.2L engine swap demands a systematic and knowledgeable approach. By utilizing OBDII scanners, understanding CAN bus diagnostics, and crucially, employing accurate wiring diagrams, you can effectively pinpoint and resolve wiring problems. Focusing on the U0073 code and systematically checking voltage, resistance, and wiring connections, while considering potentially interfering modules like the radio and TCM, will guide you towards a successful resolution and get your swapped 6.2L engine running smoothly without that persistent check engine light. Remember to always prioritize safety and consult professional resources when dealing with automotive electrical systems.

