Monitoring your car’s health and performance has never been easier, thanks to advancements in automotive technology and smart home integration. This guide will walk you through setting up a Car Wifi Obd 2 Obd2 Obdii connection with Home Assistant using WiCAN, allowing you to access real-time vehicle diagnostics and data directly within your home automation system. This powerful combination opens up a world of possibilities for vehicle monitoring, automation, and deeper insights into your car’s operation.
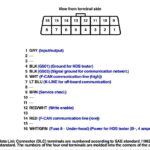
Modern vehicles are equipped with an On-Board Diagnostics II (OBD2) port, a standardized interface that provides access to a wealth of data about your car’s engine, emissions, and other systems. Traditionally, accessing this data required wired OBD2 scanners. However, with the advent of car wifi obd2 adapters, you can now wirelessly retrieve this information. WiCAN is an excellent example of such a device, offering a robust and reliable wifi obdii interface.
Integrating a car wifi obd 2 device like WiCAN with Home Assistant empowers you to go beyond simple error code reading. You can create custom dashboards to monitor parameters like engine temperature, fuel level, battery voltage, and much more, all in real-time. Furthermore, by leveraging Home Assistant’s automation capabilities, you can set up alerts for unusual readings, trigger actions based on vehicle status, and even log data for trend analysis and vehicle maintenance planning.
Let’s delve into the steps to connect your WiCAN car wifi obd2 adapter to Home Assistant.
-
Install Mosquitto Broker Add-on in Home Assistant: MQTT (Message Queuing Telemetry Transport) acts as the communication bridge between WiCAN and Home Assistant. Mosquitto is a popular MQTT broker. Navigate to your Home Assistant instance and install the Mosquitto Broker add-on. This will be essential for WiCAN to send obd2 data to Home Assistant.
-
Create a Dedicated Home Assistant User for WiCAN: For security and organization, create a new user account within Home Assistant specifically for WiCAN. These credentials will be used to configure the MQTT settings on your WiCAN device, ensuring secure communication between your car wifi obdii adapter and your smart home system.
-
Connect to WiCAN Access Point: Power up your WiCAN device and connect your computer or smartphone to the WiCAN’s Wi-Fi access point, typically named
WiCAN_xxxxxxxxxxxx. -
Access WiCAN Web Interface: Open a web browser and navigate to
http://192.168.80.1/. This will take you to the WiCAN’s web configuration interface. -
Configure WiCAN Mode to Ap+Station: In the WiCAN web interface, set the “Mode” to “Ap+Station”. This allows WiCAN to act as both an access point and a station, enabling it to connect to your home Wi-Fi network while still providing a direct connection for initial configuration if needed.
-
Enter Home Wi-Fi Credentials: Provide your home Wi-Fi network’s SSID (network name) and password. This step is crucial for your car wifi obd 2 adapter to join your local network and communicate with Home Assistant.
-
Enable and Configure MQTT: Enable the MQTT feature in the WiCAN web interface. Enter the Home Assistant MQTT broker details. This includes the broker’s IP address (typically the IP address of your Home Assistant server or
localhostif Mosquitto is running on the same machine), the username, and the password of the dedicated Home Assistant user you created in step 2. Properly configuring MQTT is vital for seamless obdii data transmission. -
Install Node-RED Add-on in Home Assistant: Node-RED is a flow-based programming tool that simplifies automation within Home Assistant. Install the Node-RED add-on. Node-RED will be used to process and route the car wifi obd2 data received from WiCAN via MQTT.
-
Import WiCAN Example Flow in Node-RED: Download the “wican_example_flow.json” file (usually available from the WiCAN developer or community). Within the Node-RED add-on in Home Assistant, import this JSON file. Remember to edit the
device_idin the flow to match your specific WiCAN device ID. This example flow provides a starting point for handling obd 2 data. -
Configure MQTT Broker Details in Node-RED: Double-click on the “subscrition” Node within the imported Node-RED flow. Edit the server details to match your MQTT broker’s IP address and the Home Assistant user credentials you configured earlier. Ensure these settings align with your obdii wifi setup.
-
Deploy the Node-RED Flow: Click “Deploy” in Node-RED to activate the flow. This will start Node-RED listening for MQTT messages from your car wifi obd2 adapter.
-
Configure Home Assistant Sensors: To visualize the obd2 data in Home Assistant, you need to define MQTT sensors in your
configuration.yamlfile. The example provided in the original article shows how to set up sensors for “Amb Temp” (Ambient Temperature) and “Fuel Level.” You can customize these sensors and add more based on the specific obdii PIDs (Parameter IDs) you want to monitor from your vehicle. Refer to OBD2 PID documentation for available parameters.
mqtt:
  sensor:
    - name: "Ambient Temperature"
      state_topic: "CAR1/Amb_Temp"
      unit_of_measurement: "°C"
      value_template: "{{ value_json.amb_temp }}"
    - name: "Fuel Level"
      state_topic: "CAR1/Fuel_Level"
      unit_of_measurement: "%"
      value_template: "{{ value_json.fuel_level }}"
Remember to adjust state_topic to match the MQTT topics your WiCAN device is publishing. The value_template uses JSON path to extract the specific data points from the MQTT payload.
-
Restart Home Assistant: After modifying
configuration.yaml, restart your Home Assistant instance for the changes to take effect. -
Add Entities to Home Assistant Dashboard: Once Home Assistant restarts, go to your dashboard and add new “Entity” cards to display the newly created MQTT sensors. You should now see real-time data from your car wifi obd2 device displayed in your Home Assistant dashboard.

By following these steps, you can successfully integrate a car wifi obd 2 obd2 obdii adapter like WiCAN with Home Assistant. This setup provides a powerful platform for monitoring your vehicle’s data, creating custom automations, and gaining valuable insights into your car’s performance and health. Explore the vast capabilities of Home Assistant and the wealth of data available through your car’s obdii port to create a truly connected car experience.