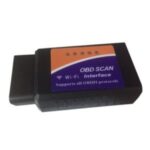
The OBDII (On-Board Diagnostics II) port is a critical component in modern vehicles, providing a gateway to the car’s internal systems for diagnostics and troubleshooting. Connecting to this port requires a specific interface, and the Cable Obdii Usb has become a popular choice for both professionals and car enthusiasts alike. This article will guide you through understanding the function, usage, and troubleshooting of an OBDII to USB cable.
How an OBDII to USB Cable Works
The cable obdii usb acts as a bridge, translating the data from your car’s OBDII port into a format understandable by your computer. It allows you to access diagnostic trouble codes (DTCs), monitor real-time sensor data, and even perform certain maintenance tasks. The cable relies on specific chipsets, commonly the FTDI FT232R USB UART, to handle this communication. This chipset converts the signals from the OBDII port into digital data that can be processed by diagnostic software on your computer.
Setting Up Your OBDII to USB Cable
Connecting your cable obdii usb typically involves a few key steps:
Driver Installation:
Most cable obdii usb utilize drivers that are automatically installed by your operating system (e.g., Windows) upon connection. However, occasionally, you might need to manually install drivers provided by the cable manufacturer, especially for older operating systems like Windows XP. These drivers enable your computer to recognize and communicate with the cable’s chipset, essentially creating a virtual COM port.
Port Verification:
After driver installation, it’s crucial to verify the assigned COM port. This can be done through the Device Manager. Ensure that the cable obdii usb is assigned to COM1, COM2, COM3, or COM4. Diagnostic software often requires the cable to operate within this range. If the assigned port is outside this range, you might need to manually reassign it within the Device Manager’s port settings.
Software Compatibility:
An essential aspect of utilizing an cable obdii usb is choosing compatible diagnostic software. Options range from freeware like VCDS-Lite to professional-grade software. Ensure the software supports your specific cable’s chipset and communication protocols.
Troubleshooting Common Issues
While generally straightforward, setting up an cable obdii usb might encounter some issues:
“Interface Not Found” Error:
This error typically signifies a communication problem between the software, cable, and car. Firstly, double-check the COM port assignment and ensure it’s within the required range. Secondly, connect the cable to both the car’s OBDII port and your computer, turn the car’s ignition to the “On” position (without starting the engine), and then retry the software’s connection test. Sometimes, the cable’s interface is only recognized when actively communicating with the vehicle’s system.
“Controller Not Responding” Error:
This error often indicates a problem with the connection to the car’s specific control modules. Ensure the ignition is “On,” the cable is securely connected, and the chosen software is compatible with your vehicle’s make and model.
Choosing the Right OBDII to USB Cable
When selecting an cable obdii usb, consider factors like build quality, chipset reliability (FTDI chips are generally recommended), and compatibility with your intended diagnostic software. Avoid extremely cheap cables, as they often have poor construction and unreliable performance, potentially leading to frustration and inaccurate diagnostic results.
Conclusion
The cable obdii usb is a valuable tool for car diagnostics, offering a relatively simple and affordable way to access your vehicle’s internal systems. By understanding its functionality, setup process, and potential troubleshooting steps, you can effectively utilize this cable to diagnose and resolve car problems, ultimately saving time and money.