Connecting a Raspberry Pi to your car’s OBDII port opens a world of possibilities for monitoring and analyzing vehicle data. This guide provides a basic framework for building your own Raspberry Pi Obdii diagnostic tool. While not exhaustive, it offers a starting point for tech-savvy individuals.
Project Prerequisites
Before diving in, familiarize yourself with these skills:
- Wiring: Experience with both automotive and small-gauge wiring is crucial.
- Basic Circuit Knowledge: Understand fundamental circuit principles.
- Python Programming: Proficiency in Python is essential for coding the project.
- Soldering: You’ll likely need to solder connections.
- Linux Command Line: Comfort using the Linux terminal is necessary.
Tools and Materials
Gather the following tools and components:
-
Wire strippers
-
Soldering iron
-
Computer or laptop
-
Computer monitor or TV
-
Raspberry Pi Zero W or Raspberry Pi 3 (recommended for built-in Wi-Fi and Bluetooth)
-
MicroSD card
-
OBDII Bluetooth adapter (most models will work, Veepeak is a popular choice)
-
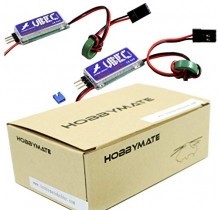
Raspberry Pi power supply (a UBEC is recommended for stepping down 12V car power to 5V)
 alt text: Hobbywing 5V UBEC
 -
Small display screen (optional, but useful for standalone operation) – Adafruit PiTFT displays are a good option.
-
Mausberry Circuits 3A Car Supply Switch (recommended for clean shutdown and power management)
-
Fuse taps
Implementation Steps
This project involves several key steps:
1. Raspberry Pi Setup
-
Install Operating System: Download and install Raspberry Pi OS (formerly Raspbian) onto the microSD card using the Raspberry Pi Imager tool. Connect the Pi to a monitor via HDMI and boot it up. Raspberry Pi Software Guide
-
Enable Remote Access: Enable VNC or SSH for remote access to the Pi when it’s in the car. Raspberry Pi VNC Documentation
-
Install Required Packages: Open a terminal and execute the following commands:
  sudo apt-get update
  sudo apt-get -y install python3-pip
  sudo pip3 install obd
  sudo apt-get install python3-serial
2. OBDII Bluetooth Adapter Installation
Locate your car’s OBDII port (usually under the dashboard) and plug in the Bluetooth adapter. Test the connection with your phone to ensure it’s working correctly.
3. Connecting Pi to OBDII Adapter
This step requires pairing and connecting the Raspberry Pi to the OBDII adapter via Bluetooth. Refer to this forum post for detailed instructions: Raspberry Pi Bluetooth Forum Post. Remember to establish a serial connection for the software to communicate with the adapter. The command sudo rfcomm connect hci0 XX:XX:XX:XX:XX:XX (replace with your adapter’s MAC address) will need to be run on each boot.
4. Vehicle Wiring (Optional)
If you want a permanent installation, wire the Pi to your car’s electrical system. Use a UBEC to convert 12V to 5V for the Pi. The Mausberry switch allows for a clean shutdown when the ignition is turned off. Consult online resources for specific wiring diagrams.
5. Python Coding
Utilize the obd library in Python to interact with the OBDII adapter. The following code snippet demonstrates basic connection and command retrieval:
import obd
connection = obd.OBD()
print("Connection Status: " + connection.status())
print("Protocol Name: " + connection.protocol_name())
commands = connection.supported_commands
print("Supported Commands:")
for command in commands:
    print(command.name)
Python OBD Library Documentation provides comprehensive information for developing more complex applications.
Conclusion
Building a Raspberry Pi OBDII diagnostic tool requires technical skills and patience. This guide offers a foundational overview. Further exploration and customization are encouraged based on individual project goals. Remember to consult the provided resources for detailed instructions and documentation. This project offers a great opportunity to learn about car diagnostics, electronics, and programming.

